Введение
In the need that you need to replace the entire disc drive, here's what you need to do. You may need to do a little eBay perusing first, but when you find that replacement, these steps will show you how to remove your old one.
Выберете то, что вам нужно
Видеообзор
-
-
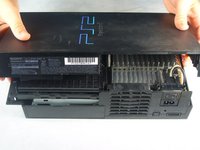
Use the flat edge of a metal spudger to pry the eight flat screw covers out.
-
Remove the following eight screws securing the top cover to the bottom case:
-
Four 55.4 mm Philips screws
-
Four 18.0 mm Phillips screws
 Спросите у FixBot
-
-
-
Some models have a different number of screws and feet. Remove all the feet and screws in the bottom of the case.
-
The 10 screw model has 6 screws in the bottom-most portion and 4 in the upper tray.
-
-
-
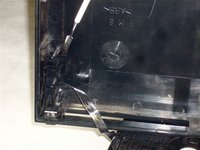
Peel the warranty sticker (located next to the main power switch) straight away from the case.
-
-
-
Lift the top cover off the bottom case.
-
Carefully remove the power cord that attaches the top and bottom halves by disconnecting the power cord assembly from the top case.
-
-
-
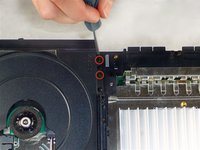
Remove the two 6.4 mm black Phillips screws securing the optical disc drive to the bottom case.
-
Lift and remove the optical disc drive straight up out of the bottom case.
-
-
-
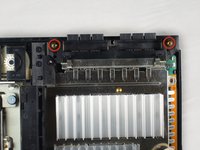
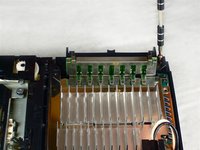
Remove the two 14.6 mm gold-headed Phillips securing the controller ports to the bottom case.
-
-
-
-
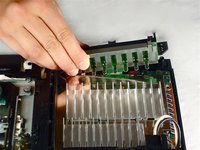
Gently lift the controller port board out of its recess within the bottom case.
-
Pull the controller port ribbon cable straight away from its socket on the controller port board.
-
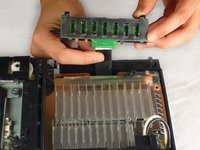
Remove the controller port board out of the bottom case.
-
-
-
Remove the two 14.6 mm gold Phillips screws securing the fan to the bottom case.
-
-
-
Pry and remove the expansion bay cover away from its posts on the bottom case.
-
-
-
Lift the motherboard assembly from its front edge and remove it from the lower case.
-
-
-
Remove the four 7.6 mm gold-head Phillips securing the power supply to the motherboard assembly.
-
-
-
Pull the power board connector straight to lift it out of its socket on the power board.
-
-
-
Underneath where the power supply once was is a transparent piece of plastic. This is the heat shield, and it can now be removed.
-
-
-
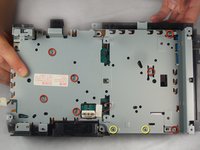
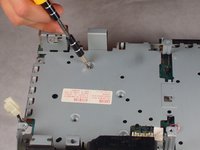
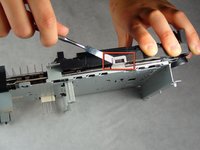
Remove the following screws securing the metal chassis to the logic board:
-
Seven 5.8 mm Phillips silver screws.
-
Two 7.4 mm Phillips gold screws.
-
-
-
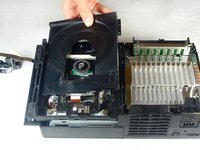
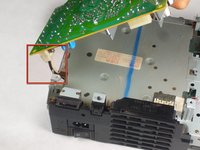
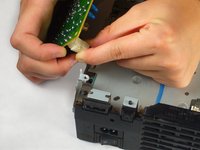
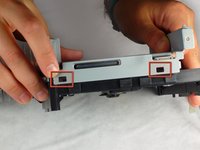
Remove the three blue ribbon cables and one orange ribbon cable by gently pulling on the blue plastic strips.
-
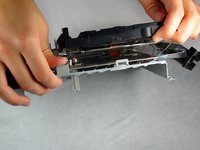
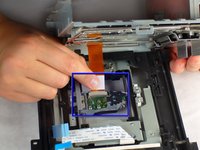
Carefully remove the orange ribbon cable from the laser by gently pulling on the white plastic strip.
-
Now the disc drive is free to be removed.
-


To reassemble your device, follow these instructions in reverse order.
Отменить: Я не выполнил это руководство.
58 человек успешно провели ремонт по этому руководству.

Команда

Cal Poly, Team 19-1, Maness Fall 2009 Участник Cal Poly, Team 19-1, Maness Fall 2009
CPSU-MANESS-F09S19G1
4 членов
Автор 35 руководств
7 Комментарии к руководству
It helped out a lot I was able to fix my
What replacement drive would you recommend?
How do you know if the DVD drive is a 3 watt or 5 watt?
Are there any "New" DVD drives we could buy?
To avoid activating the VOID that may come up, heat it carefully to remove and replace it clean
What is the VOID? Is this more than a sticker?