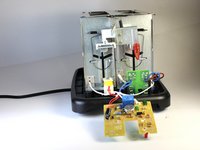
Перейти к основному содержанию

Professional Series PS77401 Lever Spring Replacement

Выберете то, что вам нужно

  1. Professional Series PS77401 Lever Spring Replacement, Shell: шаг 1, изображение 1 из 1
    • Make sure that the toaster is unplugged before attempting any sort of disassembly!

  2. Professional Series PS77401 Lever Spring Replacement: шаг 2, изображение 1 из 2 Professional Series PS77401 Lever Spring Replacement: шаг 2, изображение 2 из 2
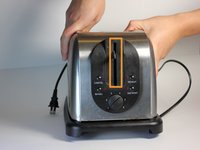
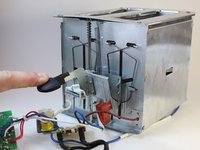
    • Grip the black plastic lever nub firmly and carefully remove it from the metal lever. Use one hand to hold the toaster in place while you pull the lever nub with the other.

    • If this is the first time detaching this piece, it will take some effort to remove. Be careful as pulling too hard can cause damage to the inner lever mechanism.

  3. Professional Series PS77401 Lever Spring Replacement: шаг 3, изображение 1 из 3 Professional Series PS77401 Lever Spring Replacement: шаг 3, изображение 2 из 3 Professional Series PS77401 Lever Spring Replacement: шаг 3, изображение 3 из 3
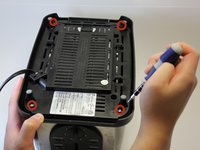
    • Flipping the toaster upside down, use a T7 Torx Screwdriver to remove the four 10mm screws that keep the outer shell attached.

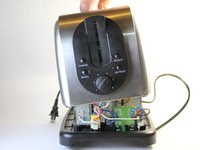
    • Flip the toaster back over and slide off the shell making sure to slip the toaster lever (now without the black plastic nub) through the lever opening in the shell.

    • The outer shell should now only be connected by its internal wiring.

  4. Professional Series PS77401 Lever Spring Replacement: шаг 4, изображение 1 из 2 Professional Series PS77401 Lever Spring Replacement: шаг 4, изображение 2 из 2
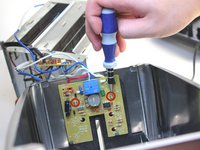
    • Locate and remove the two 8mm screws that attach the circuit board (located inside of the shell) from the shell itself using the Phillips #2 screwdriver.

    • The shell should now be completely separated from the rest of the toaster.

  5. Professional Series PS77401 Lever Spring Replacement, Lever Spring: шаг 5, изображение 1 из 1
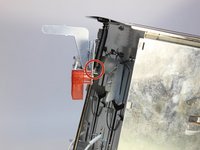
    • Locate your damaged spring that holds the toaster lever in place.

    • The spring in the picture is not damaged.

  6. Professional Series PS77401 Lever Spring Replacement: шаг 6, изображение 1 из 2 Professional Series PS77401 Lever Spring Replacement: шаг 6, изображение 2 из 2
    • Disconnect the bottom part of the damaged spring from the lever first.

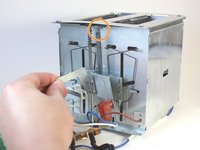
    • Then disconnect the top part of the damaged spring from the chassis.

  7. Professional Series PS77401 Lever Spring Replacement: шаг 7, изображение 1 из 2 Professional Series PS77401 Lever Spring Replacement: шаг 7, изображение 2 из 2
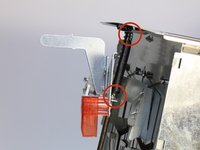
    • Attach the new spring in the same spots that the damaged spring was removed from.

    • Check to make sure that the new spring allows the lever to move down with slight resistance and that it pops back up after being released.

Заключение

To reassemble your device, follow these instructions in reverse order.

David Acosta

Участник с: 01/24/14

101 Репутация

1 руководство автора

Команда

Cal Poly, Team 10-36, Maness Winter 2014 Участник Cal Poly, Team 10-36, Maness Winter 2014

CPSU-MANESS-W14S10G36

4 членов

Автор 5 руководств

0 Комментариев

Добавить комментарий

Просмотр статистики:

За последние 24часов: 0

За последние 7 дней: 1

За последние 30 дней: 8

За всё время: 1,412