Введение
Is your Razer Phone's touch screen unresponsive, cracked, or not displaying properly? If so, here is the guide to replacing the display assembly containing the glass touch screen, the digitizer, and LCD screen. The tools you need are a #000 Phillips screw driver, a Torx head T5, tweezers, metal spudger and Jimmy.
Выберете то, что вам нужно
-
-
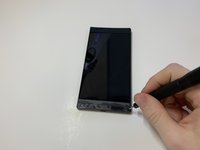
Remove the plastic speaker grills by using the metal spudger to pry underneath the strips.
-
Peel off the plastic speaker grill to reveal the screws.
 Спросите у FixBot
-
-
-
Pry the top plastic grill off with the metal spudger and reveal the screws.
-
-
-
-
Remove five (two bottom, three top) 2.5 mm screws with the Phillips #000 screwdriver.
-
Remove five (four bottom, one top) 5.5 mm screws with the Torx Head T5 screwdriver.
-
-
-
Remove the display assembly by using the Jimmy to separate the assembly from the phone's frame.
-
Lift the display assembly away from the other half of the phone.
-
-
Инструмент, используемый на этом этапе:Tweezers$4.99
-
Remove one 2.5 mm screw holding down the metal bracket connector using the Phillips #000 screwdriver.
-
Peel back the metallic shielding over the connector using tweezers.
-
Remove the metal bracket connector.
-
-
-
Grab hold of the the screen ribbon with the tweezers and remove it from the rest of the phone to free the assembly display.
-


To reassemble your device, follow these instructions in reverse order.
Отменить: Я не выполнил это руководство.
10 человек успешно провели ремонт по этому руководству.
Команда

Cal Poly, Team S19-G6, White Winter 2019 Участник Cal Poly, Team S19-G6, White Winter 2019
CPSU-WHITE-W19S19G6
4 членов
Автор 15 руководств
14 Комментарии к руководству
“Peeling off the plastic speaker grill will ruin the adhesive used to keep it in place. A new adhesive must be used to put the grill back on the device.”
Any suggestions on what adhesive to use to replace the plastic speaker grills?
Double sided tape.
Sir, where can I order Razer Phone 1 LCD Assembly?
Search on eBay. Phones are often parted out there.
I almost forgot; when searching, your Razer Phone's model number is RZ35-0215, code name: Cheryl.