Перейти к основному содержанию
Присоединяйся к сообществу ремонтников - Создай аккаунт

Remove IBM WorkPad c3 Battery

Выберете то, что вам нужно

    1. Remove IBM WorkPad c3 Battery, Back Case: шаг 1, изображение 1 из 2 Remove IBM WorkPad c3 Battery, Back Case: шаг 1, изображение 2 из 2
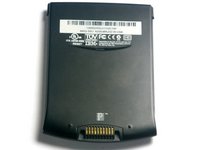
      • Turn the device over so that the screen is facing down.

      • In the next step the device will be heated, so the screen must be turned over to prevent heat damage to the LCD/Digitizer.

      Спросите у FixBot

      Добавить комментарий

    2. Remove IBM WorkPad c3 Battery: шаг 2, изображение 1 из 1
      • Using a hair dryer, slowly heat the edges of the WorkPad.

      • Spend at least one minute heating each side of the device. This will melt the glue holding the case together, and allow it to be removed.

      • Be sure not to touch the device directly after heating as it will be extremely hot. Use a towel or oven mitt to grab it.

      Спросите у FixBot

      Добавить комментарий

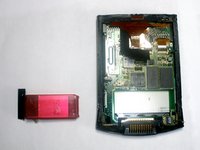
    3. Remove IBM WorkPad c3 Battery: шаг 3, изображение 1 из 2 Remove IBM WorkPad c3 Battery: шаг 3, изображение 2 из 2
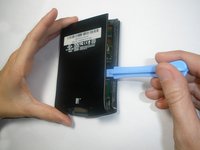
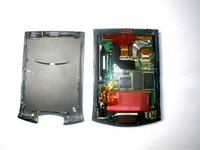
      • Use a plastic opening tool to pry the back case from the WorkPad.

      • If the rear cover is not coming off very easily, you probably need to reheat the case in order to sufficiently melt the glue.

      Спросите у FixBot

      Добавить комментарий

    1. Remove IBM WorkPad c3 Battery, Battery: шаг 4, изображение 1 из 1
      • Remove the yellow tape that is covering the battery connector

      Спросите у FixBot

      Добавить комментарий

    2. Remove IBM WorkPad c3 Battery: шаг 5, изображение 1 из 1
      Инструмент, используемый на этом этапе:
      Tweezers
      $4.99
      • Using the tweezers, carefully disconnect the battery cable from the port

      Спросите у FixBot

      Добавить комментарий

    3. Remove IBM WorkPad c3 Battery: шаг 6, изображение 1 из 2 Remove IBM WorkPad c3 Battery: шаг 6, изображение 2 из 2
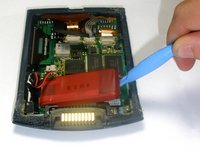
      • Using the plastic opening tools, lift the battery out of the case

      • The battery is secured with adhesive and it will take some effort to remove

      Спросите у FixBot

      Добавить комментарий

Заключение

To reassemble your device, follow these instructions in reverse order.

Отменить: Я не выполнил это руководство.

Еще один человек закончил это руководство.

Emily Falkenstein

Участник с: 10/05/10

75 Репутация

Автор 5 руководств

Команда

Cal Poly, Team 21-35, Regan Fall 2010 Участник Cal Poly, Team 21-35, Regan Fall 2010

CPSU-REGAN-F10S21G35

3 членов

Автор 40 руководств

0 Комментарии к руководству

Добавить комментарий

Статистика просмотров:

За последние 24 часов: 2

За последние 7 дней: 13

За последние 30 дней: 56

За всё время: 4,913