Перейти к основному содержанию
Присоединяйся к сообществу ремонтников - Создай аккаунт

Roku 4 Ethernet Port Replacement

Выберете то, что вам нужно

    1. Roku 4 Ethernet Port Replacement, Motherboard: шаг 1, изображение 1 из 1
      • Place the Roku 4 face-down on a table. The rubber sticker should be facing you.

      Спросите у FixBot

      Добавить комментарий

    2. Roku 4 Ethernet Port Replacement: шаг 2, изображение 1 из 1
      • Starting at one corner of the device, pull the rubber sticker back toward the opposite corner of the device carefully to reveal the underlying screws.

      • Completely remove the rubber sticker to reveal the underlying screws on the device.

      • Place the rubber sticker facing up on the table to preserve its adhesiveness. It will be needed to reassemble the device.

      Спросите у FixBot

      Добавить комментарий

    3. Roku 4 Ethernet Port Replacement: шаг 3, изображение 1 из 1
      • Turn the Phillips PH1 screwdriver counterclockwise to unscrew all 4 of the 12.0 mm screws.

      • Store the screws in a safe place, such as on a magnetic project mat, so they do not get lost before reassembly.

      Спросите у FixBot

      Добавить комментарий

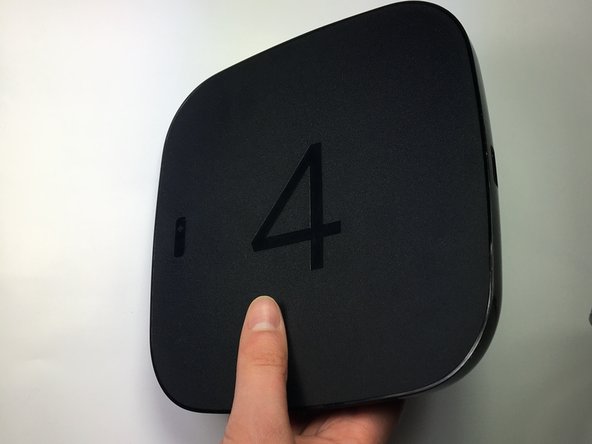
    4. Roku 4 Ethernet Port Replacement: шаг 4, изображение 1 из 2 Roku 4 Ethernet Port Replacement: шаг 4, изображение 2 из 2
      • Turn the device over so you can see the "4" on the top cover.

      Спросите у FixBot

      Добавить комментарий

    5. Roku 4 Ethernet Port Replacement: шаг 5, изображение 1 из 2 Roku 4 Ethernet Port Replacement: шаг 5, изображение 2 из 2
      • Wedge a plastic opening tool into the seam between the top cover and bottom casing of the device and create a gap.

      • Prying open the device is quite difficult and requires a large amount of force. Use caution to avoid breaking the device or hurting yourself.

      Спросите у FixBot

      Добавить комментарий

    6. Roku 4 Ethernet Port Replacement: шаг 6, изображение 1 из 1
      • After you have created a gap large enough to fit your fingers between, gently lift up the top cover to open the device and reveal the motherboard.

      • The motherboard should still be attached to the underside of the top cover by a red wire, a blue wire, and a black wire.

      Спросите у FixBot

      Добавить комментарий

    7. Roku 4 Ethernet Port Replacement: шаг 7, изображение 1 из 3 Roku 4 Ethernet Port Replacement: шаг 7, изображение 2 из 3 Roku 4 Ethernet Port Replacement: шаг 7, изображение 3 из 3
      • To begin removing the motherboard from the plastic casing, pinch the black plastic clip and gently pull upward.

      • Once you feel the motherboard begin to loosen from the plastic casing, pull it upward to remove it completely.

      • The motherboard should still be attached to the underside of the top cover by a red wire, a blue wire, and a black wire.

      Спросите у FixBot

      Добавить комментарий

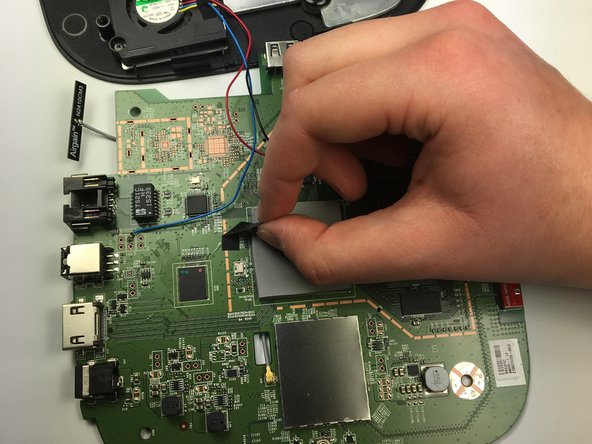
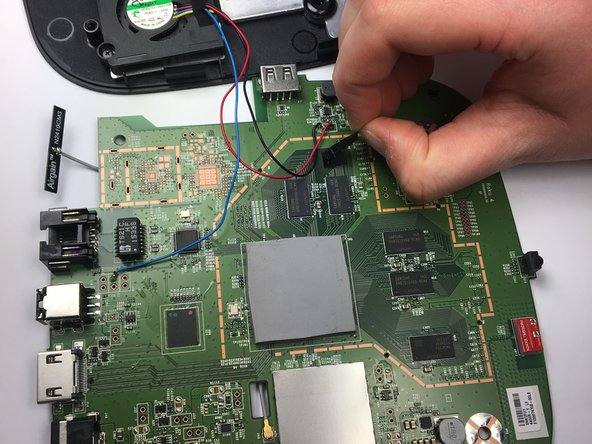
    8. Roku 4 Ethernet Port Replacement: шаг 8, изображение 1 из 3 Roku 4 Ethernet Port Replacement: шаг 8, изображение 2 из 3 Roku 4 Ethernet Port Replacement: шаг 8, изображение 3 из 3
      • Peel back the black adhesive strip that attaches the blue wire to the motherboard.

      • Repeat this step for the strip that attaches the black and red wires to the motherboard.

      Спросите у FixBot

      Добавить комментарий

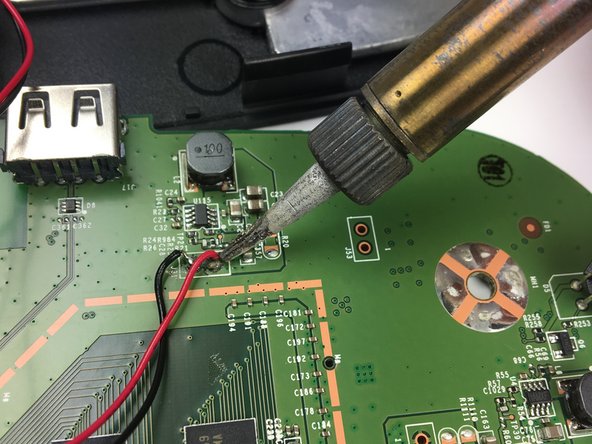
    9. Roku 4 Ethernet Port Replacement: шаг 9, изображение 1 из 3 Roku 4 Ethernet Port Replacement: шаг 9, изображение 2 из 3 Roku 4 Ethernet Port Replacement: шаг 9, изображение 3 из 3
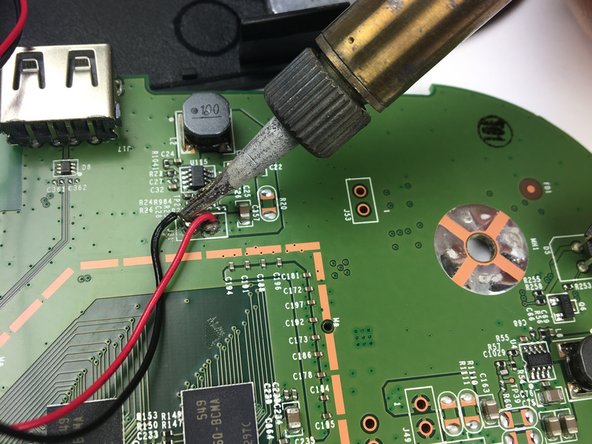
      • Using a soldering iron, desolder the blue, red, and black wires from the motherboard.

      • Consult iFixit's Soldering Skills guide to safely use the soldering iron.

      • The motherboard should now be completely disconnected from the top cover of the device.

      Спросите у FixBot

      Добавить комментарий

    1. Roku 4 Ethernet Port Replacement, Ethernet Port: шаг 10, изображение 1 из 1
      • Lay the motherboard facedown on the table so you can see the large black ethernet port with several gold connections below it.

      • Use a soldering iron to desolder each of the ethernet port's connections to the motherboard.

      • Consult iFixit's Soldering Skills guide to learn how to safely use the soldering iron.

      Спросите у FixBot

      Добавить комментарий

    2. Roku 4 Ethernet Port Replacement: шаг 11, изображение 1 из 1
      • Using your thumb and pointer finger, carefully pinch the Ethernet port and pull it to the right, away from the motherboard, to remove it.

      Спросите у FixBot

      Добавить комментарий

Заключение

To reassemble your device, follow these instructions in reverse order.

Отменить: Я не выполнил это руководство.

Еще один человек закончил это руководство.

Hank Harrison

Участник с: 03/26/17

476 Репутация

Автор 3 руководств

Команда

Baylor, Team S5-G4, Williams Spring 2017 Участник Baylor, Team S5-G4, Williams Spring 2017

BU-WILLIAMS-S17S5G4

3 членов

Автор 12 руководств

3 Комментарии к руководству

Is that the HDMI port

cruzanbay45 - Ответить Поделиться

Is that the HDMI port on roku

cruzanbay45 - Ответить Поделиться

where do you get the HDMI port for roku

mar plane - Ответить Поделиться

Добавить комментарий

Статистика просмотров:

За последние 24 часов: 0

За последние 7 дней: 9

За последние 30 дней: 39

За всё время: 1,624