Введение
The remote control is a device that will help you control your Roku 4 from a distance without having to directly interact with the device. This guide will help you replace the buttons on your remote control.
Выберете то, что вам нужно
-
-
-
Place the remote control facing down on the table, so that the buttons are facing downwards.
 Спросите у FixBot
-
-
-
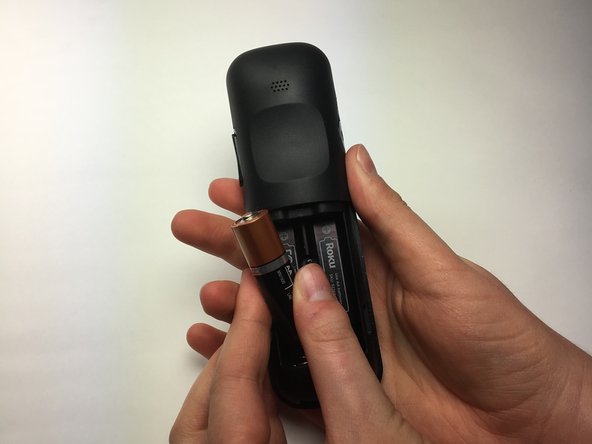
Remove the battery compartment cover from the back of the remote by sliding it outwards. This should reveal the batteries.
-
-
-
-
Turn the Phillips PH0 screwdriver counterclockwise to carefully remove the 6.9 mm screw located between both battery compartments .
-
-
-
Wedge a plastic opening tool into the seam between the top cover and bottom casing of the device to create a gap.
-
Once you have created a gap large enough for your fingers to fit between, separate the top cover from the bottom plastic casing by pulling them apart gently.
-
-
-
Using your right thumb, lift up on the left side of the motherboard to remove it from the bottom plastic casing.
-
-
-
-
-
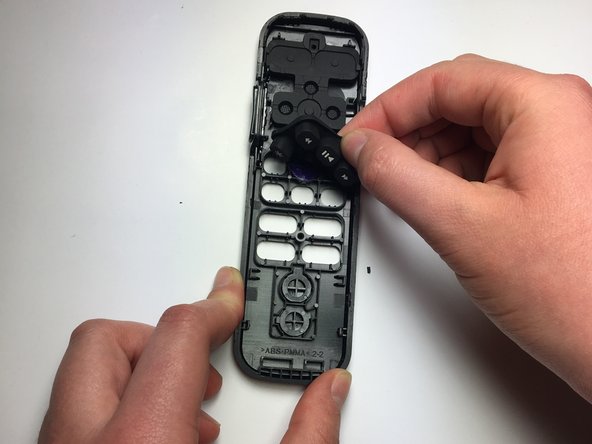
Remove the three plastic sheets from the rubber button panels by gripping one edge of the sheet and pulling upward.
-
-
-
Remove the button panels by gripping the bottom edge and pulling upward until the panel is no longer in contact with the remote cover.
-
-


To reassemble your device, follow these instructions in reverse order.
Отменить: Я не выполнил это руководство.
13 человек успешно провели ремонт по этому руководству.
Команда

Baylor, Team S5-G4, Williams Spring 2017 Участник Baylor, Team S5-G4, Williams Spring 2017
BU-WILLIAMS-S17S5G4
3 членов
Автор 8 руководств
5 Комментарии к руководству
If you had the idea to just put some tape over the contacts for buttons you want to disable, don't bother. The buttons are not typical conductive rubber keypads; they actually depress physical dome switches, and that membrane is glued to the PCB. It appears that defeating the switches requires permanent modification, either to the rubber keypad or to the switch itself.
Just remove the channel pads
It's unclear if this is about the external buttons, or the contacts behind the buttons. As I am definitely interested in repairing the contacts behind the buttons, I'm hoping there is a IFixit kit for Roku Ultra RC-AL4 ? OR as the last sentence is "... until the panel is no longer in contact with the remote cover." Is this just meant as a way to disable the shortcuts to the various channels? As I don't have subs to most of my buttons, I might use this too, once I get the Left-Right buttons to work reliably again /-;!
I thought it would be nice for everyone to know after you get the screw out of the remote instead of using the screwdriver as suggested and puuting all your muscle into it to pry it apart, well forget all that! What you need to do is just go to the very bottom of the remote near the pairing button and you will see that if you just tug ever so gently on the bottom it will separate quite easily LOL go ahead and try it I think you'll find my solution to be the better more sensible solution after removing the screw from the device! Just go to the bottom and use your hands to pry apart no tools required
Appreciate the guide, however brief and general… although, I expected a little more from a “fix it” site.