Перейти к основному содержанию
Присоединяйся к сообществу ремонтников - Создай аккаунт

Samsung Droid Charge Screen Replacement

Выберете то, что вам нужно

    1. Samsung Droid Charge Screen Replacement, Rear Cover: шаг 1, изображение 1 из 1
      • Open up the back case on the phone from the groove in the bottom of the phone.

      • You can do this by inserting a fingernail or similarly thin object into the groove and pulling up with mild force.

      Спросите у FixBot

      Добавить комментарий

    1. Samsung Droid Charge Screen Replacement, Battery: шаг 2, изображение 1 из 1
      • Below the left part of the bottom of the battery area there will be a groove large enough to fit in a finger or screw driver head.

      • Use the groove to lever out the battery gently, in order to not damage either the battery or phone. Store the battery in a safe place.

      Спросите у FixBot

      Добавить комментарий

    1. Samsung Droid Charge Screen Replacement, microSD: шаг 3, изображение 1 из 1
      • Push the SD card further into its metal slot until you hear a click.

      • Release the card, and it should automatically eject itself.

      • Remove the SD card.

      Спросите у FixBot

      Добавить комментарий

    1. Samsung Droid Charge Screen Replacement, SIM Card: шаг 4, изображение 1 из 1
      • Slide the SIM card out of its casing by pushing on it and sliding it upward.

      Спросите у FixBot

      Добавить комментарий

    1. Samsung Droid Charge Screen Replacement, Screen: шаг 5, изображение 1 из 1
      • Locate the 7 small black screws located around the edge of the phone under the battery cover.

      • With a small Philips head screwdriver, remove each of the screws and place them in a secure location.

      Спросите у FixBot

      Добавить комментарий

    2. Samsung Droid Charge Screen Replacement: шаг 6, изображение 1 из 1
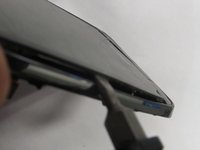
      • Locate your pry tool.

      • Insert the pry tool into the plastic edge that runs along the sides of the phone. Doing so will allow you to remove part of the back casing.

      • Use a prying motion to lift the casing up.

      • Repeat this motion all around the screen edge until the casing pops off.

      Спросите у FixBot

      Добавить комментарий

    3. Samsung Droid Charge Screen Replacement: шаг 7, изображение 1 из 1
      • Release the one pop connector for the motherboard located on the right.

      • Release the volume button flex cable on the right.

      • Release the power button flex cable on the right.

      • Now the motherboard can be removed. Simply lift out the motherboard and set aside.

      Спросите у FixBot

      Добавить комментарий

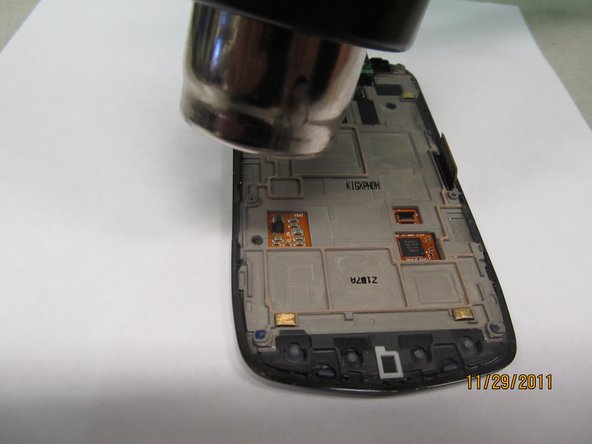
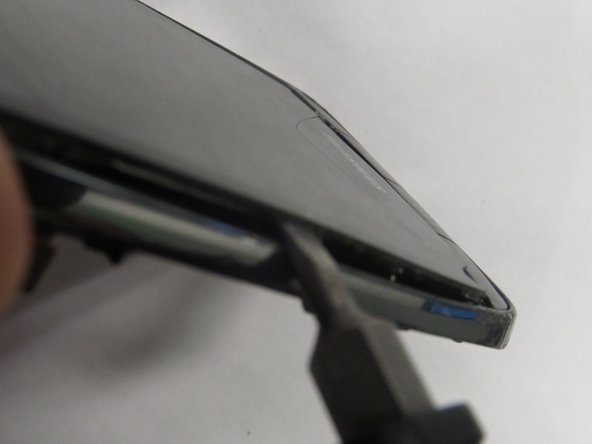
    4. Samsung Droid Charge Screen Replacement: шаг 8, изображение 1 из 3 Samsung Droid Charge Screen Replacement: шаг 8, изображение 2 из 3 Samsung Droid Charge Screen Replacement: шаг 8, изображение 3 из 3
      • Using a hairdryer or heat gun, warm the phone. Doing so will warm the adhesive holding the screen in place, allowing us to continue disassembling the device.

      • Use the pry tool to pry the screen off the casing. You may need to use force to overcome the adhesive.

      • Work carefully to prevent damage to the phone.

      Спросите у FixBot

      Добавить комментарий

    5. Samsung Droid Charge Screen Replacement: шаг 9, изображение 1 из 1
      • You can now swap out the old screen for your new one.

      Спросите у FixBot

      Добавить комментарий

Финишная прямая

Отменить: Я не выполнил это руководство.

6 человек успешно провели ремонт по этому руководству.

Luke Gordon

Участник с: 09/26/12

199 Репутация

Автор 5 руководств

Команда

Cal Poly, Team 15-44, Forte Fall 2012 Участник Cal Poly, Team 15-44, Forte Fall 2012

CPSU-FORTE-F12S15G44

4 членов

Автор 54 руководств

0 Комментарии к руководству

Добавить комментарий

Статистика просмотров:

За последние 24 часов: 2

За последние 7 дней: 7

За последние 30 дней: 25

За всё время: 3,487