Перейти к основному содержанию
Присоединяйся к сообществу ремонтников - Создай аккаунт

Samsung Galaxy Note Pro 12.2 SD Port Replacement

Выберете то, что вам нужно

  1. Samsung Galaxy Note Pro 12.2 SD Port Replacement, SD Port: шаг 1, изображение 1 из 1
    • Turn off your device before starting your repair.

    • Carefully remove the back cover with the plastic opening tool.

    • It is best to start with one corner and work your way around the device slowly.

    Спросите у FixBot

    Добавить комментарий

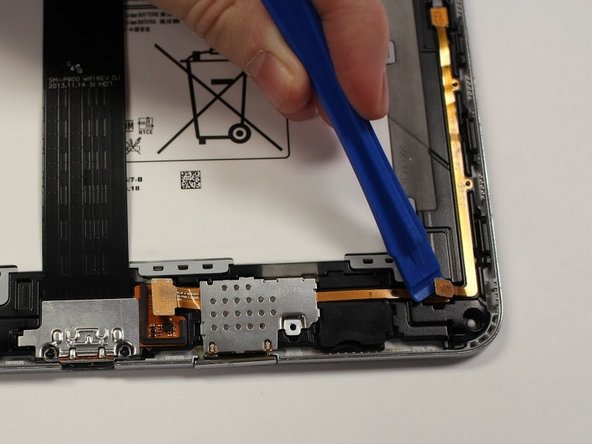
  2. Samsung Galaxy Note Pro 12.2 SD Port Replacement: шаг 2, изображение 1 из 2 Samsung Galaxy Note Pro 12.2 SD Port Replacement: шаг 2, изображение 2 из 2
    • Pop up the orange tab connected to the SD port with the plastic opening tool.

    Спросите у FixBot

    Добавить комментарий

  3. Samsung Galaxy Note Pro 12.2 SD Port Replacement: шаг 3, изображение 1 из 2 Samsung Galaxy Note Pro 12.2 SD Port Replacement: шаг 3, изображение 2 из 2
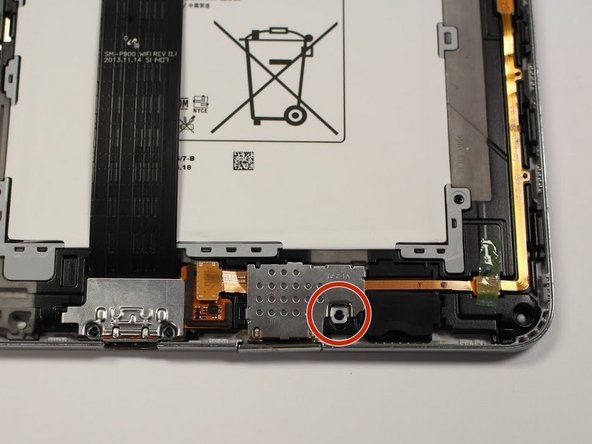
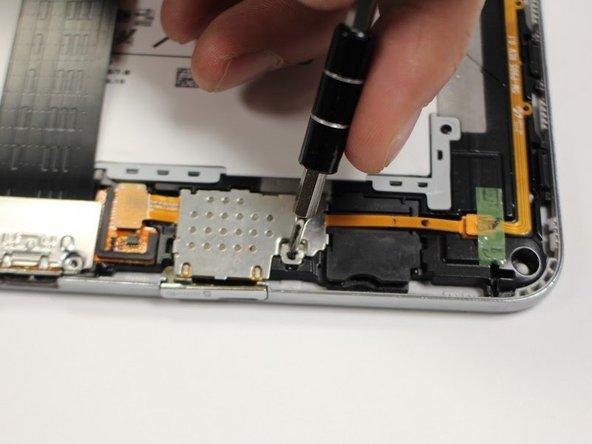
    • Remove the one 3mm Phillips #00 screw connected to the SD port.

    Спросите у FixBot

    Добавить комментарий

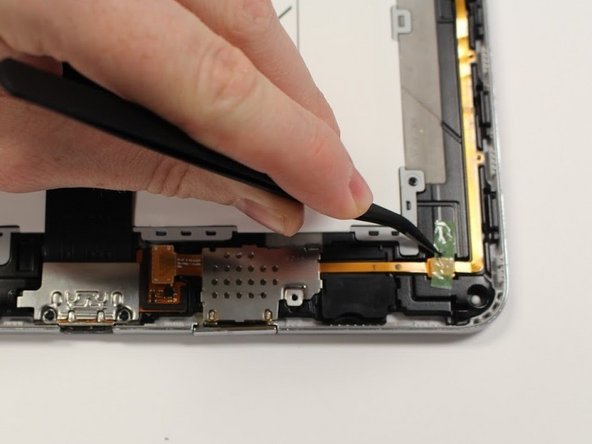
  4. Samsung Galaxy Note Pro 12.2 SD Port Replacement: шаг 4, изображение 1 из 2 Samsung Galaxy Note Pro 12.2 SD Port Replacement: шаг 4, изображение 2 из 2
    Инструмент, используемый на этом этапе:
    Tweezers
    $4.99
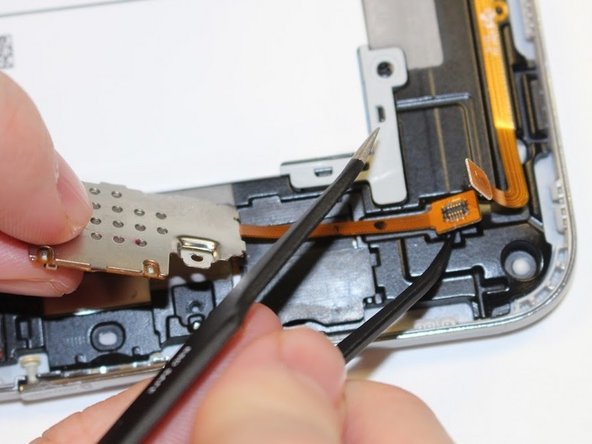
    • Pop open the orange wire tab connected to the SD port with the plastic opening tool.

    • If there is tape covering your tab, remove it with the tweezers before you pop open the tab.

    Спросите у FixBot

    Добавить комментарий

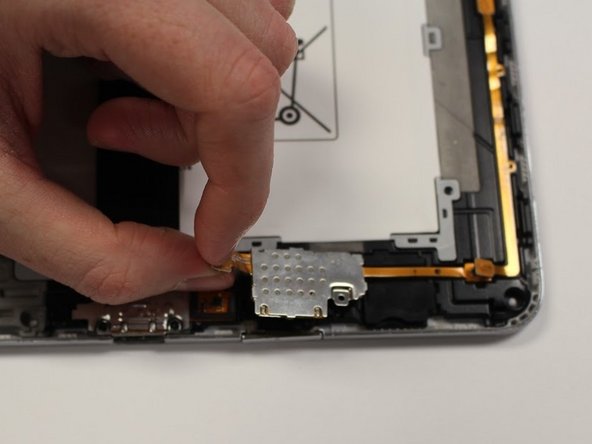
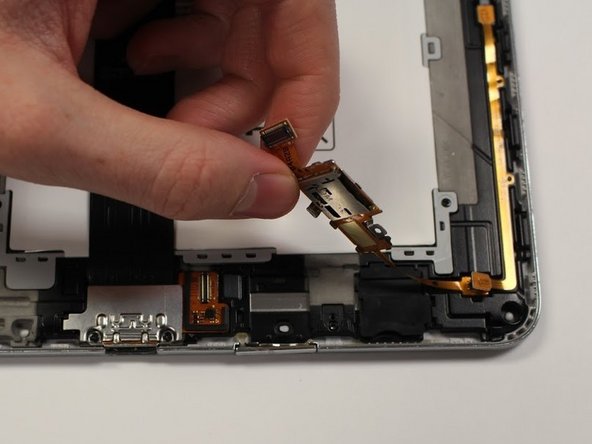
  5. Samsung Galaxy Note Pro 12.2 SD Port Replacement: шаг 5, изображение 1 из 2 Samsung Galaxy Note Pro 12.2 SD Port Replacement: шаг 5, изображение 2 из 2
    • Using the orange tab, pull the SD port up and away from the device.

    Спросите у FixBot

    Добавить комментарий

  6. Samsung Galaxy Note Pro 12.2 SD Port Replacement: шаг 6, изображение 1 из 1
    • Using the plastic end of the tweezers pop up the orange tab connecting the SD port to the device.

    • There is a little indent below the orange tab to help get under this piece. It may be difficult to remove, push up hard.

    Спросите у FixBot

    Добавить комментарий

Заключение

To reassemble your device, follow these instructions in reverse order.

Отменить: Я не выполнил это руководство.

Tina Kong

Участник с: 09/22/17

1 278 Репутация

Автор 5 руководств

Команда

Central Washington University, Team S1-G4, Pengilly Fall 2017 Участник Central Washington University, Team S1-G4, Pengilly Fall 2017

CWU-PENGILLY-F17S1G4

4 членов

Автор 10 руководств

0 Комментарии к руководству

Добавить комментарий

Статистика просмотров:

За последние 24 часов: 1

За последние 7 дней: 9

За последние 30 дней: 31

За всё время: 818