Введение
Broken or shattered display screen? Go ahead and use this no fuss guide to replace it in no time.
Выберете то, что вам нужно
-
-
Place the phone face down. Ensure that the side with the display screen is not facing you.
-
Locate the back door and slide open.
-
Remove the battery.
 Спросите у FixBot
-
-
-
Remove the 7 Phillips 3.93 mm labeled screws by using the Phillips #00 Precision Screwdriver.
-
-
-
Use the plastic opening tool to pry open the back cover.
-
Insert the tool into the SD card slot and pry around the entire phone.
-
-
-
Remove one Phillips 3.93 mm screw from the bottom center of the phone.
-
-
-
-
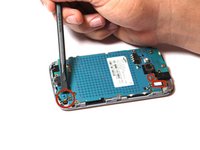
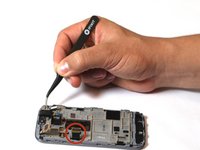
Carefully disconnect the 3 labeled ribbons. To remove, place tool under the ribbon and pull slowly to avoid tearing.
-
-
-
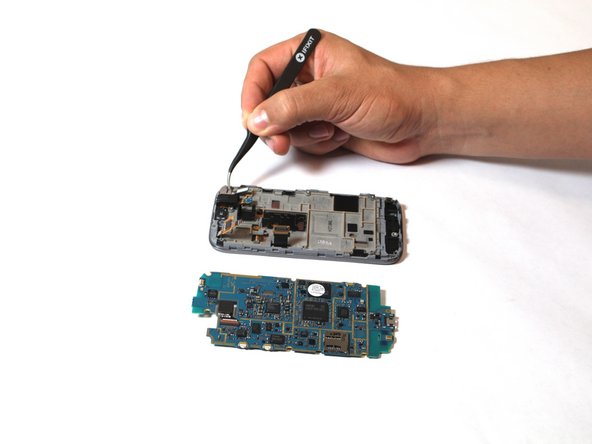
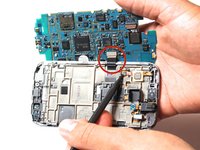
Pull the motherboard back and out to the left. Make sure the motherboard is faced straight up, as shown in the photo.
-
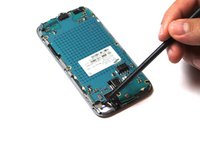
Place your tool under the labeled ribbon and pull gently to detach the ribbon cable from the motherboard.
-
At this point, the motherboard should be completely detached from the rest of the phone.
-
-
-
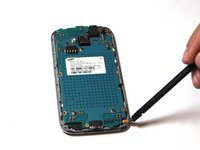
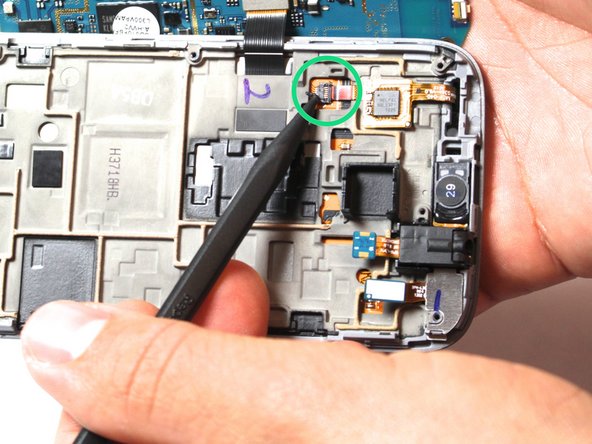
Next, detach the labeled cable . Pull gently on the black gate and use a tool to pull out the cable.
-
Detach the labeled digitizer chip by gently prying a tool under the chip and pulling it up and out.
-
-
-
Heat iOpener in microwave for one minute on the highest power setting. Let the iOpener sit on the device for about 90 seconds. This step is necessary to loosen the glue under the display screen. Be careful, the glue is very sticky!
-
-
-
Place the suction cup on the screen. Make sure not to place the cup on the cracked area.
-
-
-
Pull gently to detach the screen.
-
Once detached, gently remove the ribbon from the shown slot. At this point, you can replace the cracked screen with a new one.
-


To reassemble your device, follow these instructions in reverse order.
Отменить: Я не выполнил это руководство.
4 человек успешно провели ремонт по этому руководству.
Команда

USF Tampa, Team 15-3, Remmell Fall 2014 Участник USF Tampa, Team 15-3, Remmell Fall 2014
USFT-REMMELL-F14S15G3
4 членов
Автор 3 руководств
2 Комментарии к руководству
Info correct - replaced my screen no prob.
This phone doesn't have sim card slot?