Перейти к основному содержанию
Присоединяйся к сообществу ремонтников - Создай аккаунт

Samsung Gear S Home Button Assembly Replacement

Выберете то, что вам нужно

  1. Samsung Gear S Home Button Assembly Replacement, Display Assembly: шаг 1, изображение 1 из 3 Samsung Gear S Home Button Assembly Replacement, Display Assembly: шаг 1, изображение 2 из 3 Samsung Gear S Home Button Assembly Replacement, Display Assembly: шаг 1, изображение 3 из 3
    • Remove the wrist strap by peeling back the rubber starting from one corner of the watch face. Continue peeling the rubber away from the watch face until the strap is completely off.

    Спросите у FixBot
  2. Samsung Gear S Home Button Assembly Replacement: шаг 2, изображение 1 из 2 Samsung Gear S Home Button Assembly Replacement: шаг 2, изображение 2 из 2
    • Starting from an edge, wedge a metal spudger in between the screen and the chrome trim ring and pry, lifting the screen outwards.

    • Some force is needed due to adhesive seal.

    Спросите у FixBot
  3. Samsung Gear S Home Button Assembly Replacement: шаг 3, изображение 1 из 1
    • Use a plastic opening tool to gently pry upwards on the plastic motherboard assembly.

    Спросите у FixBot
  4. Samsung Gear S Home Button Assembly Replacement: шаг 4, изображение 1 из 1
    • Locate the ribbon assembly attaching the display to the motherboard.

    Спросите у FixBot
  5. Samsung Gear S Home Button Assembly Replacement: шаг 5, изображение 1 из 1
    • Use a plastic opening tool to detach the glass screen/ LED Display ribbon connector from the motherboard.

    Спросите у FixBot
  6. Samsung Gear S Home Button Assembly Replacement: шаг 6, изображение 1 из 1
    • Now the watch should be in three separate pieces.

    Спросите у FixBot
  7. Samsung Gear S Home Button Assembly Replacement, Home Button Assembly: шаг 7, изображение 1 из 2 Samsung Gear S Home Button Assembly Replacement, Home Button Assembly: шаг 7, изображение 2 из 2
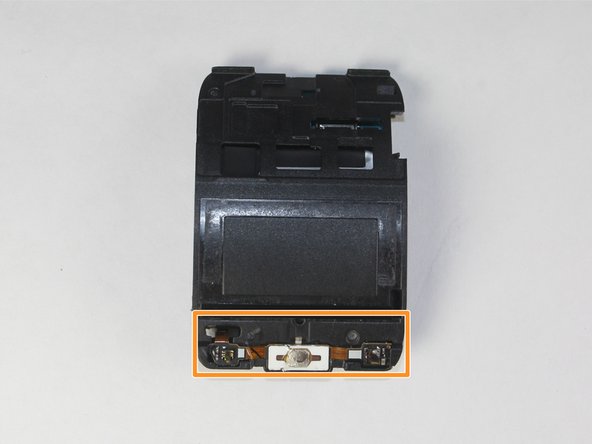
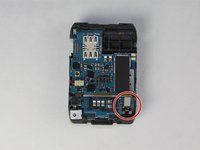
    • Locate the home ribbon connector attached to the wrist side (side that faces the user when wearing it) of the motherboard assembly.

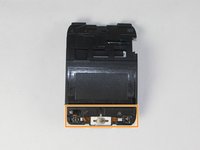
    • Locate the home ribbon assembly attached to the screen side of the motherboard assembly.

    Спросите у FixBot
  8. Samsung Gear S Home Button Assembly Replacement: шаг 8, изображение 1 из 1
    • Use a plastic opening tool to gently pry up on the home ribbon connector.

    Спросите у FixBot
  9. Samsung Gear S Home Button Assembly Replacement: шаг 9, изображение 1 из 1
    • Use the spudger to pry up the home ribbon assembly.

    Спросите у FixBot
Заключение

To reassemble your device, follow these instructions in reverse order.

2 человек успешно провели ремонт по этому руководству.

Luis Franco

Участник с: 09/03/15

1 076 Репутация

Автор 4 руководств

Команда

USF Tampa, Team 12-1, Blackwell Fall 2015 Участник USF Tampa, Team 12-1, Blackwell Fall 2015

USFT-BLACKWELL-F15S12G1

4 членов

Автор 5 руководств

2 Комментарии к руководству

where can i buy the home buton?

Hanna Iskandar - Ответить Поделиться

I am in search of the SM-R750v Housing Back Cover, any suggestions

Rita Arnold - Ответить Поделиться

Добавить комментарий

Статистика просмотров:

За последние 24 часов: 1

За последние 7 дней: 7

За последние 30 дней: 49

За всё время: 5,563