Перейти к основному содержанию
Присоединяйся к сообществу ремонтников - Создай аккаунт

Samsung Gravity TXT Screen Replacement

Выберете то, что вам нужно

  1. Samsung Gravity TXT Screen Replacement, Battery: шаг 1, изображение 1 из 2 Samsung Gravity TXT Screen Replacement, Battery: шаг 1, изображение 2 из 2
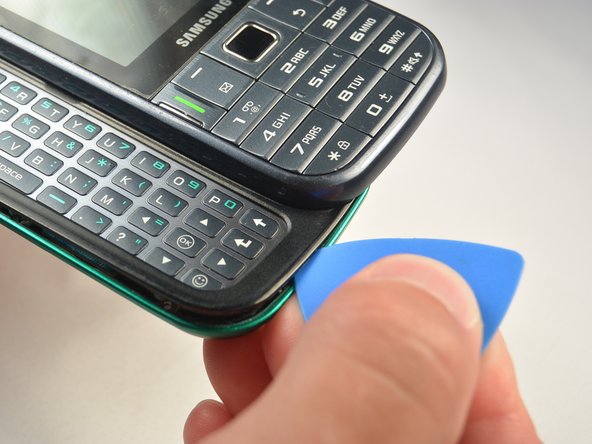
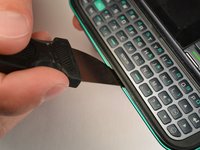
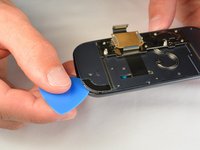
    • Pry the back cover off with a plastic opening tool, or your fingernail, in the indentation on the bottom of the device.

    Спросите у FixBot

    Добавить комментарий

  2. Samsung Gravity TXT Screen Replacement: шаг 2, изображение 1 из 1
    • Lift the back cover away from the main body of the phone.

    Спросите у FixBot

    Добавить комментарий

  3. Samsung Gravity TXT Screen Replacement: шаг 3, изображение 1 из 1
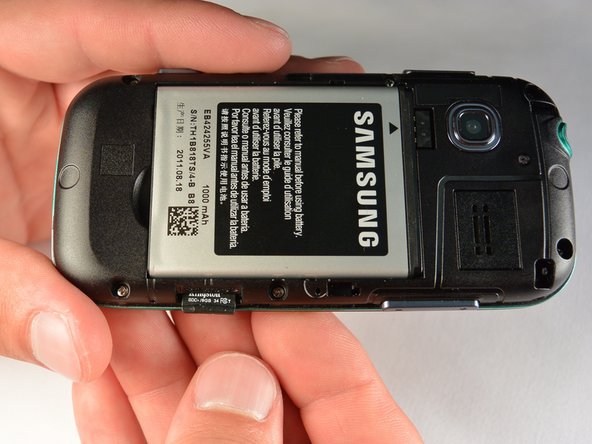
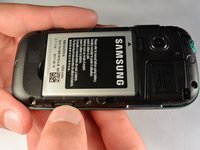
    • Insert your finger in the groove below the battery.

    • Press the battery toward the audio jack while lifting upward and away from the phone.

    • Remember to place the battery back with the copper contacts on the battery lined up with those on the phone.

    Спросите у FixBot

    Добавить комментарий

  4. Samsung Gravity TXT Screen Replacement, SIM Card: шаг 4, изображение 1 из 3 Samsung Gravity TXT Screen Replacement, SIM Card: шаг 4, изображение 2 из 3 Samsung Gravity TXT Screen Replacement, SIM Card: шаг 4, изображение 3 из 3
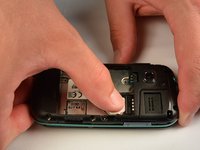
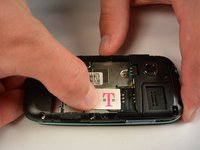
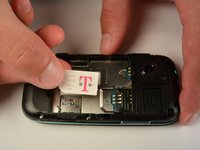
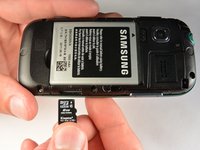
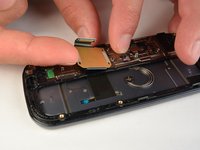
    • Using your finger, push the SIM Card down and slide out of the slot.

    • Slide the SIM card out enough to grab it firmly.

    • Remove the SIM card away from the phone.

    • Follow the visual on the bottom of the SIM card slot to put the SIM card back in the correct orientation.

    • When sliding the SIM Card back in the slot, make sure the card goes all the way in the slot until it hits the stopper.

    Спросите у FixBot

    Добавить комментарий

  5. Samsung Gravity TXT Screen Replacement, microSD Card: шаг 5, изображение 1 из 3 Samsung Gravity TXT Screen Replacement, microSD Card: шаг 5, изображение 2 из 3 Samsung Gravity TXT Screen Replacement, microSD Card: шаг 5, изображение 3 из 3
    • Using your fingernail, push the microSD card slightly deeper into the slot, until you hear a click.

    • The removal of the battery is not required for this operation; therefore, step 3 can be skipped if just replacing the microSD card.

    • After the click, release the microSD card to allow it to pop out.

    • Remove the microSD card from its slot

    • When placing the microSD card back in the phone, make sure the card clicks in place.

    Спросите у FixBot

    Добавить комментарий

  6. Samsung Gravity TXT Screen Replacement, Plastic Back Frame: шаг 6, изображение 1 из 1
    • Remove the six 3 mm #00 Phillips screws in the plastic back frame.

    Спросите у FixBot

    Добавить комментарий

  7. Samsung Gravity TXT Screen Replacement: шаг 7, изображение 1 из 3 Samsung Gravity TXT Screen Replacement: шаг 7, изображение 2 из 3 Samsung Gravity TXT Screen Replacement: шаг 7, изображение 3 из 3
    • Slide the keyboard out.

    • Use a Jimmy to separate a small segment of the plastic back frame from rest of the phone.

    • Starting at the bottom of the keyboard is recommended.

    • Slide an opening pick around the rest of the seam, starting at the gap just created with the Jimmy.

    • You will have to slide the keyboard back in to separate the back frame from the top have of the keyboard slider.

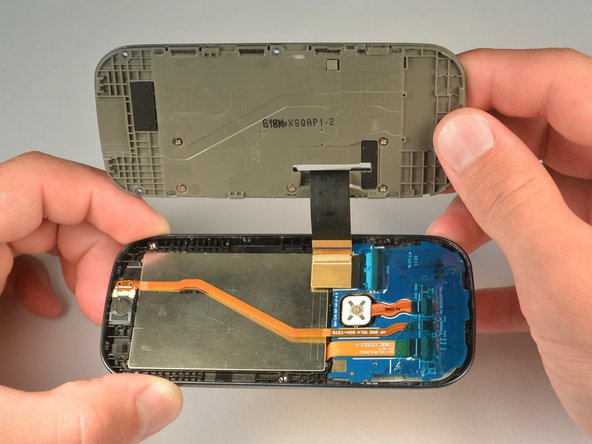
    • Lift the plastic back frame away.

    Спросите у FixBot

    Добавить комментарий

  8. Samsung Gravity TXT Screen Replacement, Motherboard: шаг 8, изображение 1 из 1
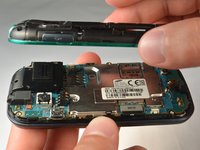
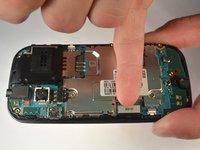
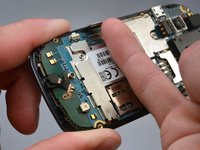
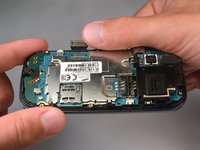
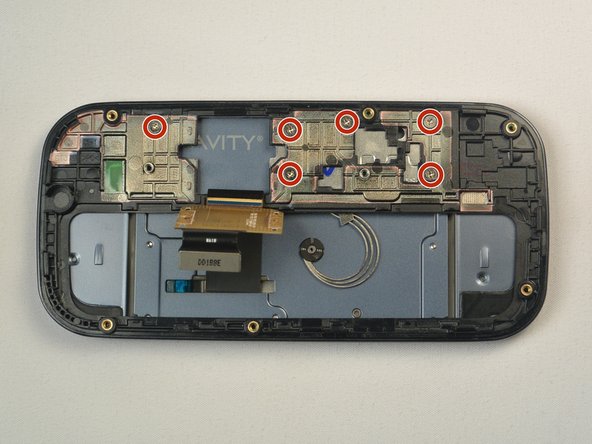
    • Remove the two 3 mm Phillips #00 screws securing the motherboard to the front panel.

    • Do not try to pull the motherboad out just yet. The display data cable needs to be disconnected from the motherboad first.

    Спросите у FixBot

    Добавить комментарий

  9. Samsung Gravity TXT Screen Replacement: шаг 9, изображение 1 из 3 Samsung Gravity TXT Screen Replacement: шаг 9, изображение 2 из 3 Samsung Gravity TXT Screen Replacement: шаг 9, изображение 3 из 3
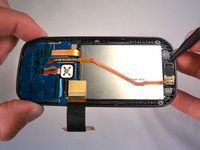
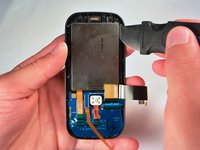
    • Use your finger nail to disconnect the display data cable from the motherboard.

    Спросите у FixBot

    Добавить комментарий

  10. Samsung Gravity TXT Screen Replacement: шаг 10, изображение 1 из 2 Samsung Gravity TXT Screen Replacement: шаг 10, изображение 2 из 2
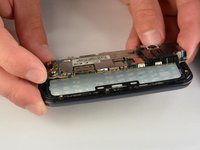
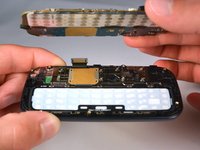
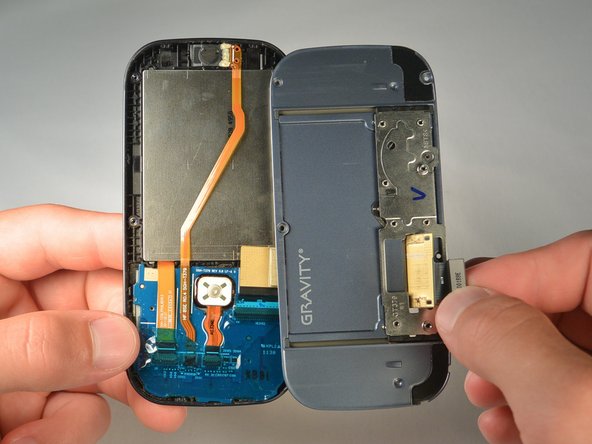
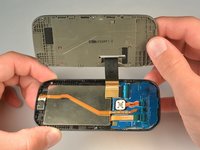
    • Carefully lift the main motherboard assembly away from the front panel.

    Спросите у FixBot

    Добавить комментарий

  11. Samsung Gravity TXT Screen Replacement, Keyboard: шаг 11, изображение 1 из 1
    • Take the keyboard off of the phone.

    Спросите у FixBot

    Добавить комментарий

  12. Samsung Gravity TXT Screen Replacement, Screen: шаг 12, изображение 1 из 3 Samsung Gravity TXT Screen Replacement, Screen: шаг 12, изображение 2 из 3 Samsung Gravity TXT Screen Replacement, Screen: шаг 12, изображение 3 из 3
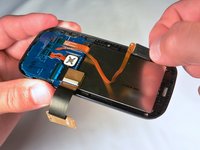
    • Lift the ribbon off the plastic inner frame.

    • You may have to warm the adhesive using an iOpener to avoid damaging the ribbon.

    • Remove the six 1.2 mm #00 screws from the inner plastic frame.

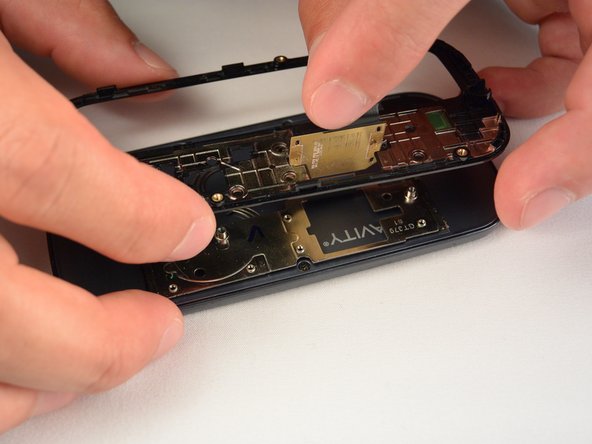
    • Slide the ribbon through the slot on the inner frame while pulling the frame away.

    Спросите у FixBot

    Добавить комментарий

  13. Samsung Gravity TXT Screen Replacement: шаг 13, изображение 1 из 1
    • Remove the four 2.4 mm #00 Phillips screws.

    Спросите у FixBot

    Добавить комментарий

  14. Samsung Gravity TXT Screen Replacement: шаг 14, изображение 1 из 3 Samsung Gravity TXT Screen Replacement: шаг 14, изображение 2 из 3 Samsung Gravity TXT Screen Replacement: шаг 14, изображение 3 из 3
    • Use a opening pick to separate the plastic back casing from the front of the phone by running it along the seam between the two.

    • Lift casing slightly away while sliding the ribbon through the slot in the casing.

    Спросите у FixBot

    Добавить комментарий

  15. Samsung Gravity TXT Screen Replacement: шаг 15, изображение 1 из 2 Samsung Gravity TXT Screen Replacement: шаг 15, изображение 2 из 2
    • Use a spudger to get underneath and remove the call speaker.

    Спросите у FixBot

    Добавить комментарий

  16. Samsung Gravity TXT Screen Replacement: шаг 16, изображение 1 из 2 Samsung Gravity TXT Screen Replacement: шаг 16, изображение 2 из 2
    • Remove the plastic adhesive sheet to expose the ribbon cables

    • The use of an iOpener may be needed to soften the eadhesive

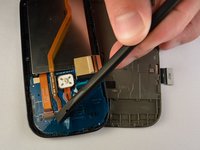
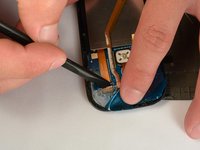
    • Use your finger or a spudger to pull the screen ribbon out of the connector

    Спросите у FixBot

    Добавить комментарий

  17. Samsung Gravity TXT Screen Replacement: шаг 17, изображение 1 из 3 Samsung Gravity TXT Screen Replacement: шаг 17, изображение 2 из 3 Samsung Gravity TXT Screen Replacement: шаг 17, изображение 3 из 3
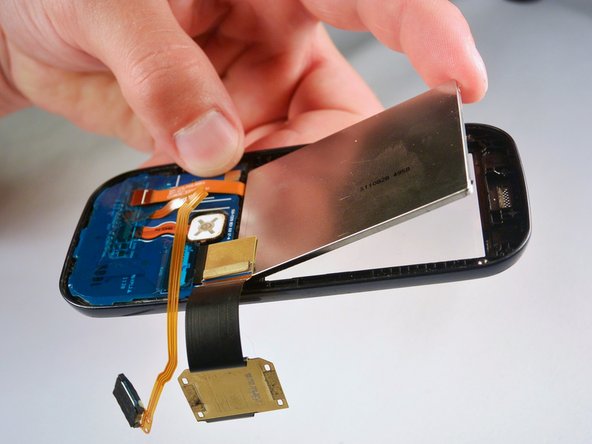
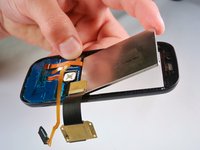
    • Use a Jimmy to separate the screen from the rest of the phone

    • You may need to heat the perimeter of the screen with an iOpener to soften the adhesive.

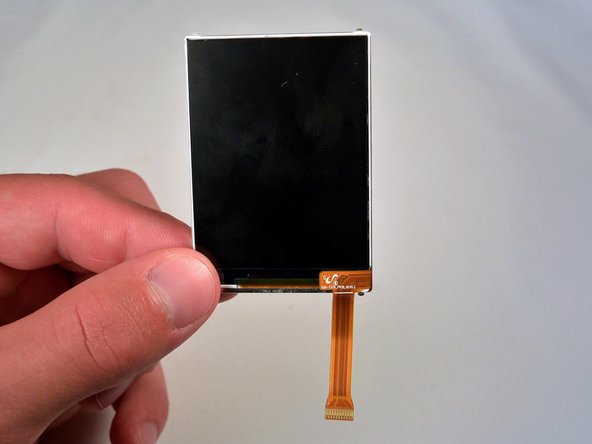
    • Lift the screen away

    Спросите у FixBot

    Добавить комментарий

Заключение

To reassemble your device, follow these instructions in reverse order.

Отменить: Я не выполнил это руководство.

Еще один человек закончил это руководство.

Andrew Sieverding

Участник с: 07/07/15

186 Репутация

1 руководство автора

Команда

IUPUI, Team 1-1, Renguette SU 2015 Участник IUPUI, Team 1-1, Renguette SU 2015

IUPUI-RENGUETTE-SU15S1G1

5 членов

Автор 16 руководств

0 Комментарии к руководству

Добавить комментарий

Статистика просмотров:

За последние 24 часов: 1

За последние 7 дней: 7

За последние 30 дней: 31

За всё время: 1,195