Перейти к основному содержанию
Присоединяйся к сообществу ремонтников - Создай аккаунт

Samsung NX Mini Button Panel Replacement

Выберете то, что вам нужно

    1. Samsung NX Mini Button Panel Replacement, Battery: шаг 1, изображение 1 из 3 Samsung NX Mini Button Panel Replacement, Battery: шаг 1, изображение 2 из 3 Samsung NX Mini Button Panel Replacement, Battery: шаг 1, изображение 3 из 3
      • Orient the camera so the button panel and LCD are facing you.

      • Use a spudger or fingernail to open the battery compartment on the right side of the camera.

      Спросите у FixBot

      Добавить комментарий

    2. Samsung NX Mini Button Panel Replacement: шаг 2, изображение 1 из 2 Samsung NX Mini Button Panel Replacement: шаг 2, изображение 2 из 2
      • Push the blue trapdoor to the left to release the battery, and remove the battery.

      • There is no battery shown in this photo.

      Спросите у FixBot

      Добавить комментарий

    1. Samsung NX Mini Button Panel Replacement, Front Case: шаг 3, изображение 1 из 1
      • Use a Phillips #00 screwdriver to remove the 4 mm screw inside the battery compartment.

      Спросите у FixBot

      Добавить комментарий

    2. Samsung NX Mini Button Panel Replacement: шаг 4, изображение 1 из 1
      • Remove the 4 mm Phillips #00 screw hiding in the external flash port.

      Спросите у FixBot

      Добавить комментарий

    3. Samsung NX Mini Button Panel Replacement: шаг 5, изображение 1 из 1
      • Remove the four 5 mm Phillips #00 screws from the lens assembly.

      Спросите у FixBot

      Добавить комментарий

    4. Samsung NX Mini Button Panel Replacement: шаг 6, изображение 1 из 1
      Инструмент, используемый на этом этапе:
      Tweezers
      $4.99
      • Remove the metal lens mount by hand or with tweezers.

      • Be careful not to touch the sensor in the center of the lens assembly.

      Спросите у FixBot

      Добавить комментарий

    5. Samsung NX Mini Button Panel Replacement: шаг 7, изображение 1 из 1
      • Use tweezers to remove the inner metal ring.

      Спросите у FixBot

      Добавить комментарий

    6. Samsung NX Mini Button Panel Replacement: шаг 8, изображение 1 из 1
      • Use a Phillips #00 screwdriver to remove the three 4 mm screws from the bottom of the case.

      Спросите у FixBot

      Добавить комментарий

    7. Samsung NX Mini Button Panel Replacement: шаг 9, изображение 1 из 2 Samsung NX Mini Button Panel Replacement: шаг 9, изображение 2 из 2
      • Use your hands to slowly pull the front casing away from the camera.

      • The case is attached with multiple clips that may make a cracking noise as you pull it away from the camera.

      Спросите у FixBot

      Добавить комментарий

    1. Samsung NX Mini Button Panel Replacement, Sensor: шаг 10, изображение 1 из 3 Samsung NX Mini Button Panel Replacement, Sensor: шаг 10, изображение 2 из 3 Samsung NX Mini Button Panel Replacement, Sensor: шаг 10, изображение 3 из 3
      Инструмент, используемый на этом этапе:
      Tweezers
      $4.99
      • Gently flip the sensor cover back to expose the screw attaching the sensor cover to the ribbon cable.

      • Use a Phillips #00 screwdriver to remove the 3 mm screw from the sensor cover.

      • Use tweezers to remove the metal contact cover. Be sure to carefully remove the cover so the gold contacts remain in place.

      • The gold lens contacts lying beneath the ribbon cable become loose when the screw and contact cover are removed.

      Спросите у FixBot

      Добавить комментарий

    2. Samsung NX Mini Button Panel Replacement: шаг 11, изображение 1 из 2 Samsung NX Mini Button Panel Replacement: шаг 11, изображение 2 из 2
      • Remove the four 4 mm Phillips #00 screws holding the sensor mount in place.

      Спросите у FixBot

      Добавить комментарий

    3. Samsung NX Mini Button Panel Replacement: шаг 12, изображение 1 из 3 Samsung NX Mini Button Panel Replacement: шаг 12, изображение 2 из 3 Samsung NX Mini Button Panel Replacement: шаг 12, изображение 3 из 3
      • Remove the four 4 mm Phillips #00 screws securing the battery compartment to the mother board.

      • Remove the battery compartment.

      Спросите у FixBot

      Добавить комментарий

    4. Samsung NX Mini Button Panel Replacement: шаг 13, изображение 1 из 2 Samsung NX Mini Button Panel Replacement: шаг 13, изображение 2 из 2
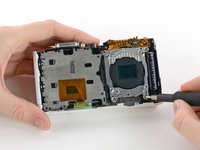
      • Use a spudger to disconnect the ribbon cable connecting the image sensor to the motherboard.

      Спросите у FixBot

      Добавить комментарий

    5. Samsung NX Mini Button Panel Replacement: шаг 14, изображение 1 из 1
      • Gently remove the sensor mount from the camera case.

      Спросите у FixBot

      Добавить комментарий

    1. Samsung NX Mini Button Panel Replacement, Motherboard: шаг 15, изображение 1 из 2 Samsung NX Mini Button Panel Replacement, Motherboard: шаг 15, изображение 2 из 2
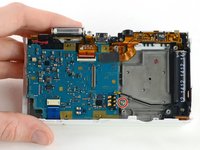
      • Use a Phillips #00 screwdriver to remove the 3 mm screw located below the wifi antenna.

      Спросите у FixBot

      Добавить комментарий

    2. Samsung NX Mini Button Panel Replacement: шаг 16, изображение 1 из 2 Samsung NX Mini Button Panel Replacement: шаг 16, изображение 2 из 2
      Инструмент, используемый на этом этапе:
      Tweezers
      $4.99
      • Use tweezers to disconnect the wifi antenna from the motherboard.

      Спросите у FixBot

      Добавить комментарий

    3. Samsung NX Mini Button Panel Replacement: шаг 17, изображение 1 из 3 Samsung NX Mini Button Panel Replacement: шаг 17, изображение 2 из 3 Samsung NX Mini Button Panel Replacement: шаг 17, изображение 3 из 3
      • Use a spudger to disconnect the LCD ribbon cable by prying it straight up from the motherboard.

      Спросите у FixBot

      Добавить комментарий

    4. Samsung NX Mini Button Panel Replacement: шаг 18, изображение 1 из 3 Samsung NX Mini Button Panel Replacement: шаг 18, изображение 2 из 3 Samsung NX Mini Button Panel Replacement: шаг 18, изображение 3 из 3
      • Use a spudger to unlock the topmost ZIF connector by flipping open the black flap.

      Спросите у FixBot

      Добавить комментарий

    5. Samsung NX Mini Button Panel Replacement: шаг 19, изображение 1 из 2 Samsung NX Mini Button Panel Replacement: шаг 19, изображение 2 из 2
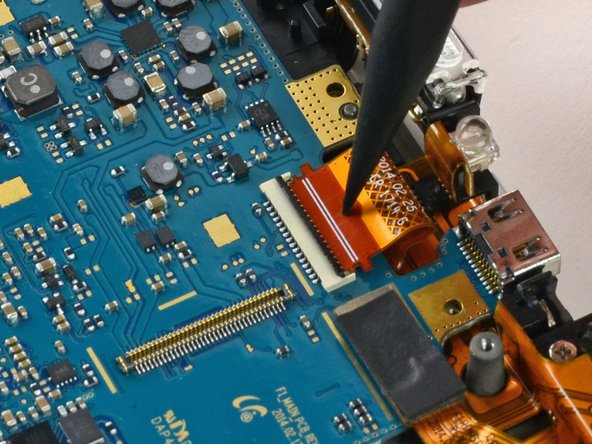
      • Insert the pointed end of a spudger into the hole in the middle of the ribbon cable.

      • Gently pull the spudger back to slide the ribbon cable out of its connector.

      Спросите у FixBot

      Добавить комментарий

    6. Samsung NX Mini Button Panel Replacement: шаг 20, изображение 1 из 3 Samsung NX Mini Button Panel Replacement: шаг 20, изображение 2 из 3 Samsung NX Mini Button Panel Replacement: шаг 20, изображение 3 из 3
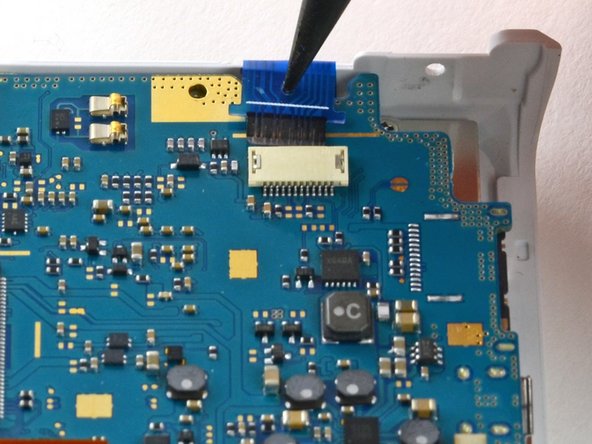
      • Disconnect the blue ribbon cable from the motherboard.

      • Insert the pointed end of a spudger into the hole in the top of the ribbon.

      • Gently pull the ribbon from the connector.

      Спросите у FixBot

      Добавить комментарий

    7. Samsung NX Mini Button Panel Replacement: шаг 21, изображение 1 из 1
      • Remove the motherboard from the camera.

      Спросите у FixBot

      Добавить комментарий

    1. Samsung NX Mini Button Panel Replacement, Button Panel: шаг 22, изображение 1 из 1
      • Remove the three 4 mm Phillips #00 screws securing the button panel to the camera case.

      Спросите у FixBot

      Добавить комментарий

    2. Samsung NX Mini Button Panel Replacement: шаг 23, изображение 1 из 1
      Инструмент, используемый на этом этапе:
      Tweezers
      $4.99
      • Use tweezers to lift the button panel cover away from the case.

      Спросите у FixBot

      Добавить комментарий

Заключение

To reassemble your device, follow these instructions in reverse order.

Отменить: Я не выполнил это руководство.

Kelsea Weber

Участник с: 11/12/15

21 470 Репутация

Автор 32 руководств

0 Комментарии к руководству

Добавить комментарий

Статистика просмотров:

За последние 24 часов: 0

За последние 7 дней: 3

За последние 30 дней: 24

За всё время: 844