Введение
This replacement guide covers how to remove the back of the YP-P3, remove the circuit board (which the battery is connected to), and replace the battery.
Выберете то, что вам нужно
-
-
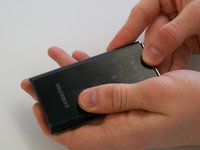
Pry up the small black piece of plastic located between the volume [-] button and the HOLD/ON button.
 Спросите у FixBot
-
-
-
Underneath the piece of plastic you just removed, there is a small screw (Phillips #000, 2.0 mm long). Use a Phillips #000 screwdriver to remove it.
-
-
-
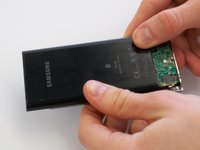
Push on the backplate with both thumbs, sliding it towards the top of the device.
-
Once it begins to move, lift up slightly. You can then slide the backplate all the way off.
-
-
-
-
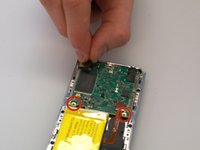
Before removing the circuit board, we must remove the ribbon-like wires attached to two sides of the circuit board.
-
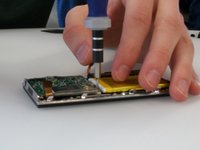
There are two screws (Phillips #000, 2.0 mm long) holding in the circuit board. Use a Phillips #000 screwdriver to take out those screws.
-
-
-
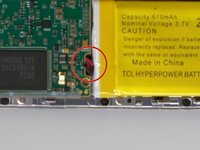
The battery is also attached to the circuit board by a cable. The cable is difficult to disconnect with both components in place. It's best to lift the circuit board out partially to give yourself more room to disconnect the connector.
-
The wire that is connected to the circuit board is connected by a plastic piece with two metal prongs.
-
Use the pointy end of the spudger to place in between the computer board and the plastic piece and gently pry the prongs away from the circuit board.
-
-
-
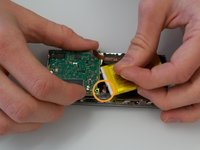
Disconnect the battery connector, and then lift the circuit board up.
-
-
-
Finally, disconnect the ribbon cable on the bottom of the circuit board. You can then lift the circuit board all the way out.
-
-
-
Use the spudger to carefully pry up the battery. The battery is attached with a few spots of glue, so it may not move at first.
-


To reassemble your device, follow these instructions in reverse order.
Отменить: Я не выполнил это руководство.
4 человек успешно провели ремонт по этому руководству.
Команда

Michigan Tech, Team 5-7, Lauer Spring 2014 Участник Michigan Tech, Team 5-7, Lauer Spring 2014
MTU-LAUER-S14S5G7
3 членов
Автор 4 руководств
2 Комментарии к руководству
I had to replace the battery two years ago and again today. This guide made it very easy for me. I was able to change batteries without completely removing the circuit board, but did remove the two screws and ribbon cables on the top of the board to lift up one end of the board.
Thanks for creating this guide!
Well done, thank you, now to find a digitizer screen, do you know?