Перейти к основному содержанию
Присоединяйся к сообществу ремонтников - Создай аккаунт

Samsung YP-P3 Buttons Replacement

Выберете то, что вам нужно

  1. Samsung YP-P3 Buttons Replacement, Case Backplate: шаг 1, изображение 1 из 1
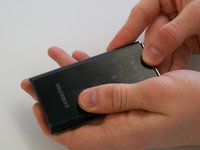
    • Pry up the small black piece of plastic located between the volume [-] button and the HOLD/ON button.

    Спросите у FixBot

    Добавить комментарий

  2. Samsung YP-P3 Buttons Replacement: шаг 2, изображение 1 из 1
    • Underneath the piece of plastic you just removed, there is a small screw (Phillips #000, 2.0 mm long). Use a Phillips #000 screwdriver to remove it.

    Спросите у FixBot

    Добавить комментарий

  3. Samsung YP-P3 Buttons Replacement: шаг 3, изображение 1 из 2 Samsung YP-P3 Buttons Replacement: шаг 3, изображение 2 из 2
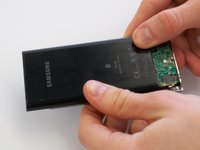
    • Push on the backplate with both thumbs, sliding it towards the top of the device.

    • Once it begins to move, lift up slightly. You can then slide the backplate all the way off.

    Спросите у FixBot

    Добавить комментарий

  4. Samsung YP-P3 Buttons Replacement, Printed Circuit Board: шаг 4, изображение 1 из 3 Samsung YP-P3 Buttons Replacement, Printed Circuit Board: шаг 4, изображение 2 из 3 Samsung YP-P3 Buttons Replacement, Printed Circuit Board: шаг 4, изображение 3 из 3
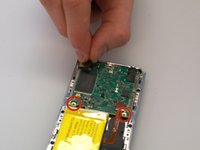
    • Before removing the circuit board, we must remove the ribbon-like wires attached to two sides of the circuit board.

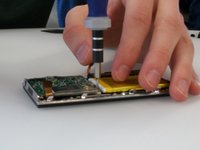
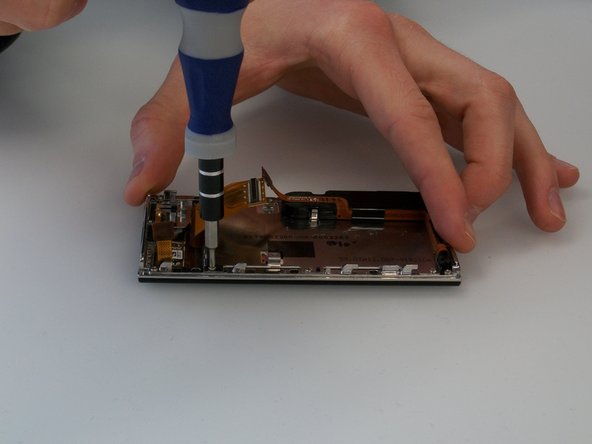
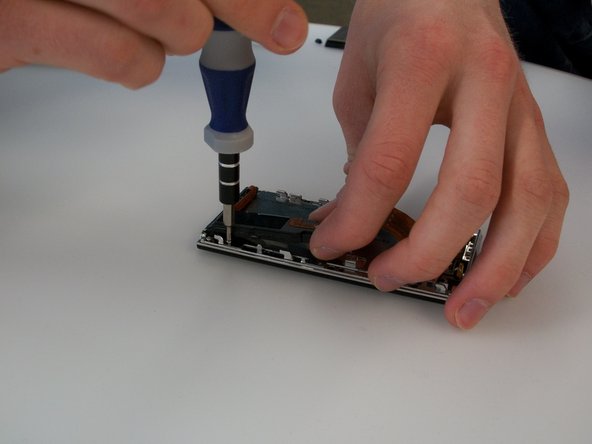
    • There are two screws (Phillips #000, 2.0 mm long) holding in the circuit board. Use a Phillips #000 screwdriver to take out those screws.

    Спросите у FixBot

    Добавить комментарий

  5. Samsung YP-P3 Buttons Replacement: шаг 5, изображение 1 из 2 Samsung YP-P3 Buttons Replacement: шаг 5, изображение 2 из 2
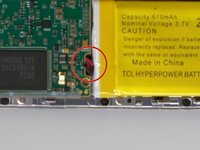
    • The battery is also attached to the circuit board by a cable. The cable is difficult to disconnect with both components in place. It's best to lift the circuit board out partially to give yourself more room to disconnect the connector.

    • The wire that is connected to the circuit board is connected by a plastic piece with two metal prongs.

    • Use the pointy end of the spudger to place in between the computer board and the plastic piece and gently pry the prongs away from the circuit board.

    Спросите у FixBot

    Добавить комментарий

  6. Samsung YP-P3 Buttons Replacement: шаг 6, изображение 1 из 1
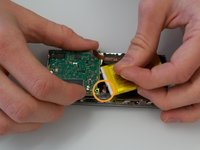
    • Disconnect the battery connector, and then lift the circuit board up.

    Спросите у FixBot

    Добавить комментарий

  7. Samsung YP-P3 Buttons Replacement: шаг 7, изображение 1 из 1
    • Finally, disconnect the ribbon cable on the bottom of the circuit board. You can then lift the circuit board all the way out.

    Спросите у FixBot

    Добавить комментарий

  8. Samsung YP-P3 Buttons Replacement, Battery: шаг 8, изображение 1 из 1
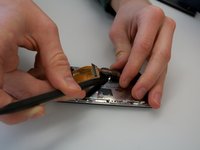
    • Use the spudger to carefully pry up the battery. The battery is attached with a few spots of glue, so it may not move at first.

    Спросите у FixBot

    Добавить комментарий

  9. Samsung YP-P3 Buttons Replacement, Touch Screen: шаг 9, изображение 1 из 3 Samsung YP-P3 Buttons Replacement, Touch Screen: шаг 9, изображение 2 из 3 Samsung YP-P3 Buttons Replacement, Touch Screen: шаг 9, изображение 3 из 3
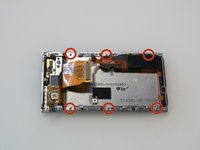
    • Remove the six screws (Phillips #000, 2.3 mm long) holding the screen frame to the front of the case. As the picture shows, one of them is hidden under the black speaker/rumble assembly.

    Спросите у FixBot

    Добавить комментарий

  10. Samsung YP-P3 Buttons Replacement: шаг 10, изображение 1 из 2 Samsung YP-P3 Buttons Replacement: шаг 10, изображение 2 из 2
    • To access the screw under the black speaker rumble/assembly, you will need to pry the assembly up slightly using the spudger.

    • The assembly is glued to the back of the screen, so the assembly may not move at first. Be patient and careful. Do not pry too hard, or you may break the assembly.

    Спросите у FixBot

    Добавить комментарий

  11. Samsung YP-P3 Buttons Replacement: шаг 11, изображение 1 из 1
    • Lift the screen out from the case.

    Спросите у FixBot

    Добавить комментарий

  12. Samsung YP-P3 Buttons Replacement, Buttons: шаг 12, изображение 1 из 2 Samsung YP-P3 Buttons Replacement, Buttons: шаг 12, изображение 2 из 2
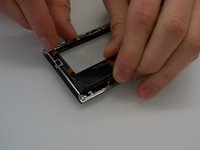
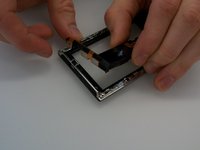
    • The buttons, built-in speaker, and rumble device are all contained in a black plastic assembly. This assembly simply snaps into place at the top of the case. Lift up gently to remove it from its place.

    Спросите у FixBot

    Добавить комментарий

Заключение

To reassemble your device, follow these instructions in reverse order.

Отменить: Я не выполнил это руководство.

Andrew Groeneveld

Участник с: 02/24/14

567 Репутация

Автор 4 руководств

Команда

Michigan Tech, Team 5-3, Lauer Spring 2014 Участник Michigan Tech, Team 5-3, Lauer Spring 2014

MTU-LAUER-S14S5G3

4 членов

Автор 6 руководств

1 Комментарий к руководству

This is terrific, but who makes a 3”, 272x480 pixel lcd screen and/or touchpanel for the samsung? Is this the same screen hardware as on the P2?

Kevin Moorman - Ответить Поделиться

Добавить комментарий

Статистика просмотров:

За последние 24 часов: 2

За последние 7 дней: 9

За последние 30 дней: 49

За всё время: 1,007