Перейти к основному содержанию

Screen Removal

Абсолютно необходимое руководство
Это руководство предназначено только для использования в качестве обязательного условия для других руководств. Оно не полностью само по себе.

Выберете то, что вам нужно

  1. Screen Removal, Disconnect the display cable: шаг 1, изображение 1 из 2 Screen Removal, Disconnect the display cable: шаг 1, изображение 2 из 2
    • Use a spudger or a fingernail to disconnect the display cable connector.

    • To re-attach press connectors like this one, carefully align and press down on one side until it clicks into place, then repeat on the other side. Do not press down on the middle. If the connector is misaligned, the pins can bend, causing permanent damage.

  2. Screen Removal, Unscrew the front sensor connector cover: шаг 2, изображение 1 из 1
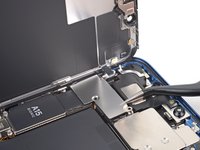
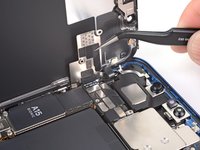
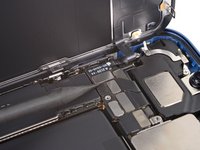
    • Remove three screws securing the front sensor connector cover:

    • One 1.7 mm Phillips screw

    • One 1.3 mm Phillips screw

    • One 1.8 mm Y000 screw

  3. Screen Removal, Remove the front sensor connector cover: шаг 3, изображение 1 из 2 Screen Removal, Remove the front sensor connector cover: шаг 3, изображение 2 из 2
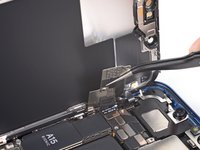
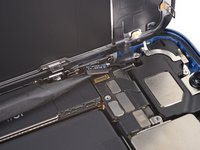
    • Swing the cover up from the center of the phone until the small clip by the edge of the phone unhooks.

  4. Screen Removal: шаг 4, изображение 1 из 2 Screen Removal: шаг 4, изображение 2 из 2
    • Remove the cover.

    • During reassembly, insert the clip on the left edge into its slot first, then hinge the rest of the cover into place.

  5. Screen Removal, Disconnect the front sensors: шаг 5, изображение 1 из 2 Screen Removal, Disconnect the front sensors: шаг 5, изображение 2 из 2
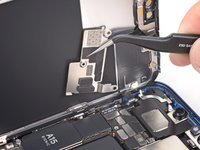
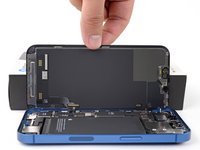
    • Use a spudger or a fingernail to disconnect the front sensor assembly cable connector.

  6. Screen Removal, Remove the screen: шаг 6, изображение 1 из 2 Screen Removal, Remove the screen: шаг 6, изображение 2 из 2
Заключение

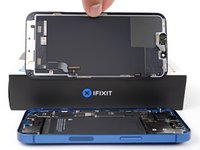
Compare your new replacement part to the original part—you may need to transfer remaining components or remove adhesive backings from the new part before installing.

To reassemble your device, follow these instructions in reverse order.

Take your e-waste to an R2 or e-Stewards certified recycler.

Repair didn’t go as planned? Try some basic troubleshooting, or ask our iPhone 13 Answers community for help.

Kyle Smith

Участник с: 02/01/21

44 809 Репутация

Автор 123 руководств

0 Комментариев

Добавить комментарий

Статистика просмотров:

За последние 24 час(ов): 1

За последние 7 дней: 1

За последние 30 дней: 1

За всё время: 87