Перейти к основному содержанию
Присоединяйся к сообществу ремонтников - Создай аккаунт

Sirius XM Onyx Plus Screen Replacement

Выберете то, что вам нужно

    1. Sirius XM Onyx Plus Screen Replacement, Case: шаг 1, изображение 1 из 1
      • Wedge a plastic opening tool in between the case.

      Спросите у FixBot

      Добавить комментарий

    2. Sirius XM Onyx Plus Screen Replacement: шаг 2, изображение 1 из 3 Sirius XM Onyx Plus Screen Replacement: шаг 2, изображение 2 из 3 Sirius XM Onyx Plus Screen Replacement: шаг 2, изображение 3 из 3
      • Starting with the bottom left corner, press down on the plastic opening tool to unhook the latches on the inside of the device.

      • You have to start with the bottom left and right corners, and then flip the device to over and do the top of the device.

      Спросите у FixBot

      Добавить комментарий

    3. Sirius XM Onyx Plus Screen Replacement: шаг 3, изображение 1 из 1
      • Once unclipped, separate the back casing from the device.

      Спросите у FixBot

      Добавить комментарий

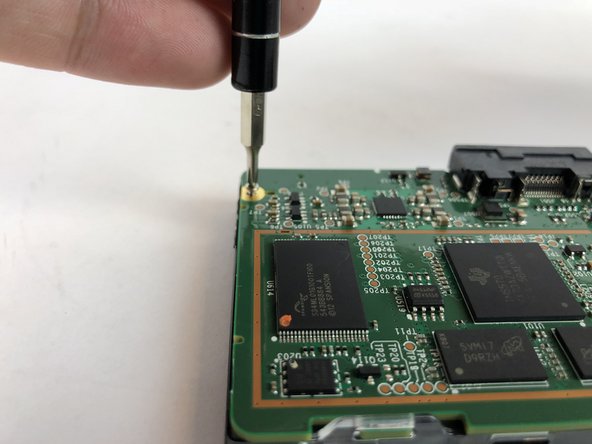
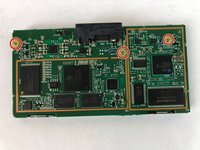
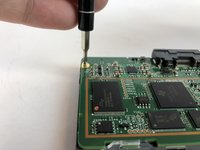
    1. Sirius XM Onyx Plus Screen Replacement, Motherboard: шаг 4, изображение 1 из 2 Sirius XM Onyx Plus Screen Replacement, Motherboard: шаг 4, изображение 2 из 2
      • Remove the three 5.4mm JIS #00 screws from the motherboard.

      Спросите у FixBot

      Добавить комментарий

    2. Sirius XM Onyx Plus Screen Replacement: шаг 5, изображение 1 из 1
      • Unlatch the two clips located at the top of the device that hold the motherboard in place.

      Спросите у FixBot

      Добавить комментарий

    3. Sirius XM Onyx Plus Screen Replacement: шаг 6, изображение 1 из 1
      • Lift the motherboard up from the bottom.

      Спросите у FixBot

      Добавить комментарий

    4. Sirius XM Onyx Plus Screen Replacement: шаг 7, изображение 1 из 1
      • Lift the screen up, so you can see where it is attached to the motherboard.

      Спросите у FixBot

      Добавить комментарий

    5. Sirius XM Onyx Plus Screen Replacement: шаг 8, изображение 1 из 1
      • Use a spudger to flip up the retaining flap on the display ribbon cable ZIF socket.

      Спросите у FixBot

      Добавить комментарий

    6. Sirius XM Onyx Plus Screen Replacement: шаг 9, изображение 1 из 1
      • Carefully pull the ribbon out from the ZIF connector.

      Спросите у FixBot

      Добавить комментарий

    1. Sirius XM Onyx Plus Screen Replacement, Screen: шаг 10, изображение 1 из 1
      • Take the black casing off the screen.

      Спросите у FixBot

      Добавить комментарий

Заключение

To reassemble your device, follow these instructions in reverse order.

Отменить: Я не выполнил это руководство.

Еще один человек закончил это руководство.

Angel Rivera

Участник с: 01/25/18

532 Репутация

Автор 5 руководств

Команда

USF Tampa, Team S7-G2, Passmore Spring 2018 Участник USF Tampa, Team S7-G2, Passmore Spring 2018

USFT-PASSMORE-S18S7G2

4 членов

Автор 5 руководств

0 Комментарии к руководству

Добавить комментарий

Статистика просмотров:

За последние 24 часов: 0

За последние 7 дней: 3

За последние 30 дней: 24

За всё время: 864