Введение
Snowboard bindings are easy to take apart and replace. In this guide we will show you how to replace a Union Force binding. Most snowboard bindings are very similar to remove, but there may be some slight differences.
Выберете то, что вам нужно
-
-
-
Release the binding straps by lifting up on the buckle and pulling towards the direction of the end of the ladder.
 Спросите у FixBot
-
-
-
Move the straps and the highback plate out of the way in order to have clear access to the foot pad screw.
-
-
-
-
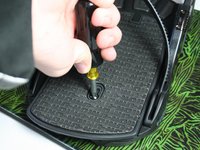
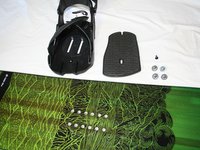
Use a #2 Phillips screwdriver to remove the panhead, 10mm wide, M4 x 12mm screw located in the middle of the foot pad.
-
-
-
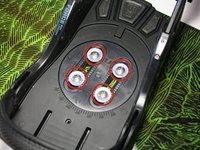
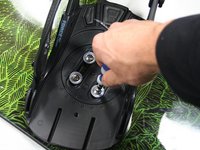
Use a #2 Phillips screwdriver to remove the four ovalhead M6 x 12mm screws that attach the base plate of the binding to the board.
-
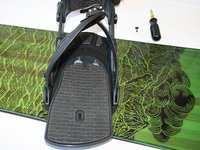
Lift or slide the binding off the board and set the screws aside.
-
-


To reassemble your device, follow these instructions in reverse order.
Отменить: Я не выполнил это руководство.
2 человек успешно провели ремонт по этому руководству.
Команда

Cal Poly, Team 17-4, Forte Winter 2014 Участник Cal Poly, Team 17-4, Forte Winter 2014
CPSU-FORTE-W14S17G4
5 членов
Автор 11 руководств