Перейти к основному содержанию
Присоединяйся к сообществу ремонтников - Создай аккаунт

Sony BDP-BX520 Disc Tray Replacement

Выберете то, что вам нужно

  1. Sony BDP-BX520 Disc Tray Replacement, Disc Tray Cover: шаг 1, изображение 1 из 1
    • Plug in the Blu-Ray player, then press the power button, making sure the Blu-Ray player is powered on.

    • Press the eject button on either the top of the Blu-Ray player or on the remote to open the disc tray.

    Спросите у FixBot

    Добавить комментарий

  2. Sony BDP-BX520 Disc Tray Replacement: шаг 2, изображение 1 из 1
    • Grab the sides of the disc tray cover and carefully pull each side upwards, starting with the left side. This will unhook the cover from the tray.

    Спросите у FixBot

    Добавить комментарий

  3. Sony BDP-BX520 Disc Tray Replacement: шаг 3, изображение 1 из 1
    • Close the disc tray, then power off and unplug the Blu-Ray player.

    Спросите у FixBot

    Добавить комментарий

  4. Sony BDP-BX520 Disc Tray Replacement, Top Case: шаг 4, изображение 1 из 1
    • Locate the three 8 mm screws on the back of the Blu-Ray player.

    • Using the Phillips #2 screwdriver, unscrew each of the screws and set them aside.

    Спросите у FixBot

    Добавить комментарий

  5. Sony BDP-BX520 Disc Tray Replacement: шаг 5, изображение 1 из 2 Sony BDP-BX520 Disc Tray Replacement: шаг 5, изображение 2 из 2
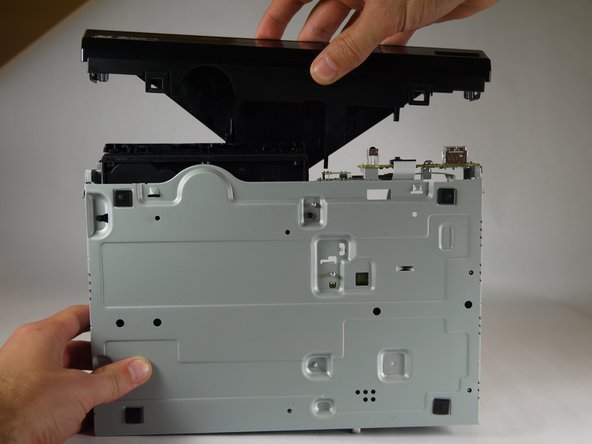
    • Gently pull the top case back to remove it from the Blu-Ray player.

    Спросите у FixBot

    Добавить комментарий

  6. Sony BDP-BX520 Disc Tray Replacement, Front Panel: шаг 6, изображение 1 из 1
    • Insert the nylon or metal spudger under the clip on the side near the front of the device. Lift the clip so it is free from the device.

    • Lifting these clips may require you to hold one clip open while you move on to the next clip.

    Спросите у FixBot

    Добавить комментарий

  7. Sony BDP-BX520 Disc Tray Replacement: шаг 7, изображение 1 из 1
    • Flip device over so the bottom faces you.

    • Insert the nylon or metal spudger and lift the two clips on the bottom of the device.

    Спросите у FixBot

    Добавить комментарий

  8. Sony BDP-BX520 Disc Tray Replacement: шаг 8, изображение 1 из 1
    • Lift the clip on the opposite side of the device with the nylon or metal spudger.

    Спросите у FixBot

    Добавить комментарий

  9. Sony BDP-BX520 Disc Tray Replacement: шаг 9, изображение 1 из 2 Sony BDP-BX520 Disc Tray Replacement: шаг 9, изображение 2 из 2
    • Grasp the front case firmly and lift from the rest of the device.

    • Lifting may require some force.

    Спросите у FixBot

    Добавить комментарий

  10. Sony BDP-BX520 Disc Tray Replacement, Disc Tray: шаг 10, изображение 1 из 2 Sony BDP-BX520 Disc Tray Replacement, Disc Tray: шаг 10, изображение 2 из 2
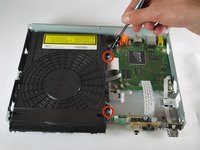
    • Using a Phillips #2 screwdriver, remove the two silver 8 mm screws on the right side of the disk tray .

    Спросите у FixBot

    Добавить комментарий

  11. Sony BDP-BX520 Disc Tray Replacement: шаг 11, изображение 1 из 2 Sony BDP-BX520 Disc Tray Replacement: шаг 11, изображение 2 из 2
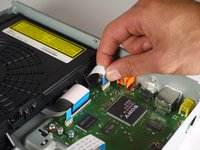
    • Pull the medium-sized 9 pin ribbon cable out of its connector on the motherboard.

    Спросите у FixBot

    Добавить комментарий

  12. Sony BDP-BX520 Disc Tray Replacement: шаг 12, изображение 1 из 3 Sony BDP-BX520 Disc Tray Replacement: шаг 12, изображение 2 из 3 Sony BDP-BX520 Disc Tray Replacement: шаг 12, изображение 3 из 3
    Инструмент, используемый на этом этапе:
    Tweezers
    $4.99
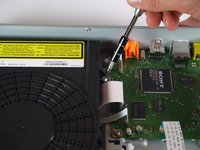
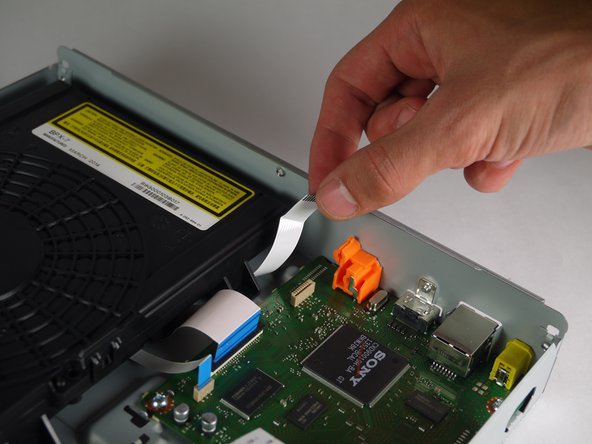
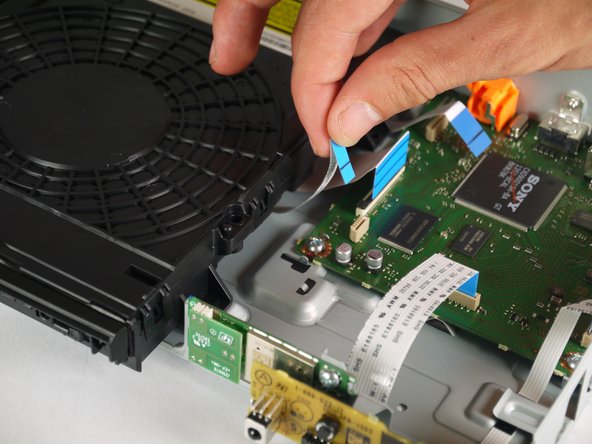
    • Using tweezers, lift up the tab of the large 45 pin connector on the motherboard.

    • Pull the large 45 pin ribbon cable out of its connector.

    Спросите у FixBot

    Добавить комментарий

  13. Sony BDP-BX520 Disc Tray Replacement: шаг 13, изображение 1 из 2 Sony BDP-BX520 Disc Tray Replacement: шаг 13, изображение 2 из 2
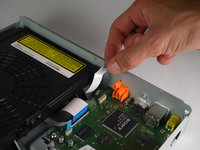
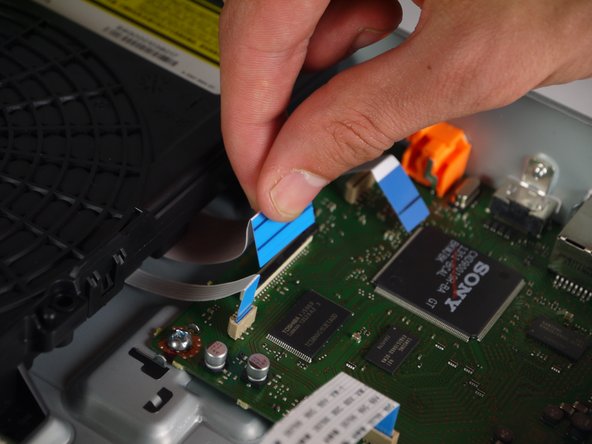
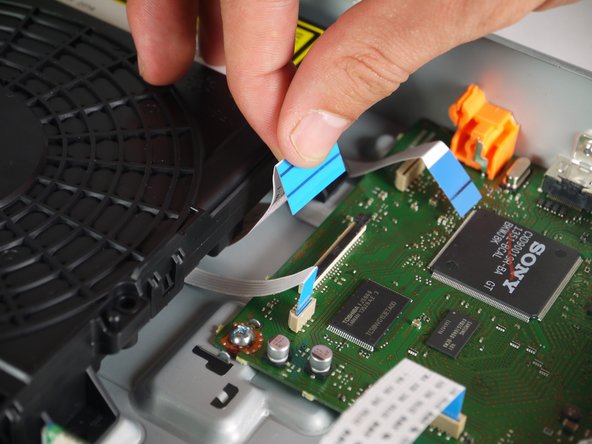
    • Pull the small 5 pin ribbon cable out of its connector on the motherboard.

    Спросите у FixBot

    Добавить комментарий

  14. Sony BDP-BX520 Disc Tray Replacement: шаг 14, изображение 1 из 2 Sony BDP-BX520 Disc Tray Replacement: шаг 14, изображение 2 из 2
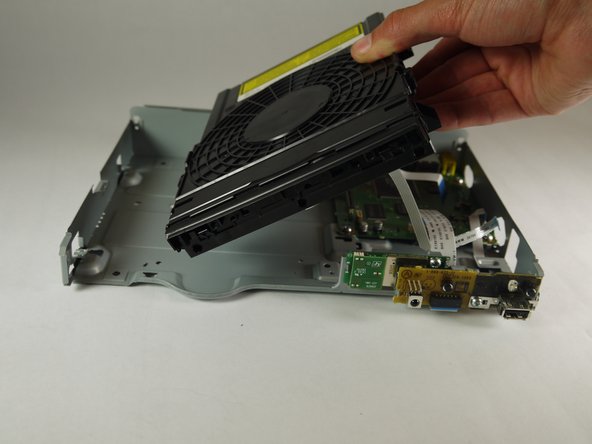
    • Slide the disk tray out from under the tabs on the case holding it down while lifting it out of the case.

    Спросите у FixBot

    Добавить комментарий

Заключение

To reassemble your device, follow these instructions in reverse order.

Отменить: Я не выполнил это руководство.

6 человек успешно провели ремонт по этому руководству.

Gregory Pellegrino

Участник с: 02/02/15

405 Репутация

Автор 2 руководств

Команда

Cal Poly, Team 8-41, Amido Winter 2015 Участник Cal Poly, Team 8-41, Amido Winter 2015

CPSU-AMIDO-W15S8G41

4 членов

Автор 8 руководств

3 Комментарии к руководству

Thanks, this helped a lot. I still cant get the DVD drawer to eject with the eject button. The power light will not turn off.

tomcerecedes - Ответить Поделиться
Thank you thank you thank you. I spent an hour on the phone with Sony “technical support “ and was told nothing could be done except to send it off for servicing. This worked PERFECTLY!!!! THANKS AGAIN ?

Susan Brown - Ответить Поделиться

Cómo retiro la charola del disco

Anuar - Ответить Поделиться

Добавить комментарий

Статистика просмотров:

За последние 24 часов: 1

За последние 7 дней: 9

За последние 30 дней: 40

За всё время: 8,056