Перейти к основному содержанию

Sony Ericsson W580i LCD Replacement

Выберете то, что вам нужно

  1. Sony Ericsson W580i LCD Replacement, Front Cover: шаг 1, изображение 1 из 2 Sony Ericsson W580i LCD Replacement, Front Cover: шаг 1, изображение 2 из 2
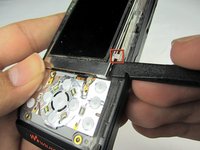
    • Insert the edge of an opening tool between the front cover and the phone.

    • Gently pry off the front cover working your way around the edges.

  2. Sony Ericsson W580i LCD Replacement: шаг 2, изображение 1 из 2 Sony Ericsson W580i LCD Replacement: шаг 2, изображение 2 из 2
    • Pull the front cover down and away from the phone.

    • The front keypads might come off with the front cover. Do not lose these.

  3. Sony Ericsson W580i LCD Replacement: шаг 3, изображение 1 из 1
    • Gently peel the keypad away from the phone.

  4. Sony Ericsson W580i LCD Replacement, LCD: шаг 4, изображение 1 из 2 Sony Ericsson W580i LCD Replacement, LCD: шаг 4, изображение 2 из 2
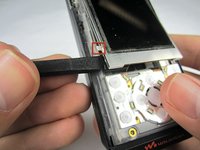
    • Insert a spudger between the lower edge of the screen and the phone.

    • Pry the screen up to disconnect the tabs on each side holding the screen in.

    • Do not remove the screen yet. There is a ribbon connecting the screen to the motherboard.

  5. Sony Ericsson W580i LCD Replacement: шаг 5, изображение 1 из 2 Sony Ericsson W580i LCD Replacement: шаг 5, изображение 2 из 2
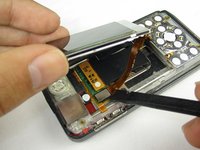
    • Use a spudger to remove the ribbon cable from the motherboard.

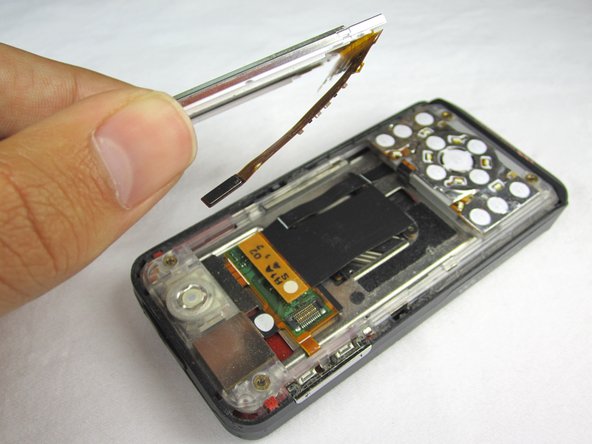
    • Lift the screen away from the phone

Заключение

To reassemble your device, follow these instructions in reverse order.

6 участников успешно повторили данное руководство.

Diego

Участник с: 10/09/11

388 Репутация

Автор 4 руководств

Команда

Cal Poly, Team 5-31, Amido Fall 2011 Участник Cal Poly, Team 5-31, Amido Fall 2011

CPSU-AMIDO-F11S5G31

4 членов

Автор 12 руководств

0 Комментариев

Добавить комментарий

Просмотр статистики:

За последние 24часов: 1

За последние 7 дней: 6

За последние 30 дней: 12

За всё время: 5,617