Перейти к основному содержанию
Присоединяйся к сообществу ремонтников - Создай аккаунт

Sony Xperia TL Display Assembly Replacement

Выберете то, что вам нужно

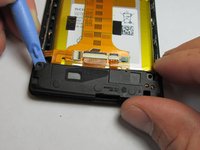
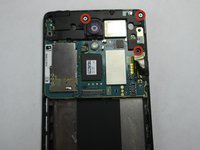
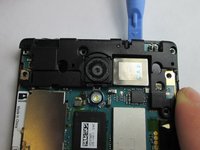
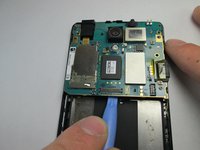
  1. Sony Xperia TL Display Assembly Replacement, Remove Top Plastic Section: шаг 1, изображение 1 из 3 Sony Xperia TL Display Assembly Replacement, Remove Top Plastic Section: шаг 1, изображение 2 из 3 Sony Xperia TL Display Assembly Replacement, Remove Top Plastic Section: шаг 1, изображение 3 из 3
    • Use the plastic opening tool to pry the top plastic section off.

    Спросите у FixBot

    Добавить комментарий

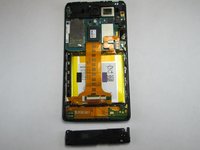
  2. Sony Xperia TL Display Assembly Replacement, Remove Bottom Plastic Section: шаг 2, изображение 1 из 2 Sony Xperia TL Display Assembly Replacement, Remove Bottom Plastic Section: шаг 2, изображение 2 из 2
    • Use the plastic opening tool to pry the bottom plastic section off.

    Спросите у FixBot

    Добавить комментарий

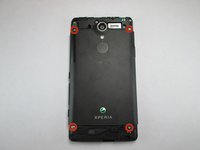
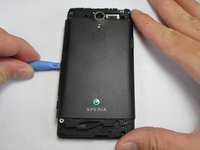
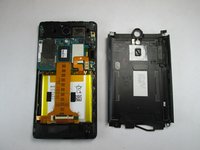
  3. Sony Xperia TL Display Assembly Replacement, Unscrewing the Back Off: шаг 3, изображение 1 из 3 Sony Xperia TL Display Assembly Replacement, Unscrewing the Back Off: шаг 3, изображение 2 из 3 Sony Xperia TL Display Assembly Replacement, Unscrewing the Back Off: шаг 3, изображение 3 из 3
    • Remove the four 5mm screws.

    • Use the plastic opening tool to pry off the back.

    Спросите у FixBot

    Добавить комментарий

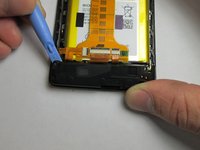
  4. Sony Xperia TL Display Assembly Replacement, Loud Speaker: шаг 4, изображение 1 из 3 Sony Xperia TL Display Assembly Replacement, Loud Speaker: шаг 4, изображение 2 из 3 Sony Xperia TL Display Assembly Replacement, Loud Speaker: шаг 4, изображение 3 из 3
    • Use the plastic opening tool to remove the loud speaker module.

    Спросите у FixBot

    Добавить комментарий

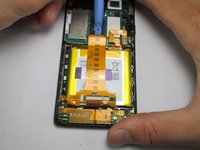
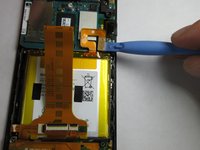
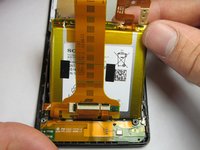
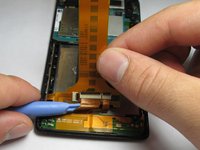
  5. Sony Xperia TL Display Assembly Replacement, Battery: шаг 5, изображение 1 из 3 Sony Xperia TL Display Assembly Replacement, Battery: шаг 5, изображение 2 из 3 Sony Xperia TL Display Assembly Replacement, Battery: шаг 5, изображение 3 из 3
    • Use the plastic opening tool to detach the ribbon running across the battery.

    • Use the plastic opening tool to detach the ribbon connecting the battery to the motherboard.

    Спросите у FixBot

    Добавить комментарий

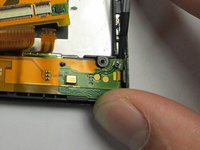
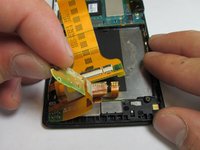
  6. Sony Xperia TL Display Assembly Replacement, Battery Harness: шаг 6, изображение 1 из 3 Sony Xperia TL Display Assembly Replacement, Battery Harness: шаг 6, изображение 2 из 3 Sony Xperia TL Display Assembly Replacement, Battery Harness: шаг 6, изображение 3 из 3
    • Unhook the 2 connections between the harness and phone shell.

    • Using the plastic opening tool, pry the harness up and remove it.

    • There is an adhesive on the bottom half of the battery harness.

    Спросите у FixBot

    Добавить комментарий

  7. Sony Xperia TL Display Assembly Replacement: шаг 7, изображение 1 из 1
    • The final step is taking the entire harness off of the phone.

    Спросите у FixBot

    Добавить комментарий

  8. Sony Xperia TL Display Assembly Replacement, Motherboard: шаг 8, изображение 1 из 3 Sony Xperia TL Display Assembly Replacement, Motherboard: шаг 8, изображение 2 из 3 Sony Xperia TL Display Assembly Replacement, Motherboard: шаг 8, изображение 3 из 3
    • Use the Phillips #00 to remove the 3 5mm screws.

    • Lift the plastic cover off.

    • Use the plastic opening tool to pry the motherboard out of the phone shell.

    Спросите у FixBot

    Добавить комментарий

  9. Sony Xperia TL Display Assembly Replacement, Ear Speaker: шаг 9, изображение 1 из 1
    • Use the plastic opening tool to detach the ear piece speaker.

    • Avoid majorly bending the tiny metal hooks holding the ear piece in.

    Спросите у FixBot

    Добавить комментарий

  10. Sony Xperia TL Display Assembly Replacement, Display Assembly: шаг 10, изображение 1 из 1
    • Once every single piece is removed from the main screen/digitizer this will be the only remaining piece. Nothing else can be removed. If you need to replace your screen this entire piece must be replaced.

    Спросите у FixBot

    Добавить комментарий

Заключение

To reassemble your device, follow these instructions in reverse order.

Отменить: Я не выполнил это руководство.

Еще один человек закончил это руководство.

Adam Giniger

Участник с: 09/22/14

1 303 Репутация

Автор 8 руководств

Команда

USF Tampa, Team 4-4, Brown Fall 2014 Участник USF Tampa, Team 4-4, Brown Fall 2014

USFT-BROWN-F14S4G4

3 членов

Автор 10 руководств

0 Комментарии к руководству

Добавить комментарий

Статистика просмотров:

За последние 24 часов: 0

За последние 7 дней: 6

За последние 30 дней: 32

За всё время: 870