Перейти к основному содержанию
Присоединяйся к сообществу ремонтников - Создай аккаунт

Sunbeam Snow Cone Maker Dasher Replacement

Выберете то, что вам нужно

  1. Sunbeam Snow Cone Maker Dasher Replacement, Dasher: шаг 1, изображение 1 из 1
    • Push the button on the back to release the lid. (Missing on this example device.)

    • In the photo on the device page it is red.

    Спросите у FixBot
  2. Sunbeam Snow Cone Maker Dasher Replacement: шаг 2, изображение 1 из 2 Sunbeam Snow Cone Maker Dasher Replacement: шаг 2, изображение 2 из 2
    • Unscrew the dasher by holding it in the middle and turning clockwise.

    • You will have to spin it quite a bit.

    • Remove the dasher.

    • Alternately, you can continue to step 3 to further disassemble the dasher components.

    Спросите у FixBot
  3. Sunbeam Snow Cone Maker Dasher Replacement: шаг 3, изображение 1 из 2 Sunbeam Snow Cone Maker Dasher Replacement: шаг 3, изображение 2 из 2
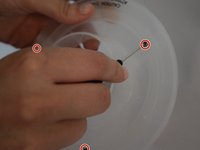
    • To take the dasher apart, remove the three 5.5 mm Phillips #00 screws embedded in the plastic. **The 3rd screw is behind the hand in the picture

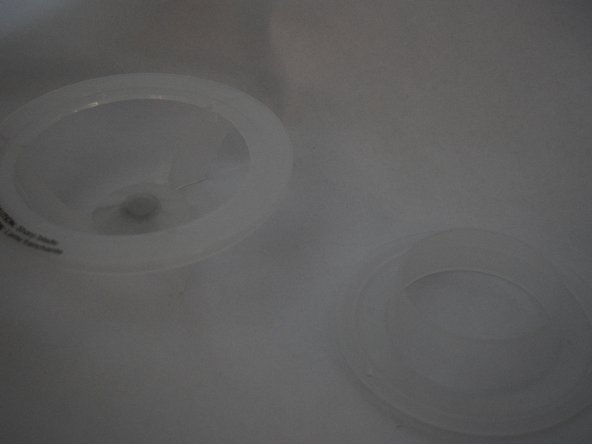
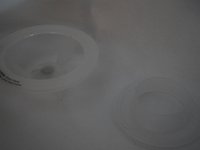
    • Carefully pull the two pieces apart.

    • When you've finished taking apart the dasher, you should have two parts that are shown in the second picture in this step.

    Спросите у FixBot
Заключение

To reassemble your device, follow these instructions in reverse order.

Thomas Falcon

Участник с: 03/24/15

107 Репутация

1 руководство автора

Команда

University of Alabama, Team 1-5, Naidoo Spring 2015 Участник University of Alabama, Team 1-5, Naidoo Spring 2015

UA-NAIDOO-S15S1G5

4 членов

Автор 2 руководств

0 Комментарии к руководству

Добавить комментарий

Статистика просмотров:

За последние 24 часов: 2

За последние 7 дней: 16

За последние 30 дней: 59

За всё время: 1,183