Перейти к основному содержанию
Присоединяйся к сообществу ремонтников - Создай аккаунт

SwagTron T1 Wheel Replacement

Выберете то, что вам нужно

  1. SwagTron T1 Wheel Replacement, Back Panels: шаг 1, изображение 1 из 1
    • Ensure that the SwagTron is off.

    • Turn the SwagTron upside down to see the underside.

    Спросите у FixBot

    Добавить комментарий

  2. SwagTron T1 Wheel Replacement: шаг 2, изображение 1 из 3 SwagTron T1 Wheel Replacement: шаг 2, изображение 2 из 3 SwagTron T1 Wheel Replacement: шаг 2, изображение 3 из 3
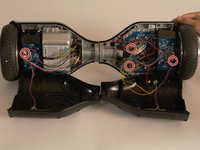
    • Unscrew the eighteen 10mm screws that secure the back panels using a Phillips #2 screwdriver.

    • The screws are tightly in place. It will take effort to screw them out.

    • The panel is still attached to the SwagTron by wires that go to the motherboard.

    • Carefully lift the panels off

    Спросите у FixBot

    Добавить комментарий

  3. SwagTron T1 Wheel Replacement: шаг 3, изображение 1 из 3 SwagTron T1 Wheel Replacement: шаг 3, изображение 2 из 3 SwagTron T1 Wheel Replacement: шаг 3, изображение 3 из 3
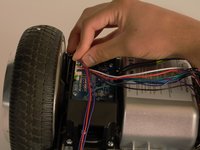
    • Follow the wires from the panels to the motherboard.

    • You may need to cut any zip ties that are holding the wires together.

    • There is one connection on the battery side and three on the other side that must be removed.

    • These connections may be difficult to remove. Try to securely press the connection and pull firmly.

    • Your back panels are now completely removed.

    Спросите у FixBot

    Добавить комментарий

  4. SwagTron T1 Wheel Replacement, Wheel: шаг 4, изображение 1 из 3 SwagTron T1 Wheel Replacement, Wheel: шаг 4, изображение 2 из 3 SwagTron T1 Wheel Replacement, Wheel: шаг 4, изображение 3 из 3
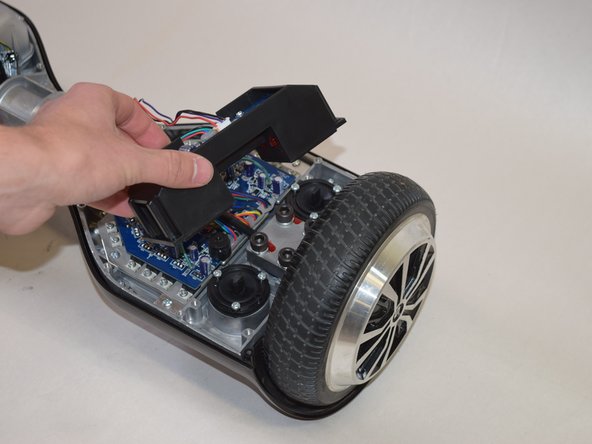
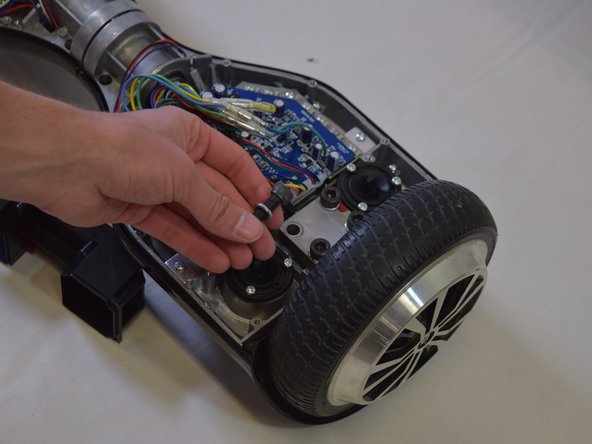
    • Using your Phillips #2 screwdriver, remove the four 1cm screws that attach the gyroscope and its black case to the hoverboard.

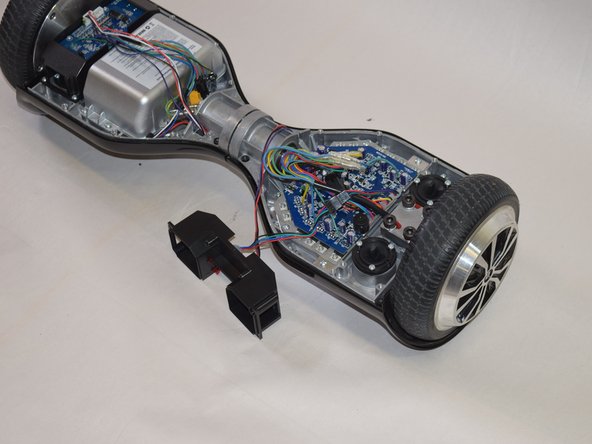
    • Carefully remove this component and set it off to the side.

    Спросите у FixBot

    Добавить комментарий

  5. SwagTron T1 Wheel Replacement: шаг 5, изображение 1 из 3 SwagTron T1 Wheel Replacement: шаг 5, изображение 2 из 3 SwagTron T1 Wheel Replacement: шаг 5, изображение 3 из 3
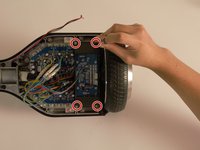
    • Using your H 6.0 allen wrench, remove the four 20mm black bolts shown in the picture.

    • Take off the iron plate holding the wheel in place.

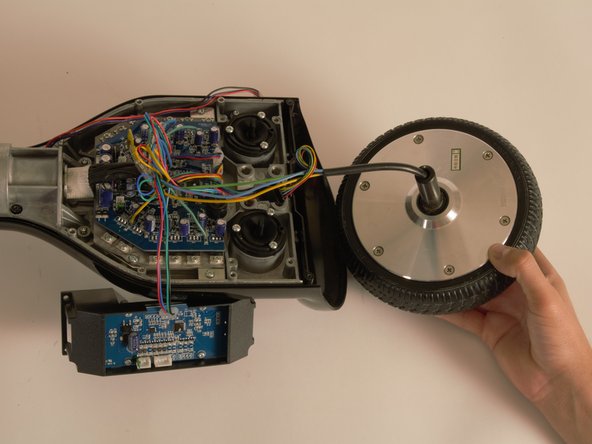
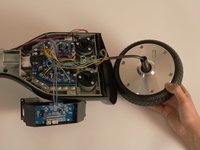
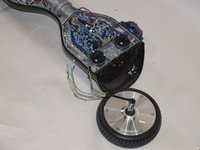
    • Remove the Motor/Wheel and set it aside close by to the hoverboard.

    • The wires from the Motor/Wheel should still be connected to the motherboard.

    • These bolts are very tight, it may be difficult to remove them. Try using a tool with a long handle.

    Спросите у FixBot

    Добавить комментарий

  6. SwagTron T1 Wheel Replacement: шаг 6, изображение 1 из 3 SwagTron T1 Wheel Replacement: шаг 6, изображение 2 из 3 SwagTron T1 Wheel Replacement: шаг 6, изображение 3 из 3
    Инструмент, используемый на этом этапе:
    Tweezers
    $4.99
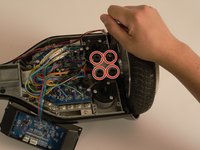
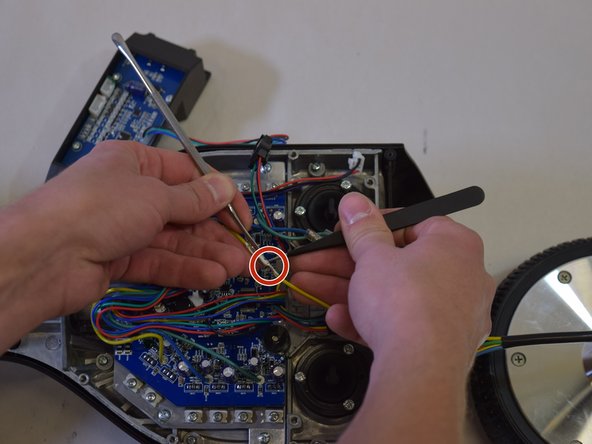
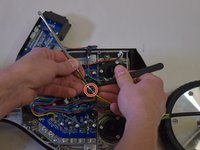
    • Slide the protective plastic off the connectors on the marked wires (green, blue, and yellow) using your hands or a set of tweezers.

    • The connectors on the wires of your hoverboard may be different from those shown in the pictures on the left due to differences in manufacturing.

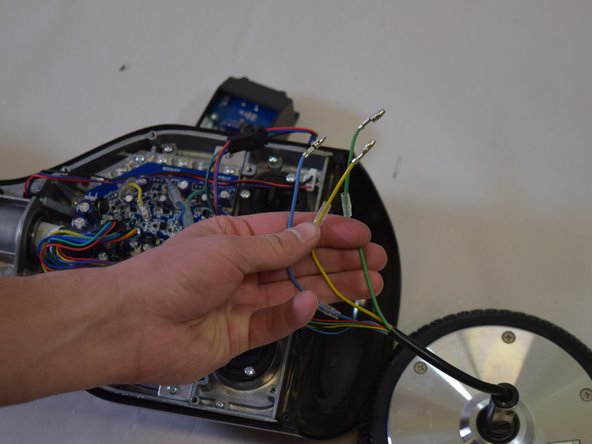
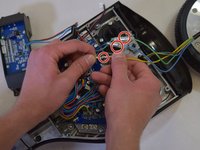
    • Separate the set of marked green, blue, and yellow wires from their connectors.

    Спросите у FixBot

    Добавить комментарий

  7. SwagTron T1 Wheel Replacement: шаг 7, изображение 1 из 3 SwagTron T1 Wheel Replacement: шаг 7, изображение 2 из 3 SwagTron T1 Wheel Replacement: шаг 7, изображение 3 из 3
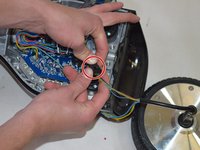
    • Finally separate the last connector shown on the left.

    • Your wheel is completely removed; slide in a new Motor/Wheel into the slot and follow the previous steps in reverse order.

    • Make sure the replacement wheel is snug. Neither rubbing on the outer rim nor on the side of the hoverboard.

    Спросите у FixBot

    Добавить комментарий

Заключение

To reassemble your device, follow these instructions in reverse order.

Отменить: Я не выполнил это руководство.

5 человек успешно провели ремонт по этому руководству.

Teagan Allen

Участник с: 04/18/17

432 Репутация

Автор 2 руководств

Команда

Cal Poly, Team S17-G5, Banghart Spring 2017 Участник Cal Poly, Team S17-G5, Banghart Spring 2017

CPSU-BANGHART-S17S17G5

4 членов

Автор 5 руководств

3 Комментарии к руководству

Where do you get replacement wheels?

Elizabeth Schumacher - Ответить Поделиться

Where can we find replacement wheels?

Liz Vance - Ответить Поделиться

Mine won't stop beeping?? Fully charged.

Rachael Anderson - Ответить Поделиться

Добавить комментарий

Статистика просмотров:

За последние 24 часов: 3

За последние 7 дней: 18

За последние 30 дней: 66

За всё время: 6,534