Введение
This guide will show you how to replace the gyroscope when your Swagtron T3 is not balancing properly. To avoid electric shock, discharge the capacitors using the capacitor discharge tool before making any changes to your Swagtron.
Выберете то, что вам нужно
-
-
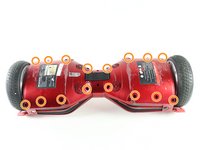
Flip the Swagtron so that the footpads are facing the ground.
-
Unscrew the sixteen 9.4 mm Phillips #1 machine screws on the side of the Swagtron that is now facing upwards.
 Спросите у FixBot
-
-
-
Slowly lift the backside cover.
-
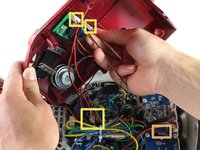
Detach the four cables connected to the cover by pinching the connector clips and pulling the cables out:
-
Three cables on the motherboard side.
-
Two red cables with white connectors and one white cable with a white connector.
-
One yellow cable with a black connector on the battery side.
-
-
-
-
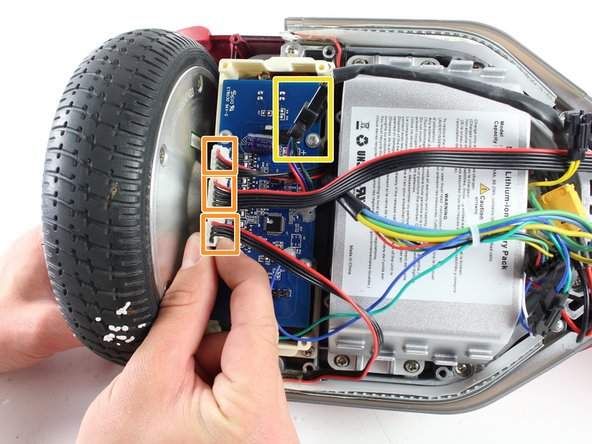
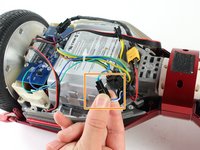
Detach the four cables connecting the gyroscope to the hoverboard by pinching the connector clips and pulling the cables out:
-
Three red and black cables with white connectors.
-
One multicolored cable with a black connector.
-
-
-
Uncrew the four 7.2 mm Phillips #1 self-drilling screws connecting the blue gyroscope to the white plastic holding piece.
-
-
-
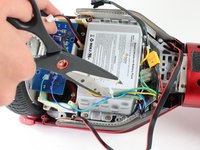
Cut the plastic cable tie holding the cables together with utility scissors.
-
Disconnect the blue/green cable from the blue/white cable by pinching the connector clips and pulling the cables apart.
-
-
-
Gently lift the blue gyroscope off of the white plastic holder piece.
-


To reassemble your device, follow these instructions in reverse order.
Отменить: Я не выполнил это руководство.
3 человек успешно провели ремонт по этому руководству.
Команда

Cal Poly, Team S13-G3, Forte Spring 2017 Участник Cal Poly, Team S13-G3, Forte Spring 2017
CPSU-FORTE-S17S13G3
4 членов
Автор 4 руководств
3 Комментарии к руководству
Where can one buy the new gyroscope?
Where is the best place to buy the gyroscope for the T3?
I see Ebay sells complete kits with motherboards and all.
Are they compatible?
where can I buy new gyroscope