Введение
This guide will successfully teach you to replace the Motherboard control panel of your Tungsten T3 Palm Pilot.
When beginning the process of replacing your Motherboard control panel have all of your tools readily at hand. These can be purchased through IFixit.com
Выберете то, что вам нужно
-
-
-
To remove the cover press down on the center indentation and remove from device.
 Спросите у FixBot
-
-
-
There will be a set of 2 screws located on each side of your device. Remove these by using a Phillips head screwdriver.
-
-
-
The arrows in the picture indicate two small holes located at the top of the device. Insert a paper clip or a tack simultaneously into each of these holes and moderately push downward to remove the backing.
-
The springs will give as pressure is exerted. Once you feel this take place, pull down the cover with the paper clip/tack while continuing to push downward. This will release the back cover.
-
-
-
The buttons and sliding tray will be connected to the main body by a orange cable. You can separate the two components by gently peeling the cable off of the main body. You can remove this by gently lifting up.
-
-
-
The arrows indicate two small screws. Using a Phillips head screwdriver, remove them.
-
-
-
To open the device, the sides must be (with moderate force) pried apart using a prying tool as seen in the picture.
-
Both sides must be separated from one another.
-
Tip: The right side may be slightly more difficult. It will be easiest to begin on the left.
-
Beginning with the left side, gently pry at the division of the face plates until they separate from one another.
-
Repeat this process on the other side of the device.
-
-
-
-
Hint: There will be pressure points along the side (as seen in the picture). Exerting pressure in these points will allow the sides to separate more easily.
-
-
-
Remove the face plate and set aside. This will leave the core of the device in front of you.
-
As labeled in the picture, the orange screen cable will connect on the lower right side of the motherboard.
-
Disconnect the cable by pulling it upward from the motherboard connection. Depending on your device, it may require little to moderate force.
-
Carefully remove your screen.
-
-
-
The battery connects to the motherboard (as seen in picture) by red and black cables.
-
Gently pull out battery wire connection.
-
-
-
The new Motherboard reconnects to the battery through the same connection as shown in picture.
-
Once connected, place the new Motherboard control panel.
-
-
-
Next, the screen must be reconnected to the motherboard.
-
Connect the new orange cable into the same location as the previous screen. (Location noted in picture by arrow). Make sure the cable is placed facing downward on the connection.
-
Lower the motherboard into place. Make sure to keep the back facing downward. Hint: This will be the side where all cables are connected.
-
Gently lay the screen on the core of the device.
-
-
-
On each side, the prongs must be adjusted so that they fit into their respective slots.
-
-
-
To reconnect the sliding tray and buttons, lay the device on its face.
-
-
-
To reconnect the sliding track, align the hooks and tracks (noted in picture).
-
Push the hooks into the tracks and slide the tray upward. This should lock the hooks in place.
-
-
-
Install the screws on both sides of device as seen in the picture.
-
-


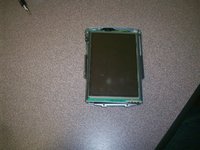
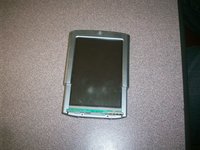


To reassemble your device, follow these instructions in reverse order.
Отменить: Я не выполнил это руководство.
Еще один человек закончил это руководство.

Команда

University of Maine, Team 1-14, Diaz Fall 2011 Участник University of Maine, Team 1-14, Diaz Fall 2011
UMAINE-DIAZ-F11S1G14
2 членов
Автор 9 руководств
