Перейти к основному содержанию
Присоединяйся к сообществу ремонтников - Создай аккаунт

Turtle Beach Pure Air Battery Replacement

Выберете то, что вам нужно

  1. Turtle Beach Pure Air Battery Replacement, Bottom Cover: шаг 1, изображение 1 из 2 Turtle Beach Pure Air Battery Replacement, Bottom Cover: шаг 1, изображение 2 из 2
    • Power off the mouse by moving the power switch to the center.

    Спросите у FixBot
  2. Turtle Beach Pure Air Battery Replacement: шаг 2, изображение 1 из 2 Turtle Beach Pure Air Battery Replacement: шаг 2, изображение 2 из 2
    • Peel back the mouse feet.

    • Remove the three 1.6mm screws using a JIS #000 screwdriver.

    • Remove the single 1.6mm screws using remove using a 1.3 mm hex screwdriver.

    Спросите у FixBot
  3. Turtle Beach Pure Air Battery Replacement: шаг 3, изображение 1 из 2 Turtle Beach Pure Air Battery Replacement: шаг 3, изображение 2 из 2
    • Carefully remove the bottom cover of the mouse.

    • Be cautious of the cable connecting the bottom cover to the rest of the mouse.

    Спросите у FixBot
  4. Turtle Beach Pure Air Battery Replacement: шаг 4, изображение 1 из 3 Turtle Beach Pure Air Battery Replacement: шаг 4, изображение 2 из 3 Turtle Beach Pure Air Battery Replacement: шаг 4, изображение 3 из 3
    • Disconnect the ribbon cable securing the upper shell to the motherboard.

    • Lift the locking clip to release the cable from its connector.

    Спросите у FixBot
  5. Turtle Beach Pure Air Battery Replacement, Motherboard: шаг 5, изображение 1 из 3 Turtle Beach Pure Air Battery Replacement, Motherboard: шаг 5, изображение 2 из 3 Turtle Beach Pure Air Battery Replacement, Motherboard: шаг 5, изображение 3 из 3
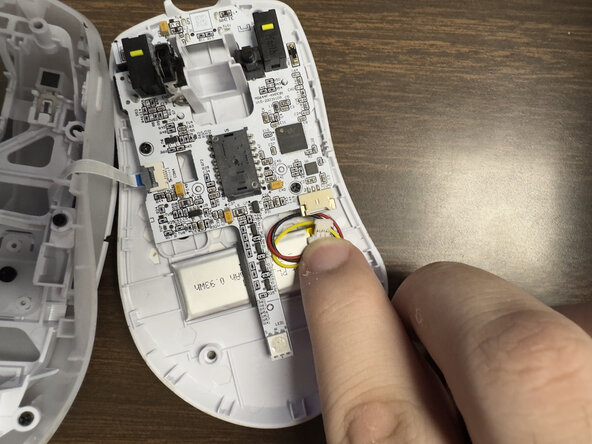
    • Carefully disconnect the battery clip from the motherboard socket by softly pulling the bottom of the clip.

    Спросите у FixBot
  6. Turtle Beach Pure Air Battery Replacement: шаг 6, изображение 1 из 2 Turtle Beach Pure Air Battery Replacement: шаг 6, изображение 2 из 2
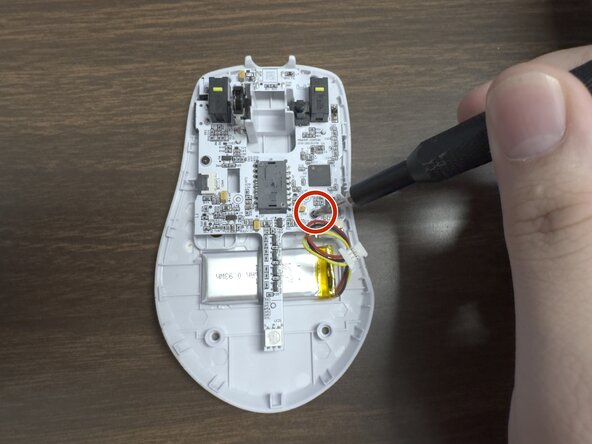
    • Remove the two 1.6 mm screws on the middle left and lower right sides with a JIS000 screwdriver to disconnect the motherboard from the lower shell.

    Спросите у FixBot
  7. Turtle Beach Pure Air Battery Replacement: шаг 7, изображение 1 из 2 Turtle Beach Pure Air Battery Replacement: шаг 7, изображение 2 из 2
    • Gently lift the motherboard out of the housing.

    Спросите у FixBot
  8. Turtle Beach Pure Air Battery Replacement, Battery: шаг 8, изображение 1 из 3 Turtle Beach Pure Air Battery Replacement, Battery: шаг 8, изображение 2 из 3 Turtle Beach Pure Air Battery Replacement, Battery: шаг 8, изображение 3 из 3
    • Carefully pry up the battery.

    • Prying the battery may take a bit of force since it is glued to the plastic.

    Спросите у FixBot
Заключение

To reassemble your device, follow these instructions in reverse order.

Preston Sanchez

Участник с: 02/03/26

291 Репутация

Автор 3 руководств

Команда

Austin Community College, Team 9-1, Watkins Spring 2026 Участник Austin Community College, Team 9-1, Watkins Spring 2026

AUSTINCC-WATKINS-S26S9G1

3 членов

Автор 6 руководств

0 Комментарии к руководству

Добавить комментарий

Статистика просмотров:

За последние 24 часов: 0

За последние 7 дней: 7

За последние 30 дней: 7

За всё время: 104