Перейти к основному содержанию
Присоединяйся к сообществу ремонтников - Создай аккаунт

Xbox Controller S Buttons Replacement Guide

Выберете то, что вам нужно

  1. Xbox Controller S Buttons Replacement Guide, Backplate: шаг 1, изображение 1 из 2 Xbox Controller S Buttons Replacement Guide, Backplate: шаг 1, изображение 2 из 2
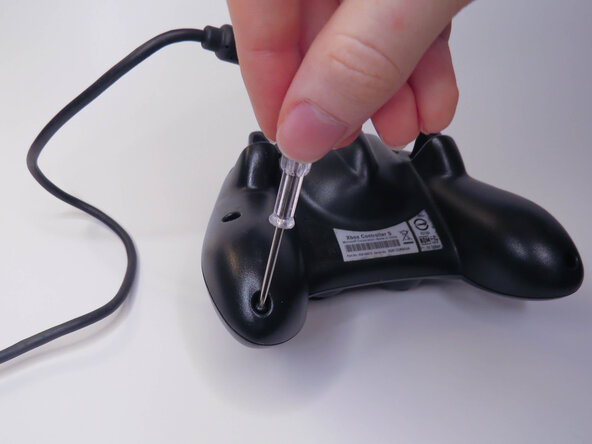
    • Remove the six visible 8mm Phillips screws with a #1 Phillips screwdriver.

  2. Xbox Controller S Buttons Replacement Guide: шаг 2, изображение 1 из 2 Xbox Controller S Buttons Replacement Guide: шаг 2, изображение 2 из 2
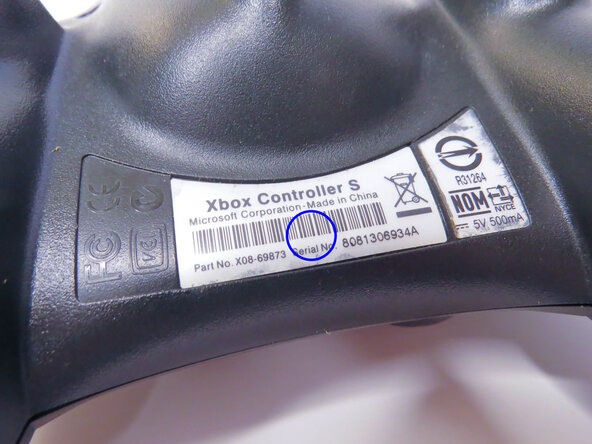
    • Peel back the barcode sticker to reveal the seventh Phillips screw and remove it.

  3. Xbox Controller S Buttons Replacement Guide: шаг 3, изображение 1 из 3 Xbox Controller S Buttons Replacement Guide: шаг 3, изображение 2 из 3 Xbox Controller S Buttons Replacement Guide: шаг 3, изображение 3 из 3
    • Carefully lift the backplate off of the controller.

    • Make sure to hold the frontplate to prevent the buttons from falling out.

  4. Xbox Controller S Buttons Replacement Guide, Vibration Motors: шаг 4, изображение 1 из 3 Xbox Controller S Buttons Replacement Guide, Vibration Motors: шаг 4, изображение 2 из 3 Xbox Controller S Buttons Replacement Guide, Vibration Motors: шаг 4, изображение 3 из 3
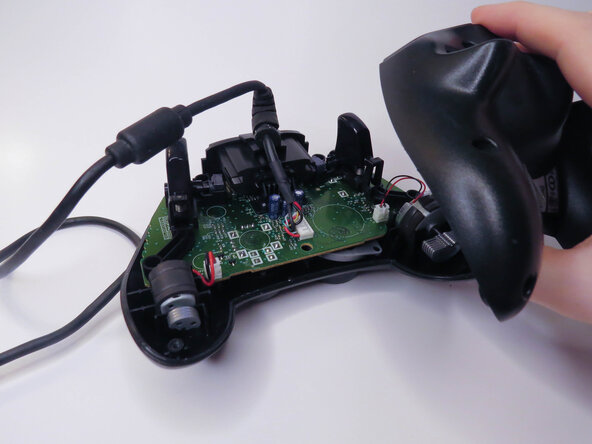
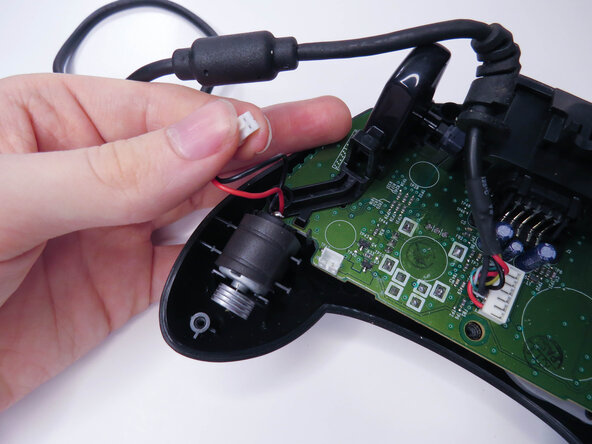
    • Unplug the two vibration motors and lift them out of the case, being sure not to pull on the wires.

  5. Xbox Controller S Buttons Replacement Guide, Logic Board: шаг 5, изображение 1 из 2 Xbox Controller S Buttons Replacement Guide, Logic Board: шаг 5, изображение 2 из 2
    • Lift the logic board out of the controller.

  6. Xbox Controller S Buttons Replacement Guide, Rubber Pads: шаг 6, изображение 1 из 3 Xbox Controller S Buttons Replacement Guide, Rubber Pads: шаг 6, изображение 2 из 3 Xbox Controller S Buttons Replacement Guide, Rubber Pads: шаг 6, изображение 3 из 3
    • Remove the rubber pads.

  7. Xbox Controller S Buttons Replacement Guide, Buttons: шаг 7, изображение 1 из 3 Xbox Controller S Buttons Replacement Guide, Buttons: шаг 7, изображение 2 из 3 Xbox Controller S Buttons Replacement Guide, Buttons: шаг 7, изображение 3 из 3
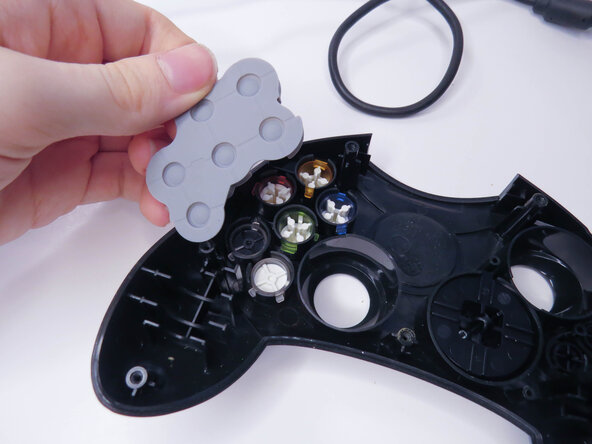
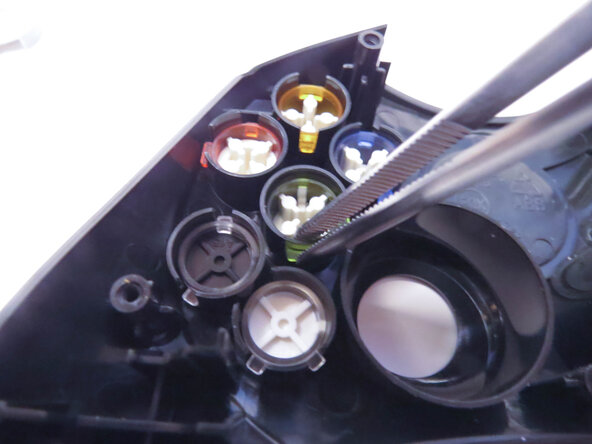
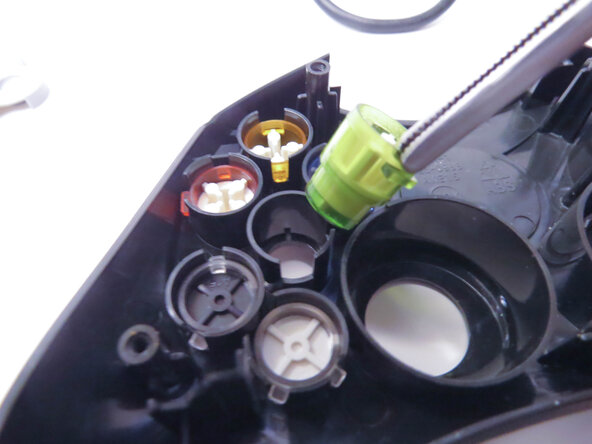
    • Remove the A, B, X, Y, White, and Black buttons with a pair of tweezers.

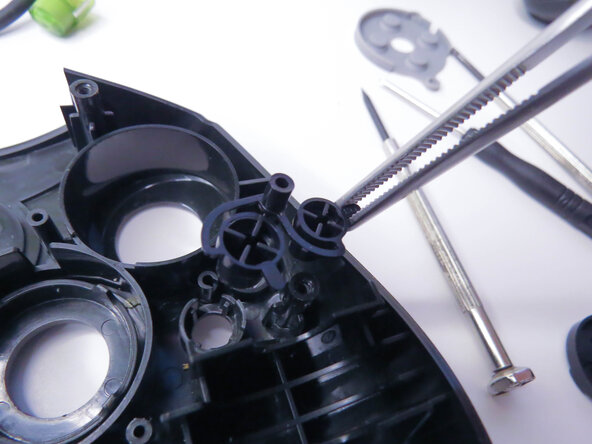
    • Remove the Back and Start buttons.

    • When putting the buttons back in, make sure to align the notches with the case.

  8. Xbox Controller S Buttons Replacement Guide, D-Pad: шаг 8, изображение 1 из 3 Xbox Controller S Buttons Replacement Guide, D-Pad: шаг 8, изображение 2 из 3 Xbox Controller S Buttons Replacement Guide, D-Pad: шаг 8, изображение 3 из 3
    • Unscrew the the two 7mm Phillips screws.

    • Separate the D-pad by pushing the two clips in with a pair of tweezers.

  9. Xbox Controller S Buttons Replacement Guide: шаг 9, изображение 1 из 1
    • Separate the two halves of the D-pad.

    • The front half of the D-pad will fall when you take the back half out, be sure to catch it.

Заключение

To reassemble your device, follow these instructions in reverse order, being careful to line everything back up.

burntpizza

Участник с: 11/17/25

169 Репутация

1 руководство автора

0 Комментарии к руководству

Добавить комментарий

Статистика просмотров:

За последние 24 часов: 3

За последние 7 дней: 9

За последние 30 дней: 49

За всё время: 165