Введение
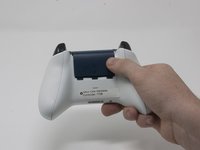
The Joystick caps on your Xbox Controller could become unresponsive or sticky. If this happens it could be necessary to remove the Joystick caps to either replace or clean them. This guide will teach you how to access and replace the Joysticks on your Xbox One Wireless Controller Model 1708.
Выберете то, что вам нужно
-
-
Slide the battery cover toward the top of the controller to remove it.
-
Lift up the batteries or the battery pack from the battery compartment.
-
-
-
Insert a plastic opening tool into the top seam, and gently work the opening tool to the bottom of the controller.
-
Continue using the opening tool to gently pry the side plate off of the controller.
-
Repeat this process for the second side plate.
-
-
-
Gently peel the battery label or punch a hole in the center of the sticker in the battery compartment to reveal the hidden screw.
-
Remove the five 9mm torx-9 security screws from the back of the controller.
-
-
-
-
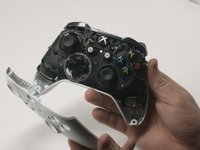
Orient the controller so the front plate is facing up.
-
Lift the front cover off of the controller.
-
-
-
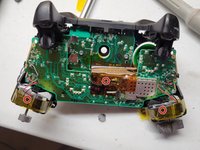
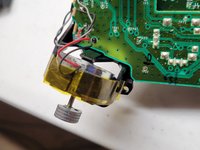
Tape the Rumbler/shock motors in place.
-
This will prevent the motors from falling out.
-


To reassemble your device, follow these instructions in reverse order.
Отменить: Я не выполнил это руководство.
154 человек успешно провели ремонт по этому руководству.
Команда

Cal Poly, Team S18-G3, Forte Fall 2017 Участник Cal Poly, Team S18-G3, Forte Fall 2017
CPSU-FORTE-F17S18G3
4 членов
Автор 42 руководств
9 Комментарии к руководству
How about the square thing with the stick and hinges that the joystick is attached to? I think it’s called the Module. I have a joystick drift / drifting problem and that may help me out. Thanks.
Agreed. That’s actually the part I need to replace too. The module.
followed this guide to take the controller apart because I had a joystick that was sticking, my solution was to put some 3in1 oil on the module that was sticking and it seems to be working a lot better now.
@corytc and @tomchak I did replace the module, in general, you buy (Amazon or eBay) you will receive a module of 6 modules you need a multimeter and test each module interface, measure both resistances and subtract them, the one nearest zero is the module you will use since is the one with least drift from the factory.
Just disassemble it, turn upside down uses a solder remover and unsolder the old one, place the new one solder back, boom you are done.
Like you will need an iron solder with medium and thin tips, I used lead-free solder, so is a patience test, be careful with the wires from the rumbles, try not to unsolder them since is a thin wire and is difficult, like I have big hands so took me a while to solder back.
Just want to say the hardest part is carefully prying off the plastic covers on the handles. It’s also not necessary to remove the back cover for simply replacing the joysticks. Other than that, it’s very easy. I would guess this is rated at moderate difficulty simply due to the plastic covers.