Перейти к основному содержанию
Присоединяйся к сообществу ремонтников - Создай аккаунт

Zune Flash 2nd Generation Face Plate Replacement

Выберете то, что вам нужно

    1. Zune Flash 2nd Generation Face Plate Replacement, Back Cover: шаг 1, изображение 1 из 2 Zune Flash 2nd Generation Face Plate Replacement, Back Cover: шаг 1, изображение 2 из 2
      • Prior to disassembly, verify the hold switch is engaged to ensure the device will not turn on during the procedure.

      • If the device turns on while it is being disassembled it could cause irreversible damage to the device.

      • PICS MAKE NO SENSE.

      Спросите у FixBot

      Добавить комментарий

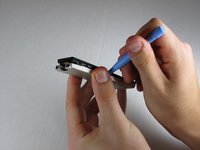
    2. Zune Flash 2nd Generation Face Plate Replacement: шаг 2, изображение 1 из 2 Zune Flash 2nd Generation Face Plate Replacement: шаг 2, изображение 2 из 2
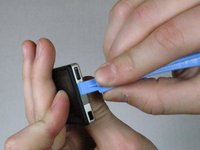
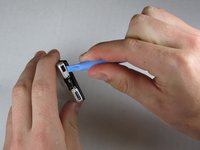
      • Remove the top metal clip by inserting a Zune opening tool in between the faceplate and back cover and pulling gently back as shown in the images.

      • You should hear a 'click' as the clip detaches from the device.

      Спросите у FixBot

      Добавить комментарий

    3. Zune Flash 2nd Generation Face Plate Replacement: шаг 3, изображение 1 из 1
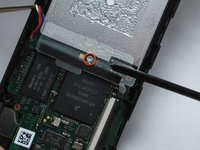
      • Remove the two screws shown using a Y00 Tri-Wing screwdriver.

      Спросите у FixBot

      Добавить комментарий

    4. Zune Flash 2nd Generation Face Plate Replacement: шаг 4, изображение 1 из 3 Zune Flash 2nd Generation Face Plate Replacement: шаг 4, изображение 2 из 3 Zune Flash 2nd Generation Face Plate Replacement: шаг 4, изображение 3 из 3
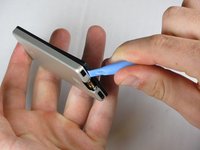
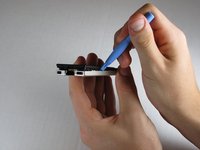
      • Insert the Zune opening tool between the faceplate and the back cover, starting from the top and slowly work your way around the device.

      Спросите у FixBot

      Добавить комментарий

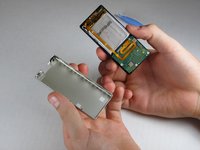
    5. Zune Flash 2nd Generation Face Plate Replacement: шаг 5, изображение 1 из 3 Zune Flash 2nd Generation Face Plate Replacement: шаг 5, изображение 2 из 3 Zune Flash 2nd Generation Face Plate Replacement: шаг 5, изображение 3 из 3
      • Work your way around the Zune until the back cover comes free. Remove the back plate and set it aside.

      Спросите у FixBot

      Добавить комментарий

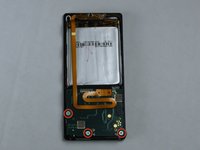
    1. Zune Flash 2nd Generation Face Plate Replacement, Face Plate: шаг 6, изображение 1 из 2 Zune Flash 2nd Generation Face Plate Replacement, Face Plate: шаг 6, изображение 2 из 2
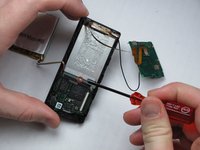
      • Remove the three screws (5.5mm by 3mm) from the backside of the Zune using a Y00 Tri-Wing screwdriver.

      • Be sure to put this set of screws aside since they are a different size than any other screws in the device.

      Спросите у FixBot

      Добавить комментарий

    2. Zune Flash 2nd Generation Face Plate Replacement: шаг 7, изображение 1 из 2 Zune Flash 2nd Generation Face Plate Replacement: шаг 7, изображение 2 из 2
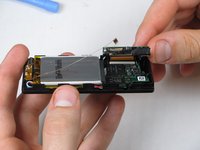
      • Use your finger or a Zune opening tool to pry back the two clear flaps.

      • Next lift the communications board that was being held down by the clear flaps.

      • Be careful not to accidentally detach the slim ribbon that connects between the communications board and the device.

      Спросите у FixBot

      Добавить комментарий

    3. Zune Flash 2nd Generation Face Plate Replacement: шаг 8, изображение 1 из 3 Zune Flash 2nd Generation Face Plate Replacement: шаг 8, изображение 2 из 3 Zune Flash 2nd Generation Face Plate Replacement: шаг 8, изображение 3 из 3
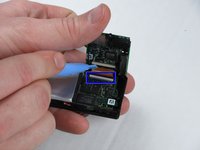
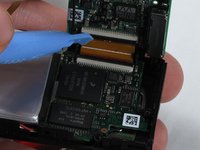
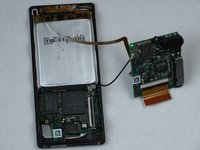
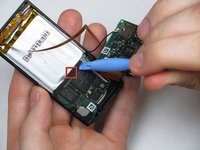
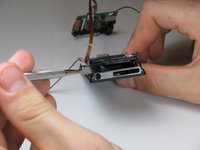
      • Disconnect the ribbon with the plastic opening tool by flipping up the black plastic flap where the ribbon connects to the memory board.

      • Carefully pull the ribbon out of the memory board, ensuring that the black plastic flap is up before removal to avoid the ripping the ribbon.

      Спросите у FixBot

      Добавить комментарий

    4. Zune Flash 2nd Generation Face Plate Replacement: шаг 9, изображение 1 из 3 Zune Flash 2nd Generation Face Plate Replacement: шаг 9, изображение 2 из 3 Zune Flash 2nd Generation Face Plate Replacement: шаг 9, изображение 3 из 3
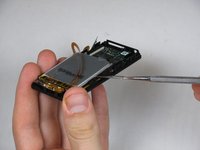
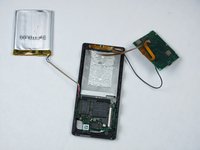
      • Remove the battery by prying the battery off from the bottom with a Zune opening tool.

      • There is an adhesive between the battery and the device, therefore use a metal spudger to finish detaching the battery.

      • Be sure not to puncture the battery in any way when using the metal spudger.

      Спросите у FixBot

      Добавить комментарий

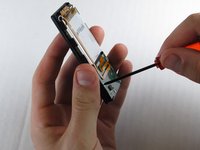
    5. Zune Flash 2nd Generation Face Plate Replacement: шаг 10, изображение 1 из 2 Zune Flash 2nd Generation Face Plate Replacement: шаг 10, изображение 2 из 2
      • Remove the single screw under the battery using a small Tri-Wing screwdriver.

      Спросите у FixBot

      Добавить комментарий

    6. Zune Flash 2nd Generation Face Plate Replacement: шаг 11, изображение 1 из 1
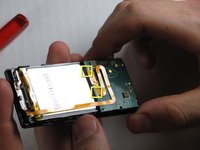
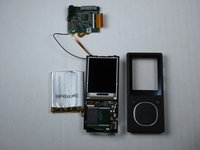
      • Disconnect the faceplate from the device by depressing the two tabs located near the middle of each of the sides using a metal spudger.

      • This will disconnect the last circuit board in the device from the center frame.

      Спросите у FixBot

      Добавить комментарий

    7. Zune Flash 2nd Generation Face Plate Replacement: шаг 12, изображение 1 из 3 Zune Flash 2nd Generation Face Plate Replacement: шаг 12, изображение 2 из 3 Zune Flash 2nd Generation Face Plate Replacement: шаг 12, изображение 3 из 3
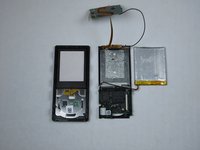
      • Remove the faceplate by using a metal spudger to separate it from the remaining components.

      Спросите у FixBot

      Добавить комментарий

Заключение

To reassemble your device, follow these instructions in reverse order.

Отменить: Я не выполнил это руководство.

2 человек успешно провели ремонт по этому руководству.

ybahman

Участник с: 11/01/09

139 Репутация

Автор 4 руководств

Команда

Cal Poly, Team 9-20, Regan Fall 2009 Участник Cal Poly, Team 9-20, Regan Fall 2009

CPSU-REGAN-F09S9G20

5 членов

Автор 20 руководств

0 Комментарии к руководству

Добавить комментарий

Статистика просмотров:

За последние 24 часов: 24

За последние 7 дней: 30

За последние 30 дней: 58

За всё время: 4,304