Перейти к основному содержанию

eMachine T5234 RAM Disks Replacement

Выберете то, что вам нужно

  1. eMachine T5234 RAM Disks Replacement, Shut Down Computer: шаг 1, изображение 1 из 2 eMachine T5234 RAM Disks Replacement, Shut Down Computer: шаг 1, изображение 2 из 2
    Инструмент, используемый на этом этапе:
    Anti-Static Wrist Strap
    $7.16
    • Shut down the computer.

    • Disconnect all cables from the computer.

    • Static electricity can damage the hardware on your motherboard. Use the iFixit Anti-Static Wrist Strap or discharge the electricity by touching the metal of the case frame before unpacking the RAM disks.

    • Note: Do not remove the RAM disks from their casing until Step 8.

  2. eMachine T5234 RAM Disks Replacement, Removing the Case: шаг 2, изображение 1 из 3 eMachine T5234 RAM Disks Replacement, Removing the Case: шаг 2, изображение 2 из 3 eMachine T5234 RAM Disks Replacement, Removing the Case: шаг 2, изображение 3 из 3
    Инструмент, используемый на этом этапе:
    Phillips #1 Screwdriver
    $5.49
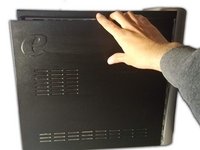
    • Place the computer upright at standing position.

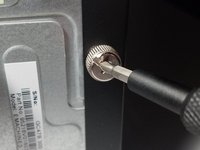
    • Using a Phillips #1 Screwdriver:

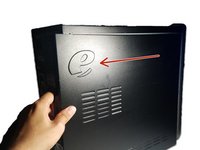
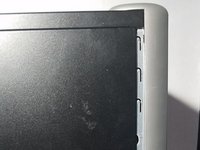
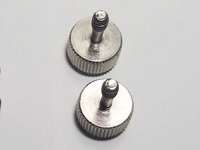
    • Remove the two 1cm combination screws located on the right of the casing.

  3. eMachine T5234 RAM Disks Replacement: шаг 3, изображение 1 из 2 eMachine T5234 RAM Disks Replacement: шаг 3, изображение 2 из 2
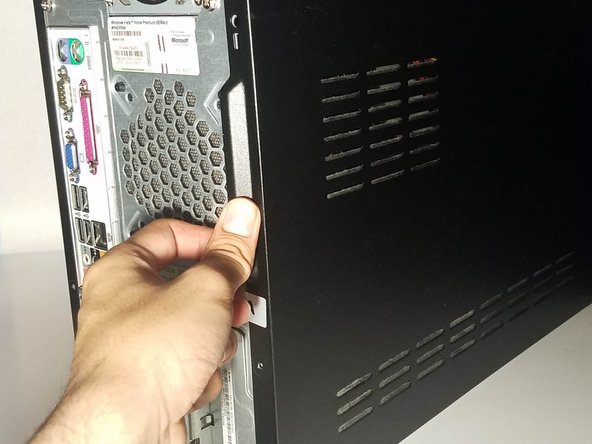
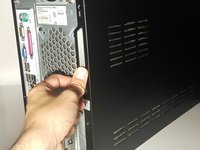
    • Using your hands, dislodge the casing and pull the case panel towards you until the panel comes off.

  4. eMachine T5234 RAM Disks Replacement, Locate the RAM Disk Slots: шаг 4, изображение 1 из 3 eMachine T5234 RAM Disks Replacement, Locate the RAM Disk Slots: шаг 4, изображение 2 из 3 eMachine T5234 RAM Disks Replacement, Locate the RAM Disk Slots: шаг 4, изображение 3 из 3
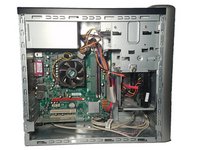
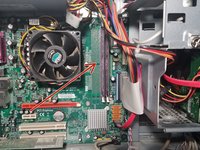
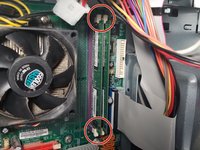
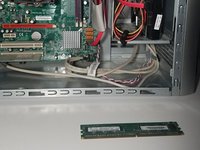
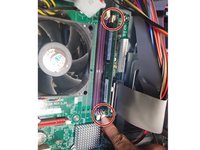
    • With the case panel open, locate the two RAM disk slots on the right side of the motherboard.

    • Do not touch the motherboard with your hands. The oil on your skin can damage or destroy the hardware modules.

  5. eMachine T5234 RAM Disks Replacement, Remove the RAM Disks: шаг 5, изображение 1 из 2 eMachine T5234 RAM Disks Replacement, Remove the RAM Disks: шаг 5, изображение 2 из 2
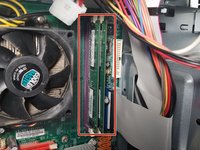
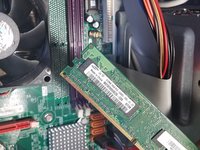
    • Locate the tabs on the RAM disks.

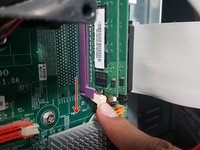
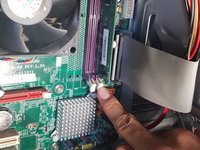
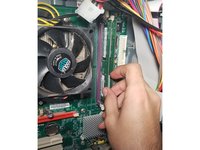
    • Use your index finger to release the tab at the bottom of the left RAM disk slot.

  6. eMachine T5234 RAM Disks Replacement: шаг 6, изображение 1 из 3 eMachine T5234 RAM Disks Replacement: шаг 6, изображение 2 из 3 eMachine T5234 RAM Disks Replacement: шаг 6, изображение 3 из 3
    • Release the tab at the top of the left RAM disk.

    • Note: The RAM disk will pop off the motherboard when you release the bottom tab. Use the edges of the RAM disk to pick up and store the memory disk.

    • If the RAM disk does not pop off, use the edges of the disk to pull it off.

    • Store the unused RAM disk in a plastic container for future use or go to a recycling center for proper disposal.

  7. eMachine T5234 RAM Disks Replacement: шаг 7, изображение 1 из 3 eMachine T5234 RAM Disks Replacement: шаг 7, изображение 2 из 3 eMachine T5234 RAM Disks Replacement: шаг 7, изображение 3 из 3
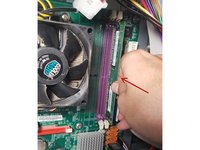
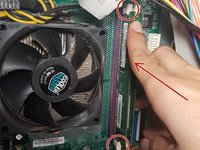
    • Release the top tab and the bottom tab to dislodge the right RAM disk.

  8. eMachine T5234 RAM Disks Replacement, Installing the RAM Disks: шаг 8, изображение 1 из 1
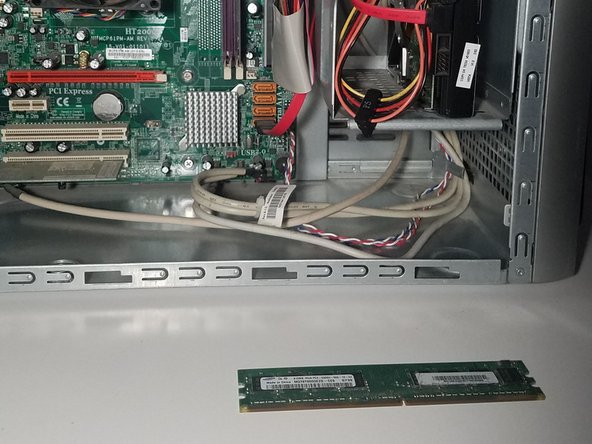
    • Remove your new RAM disks from their casing.

    • Hold the RAM disk along the sides and avoid skin contact with any of the gold components.

  9. eMachine T5234 RAM Disks Replacement: шаг 9, изображение 1 из 2 eMachine T5234 RAM Disks Replacement: шаг 9, изображение 2 из 2
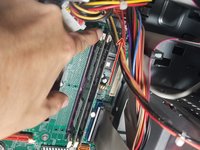
    • Align the RAM disk to match the slot and insert the disk to the right memory disk slot.

    • Gently push the disk in to secure.

    • Secure the tabs at the top and bottom of the memory disk slots to lock into place.

  10. eMachine T5234 RAM Disks Replacement: шаг 10, изображение 1 из 1
    • Now it's time for the second disk. Retrieve the second RAM disk from it's casing.

    • Hold the RAM disk along the sides and avoid skin contact with any of the gold components.

  11. eMachine T5234 RAM Disks Replacement: шаг 11, изображение 1 из 2 eMachine T5234 RAM Disks Replacement: шаг 11, изображение 2 из 2
    • Align the RAM disk to match the slot and Insert the RAM disk to the right memory disk slot

    • Gently push the disk in to secure.

    • Secure the tabs at the top and bottom of the RAM disk to lock into place.

  12. eMachine T5234 RAM Disks Replacement, Reassembly: шаг 12, изображение 1 из 3 eMachine T5234 RAM Disks Replacement, Reassembly: шаг 12, изображение 2 из 3 eMachine T5234 RAM Disks Replacement, Reassembly: шаг 12, изображение 3 из 3
    • Use both hands to align the case panel to the case frame.

    • Once in place, push the case panel forward until it secures in place.

  13. eMachine T5234 RAM Disks Replacement: шаг 13, изображение 1 из 3 eMachine T5234 RAM Disks Replacement: шаг 13, изображение 2 из 3 eMachine T5234 RAM Disks Replacement: шаг 13, изображение 3 из 3
    Инструмент, используемый на этом этапе:
    Phillips #1 Screwdriver
    $5.49
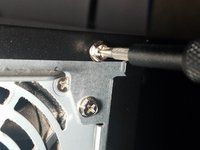
    • Using your Phillips #1 Screwdriver:

    • Screw the two 1cm combination screws back into place on the right side of the case panel.

Заключение

And that’s all there is to it! Make sure to dispose your old RAM disks properly at your local recycling center.

Luis Lopez

Участник с: 08/22/19

419 Репутация

Автор 2 руководств

0 Комментарии к руководству

Добавить комментарий

Статистика просмотров:

За последние 24 часов: 0

За последние 7 дней: 3

За последние 30 дней: 7

За всё время: 324