Перейти к основному содержанию
Присоединяйся к сообществу ремонтников - Создай аккаунт

iBook G3 12" LCD Replacement

Выберете то, что вам нужно

    1. iBook G3 12" LCD Replacement, Battery: шаг 1, изображение 1 из 1
      • Use a coin to rotate the battery locking screw 90 degrees clockwise.

      • Lift the battery out of the computer.

      Спросите у FixBot

      Добавить комментарий

    1. iBook G3 12" LCD Replacement, Rear Display Bezel: шаг 2, изображение 1 из 2 iBook G3 12" LCD Replacement, Rear Display Bezel: шаг 2, изображение 2 из 2
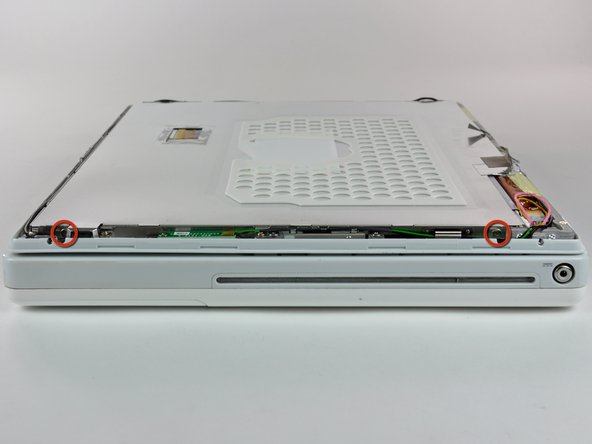
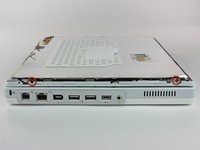
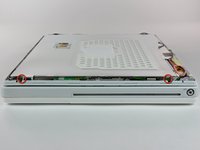
      • Use a 1.5mm hex screwdriver to remove the two hex screws on either side of the display (four screws total).

      • If you don't have a 1.5mm hex driver, you can probably get these screws out with a T6 Torx screwdriver. However, if you use a T6 Torx driver you'll be more likely to strip the screws.

      Спросите у FixBot

      Добавить комментарий

    2. iBook G3 12" LCD Replacement: шаг 3, изображение 1 из 2 iBook G3 12" LCD Replacement: шаг 3, изображение 2 из 2
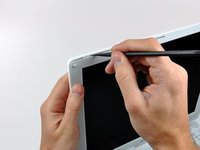
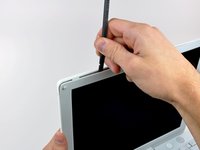
      • Insert the flat end of a spudger perpendicular to the face of the display into the gap between the front and rear bezels near the upper left corner of the display.

      • Rotate the spudger away from the display to pry the rear bezel off the front bezel.

      Спросите у FixBot

      Добавить комментарий

    3. iBook G3 12" LCD Replacement: шаг 4, изображение 1 из 1
      • Run your spudger along the top edge of the front display bezel to evenly separate the two bezels.

      Спросите у FixBot

      Добавить комментарий

    4. iBook G3 12" LCD Replacement: шаг 5, изображение 1 из 2 iBook G3 12" LCD Replacement: шаг 5, изображение 2 из 2
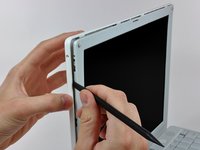
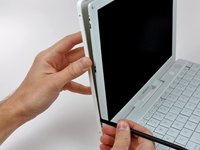
      • Working down from the upper left corner, use the flat end of a spudger to pry the rear bezel away from the left edge of the display.

      Спросите у FixBot

      Добавить комментарий

    5. iBook G3 12" LCD Replacement: шаг 6, изображение 1 из 1
      • Use the flat end of a spudger to pry the rear bezel away from the right edge of the display.

      • If necessary, pry along the bottom edge of the rear bezel to separate it from the display assembly.

      Спросите у FixBot

      Добавить комментарий

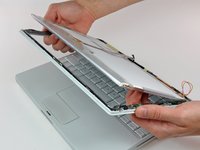
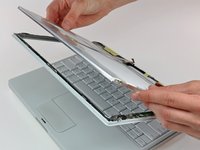
    6. iBook G3 12" LCD Replacement: шаг 7, изображение 1 из 1
      • Lift the rear bezel off the display assembly.

      Спросите у FixBot

      Добавить комментарий

    1. iBook G3 12" LCD Replacement, LCD: шаг 8, изображение 1 из 2 iBook G3 12" LCD Replacement, LCD: шаг 8, изображение 2 из 2
      • Close the display.

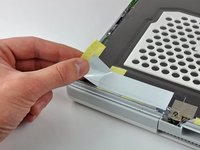
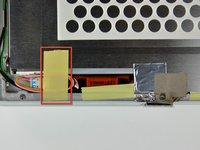
      • Remove the small pieces of yellow tape securing the thin metal LCD cover to the display.

      • Remove the large piece of tape near the right display hinge.

      Спросите у FixBot

      Добавить комментарий

    2. iBook G3 12" LCD Replacement: шаг 9, изображение 1 из 2 iBook G3 12" LCD Replacement: шаг 9, изображение 2 из 2
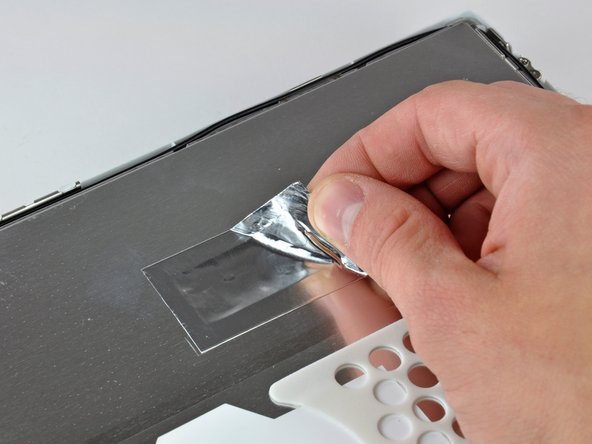
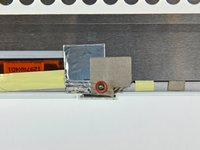
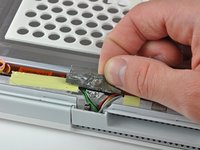
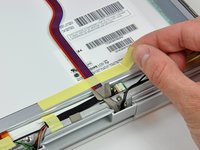
      • Remove the tape covering the inverter cable connector.

      • Remove the piece of foil tape near the center of the thin metal LCD cover.

      Спросите у FixBot

      Добавить комментарий

    3. iBook G3 12" LCD Replacement: шаг 10, изображение 1 из 2 iBook G3 12" LCD Replacement: шаг 10, изображение 2 из 2
      • Remove the Phillips screw near the right display hinge.

      • Use the tip of a spudger to remove the small spacer under the screw you just removed.

      Спросите у FixBot

      Добавить комментарий

    4. iBook G3 12" LCD Replacement: шаг 11, изображение 1 из 2 iBook G3 12" LCD Replacement: шаг 11, изображение 2 из 2
      • Pull the foil/braided pieces of tape off the aluminum frame of the clutch hinges. Leave the tape attached to the thin steel LCD cover.

      • Remove the small piece of tape holding the display data cable ground strap to the LCD cover.

      Спросите у FixBot

      Добавить комментарий

    5. iBook G3 12" LCD Replacement: шаг 12, изображение 1 из 2 iBook G3 12" LCD Replacement: шаг 12, изображение 2 из 2
      • Remove the two Phillips screws securing the left and right sides of the LCD to the frame of the clutch hinges (four screws total).

      Спросите у FixBot

      Добавить комментарий

    6. iBook G3 12" LCD Replacement: шаг 13, изображение 1 из 1
      • Carefully remove the thin steel LCD cover.

      Спросите у FixBot

      Добавить комментарий

    7. iBook G3 12" LCD Replacement: шаг 14, изображение 1 из 2 iBook G3 12" LCD Replacement: шаг 14, изображение 2 из 2
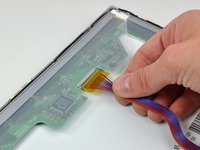
      • Remove the long piece of tape securing the display data cable to the LCD.

      • Disconnect the display data cable by pulling the cable away from the socket on the LCD.

      Спросите у FixBot

      Добавить комментарий

    8. iBook G3 12" LCD Replacement: шаг 15, изображение 1 из 1
      • Disconnect the backlight cable from the inverter.

      • It is helpful to use a spudger to push the backlight connector away from its socket while you lightly pull its cables away from the inverter.

      Спросите у FixBot

      Добавить комментарий

    9. iBook G3 12" LCD Replacement: шаг 16, изображение 1 из 3 iBook G3 12" LCD Replacement: шаг 16, изображение 2 из 3 iBook G3 12" LCD Replacement: шаг 16, изображение 3 из 3
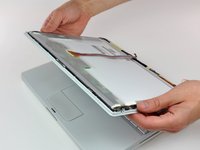
      • Open the display.

      • Lift the LCD out of the display assembly.

      Спросите у FixBot

      Добавить комментарий

Заключение

To reassemble your device, follow these instructions in reverse order.

Отменить: Я не выполнил это руководство.

12 человек успешно провели ремонт по этому руководству.

Прикрепленные документы

0 Комментарии к руководству

Добавить комментарий

Статистика просмотров:

За последние 24 часов: 2

За последние 7 дней: 7

За последние 30 дней: 39

За всё время: 12,136