

Brightness adjusment cover fix

Im writing about the problem with the brightness adjustment dial.
You can see on the photo whats wrong with it.
Это хороший вопрос?
Счет
0
Репутация: 1
 2
2
Im writing about the problem with the brightness adjustment dial.
You can see on the photo whats wrong with it.
Это хороший вопрос?
Репутация: 101к
159
 89
89
 154
154
Okay, I was able to play around with my granddaughter's Instax and I think I've figured out what the problem is for you.
To start with, the brightness ring is held on by three tabs. The spring comes up through an opening and connects to the ring to provide tension to make it want to go to the indoor setting. That same spring keeps the ring from being able to rotate back far enough to reach the point where it can be removed.
The key here is that the ring has to be in place before the front shell is placed onto the camera. In fact, I found it impossible to install the ring with the spring in place once the front shell is on the camera. So here's how to fix the issue.
First, I've set my camera up just like yours, the front cover is on minus the brightness ring.
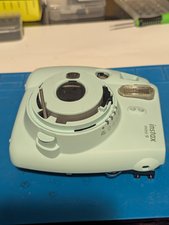
Because the spring interferes with the ability of the ring to be turned far enough to match the cutout notches, it can't be installed like this.
So the first step is to take the front cover back off.
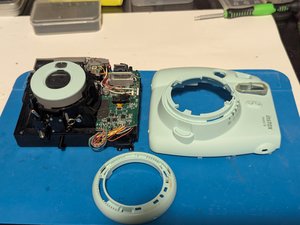
Line up the cutouts with the tabs on the brightness ring.
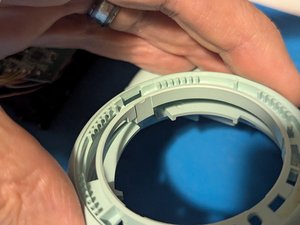
The indicator mark should be in this position in order to sit down completely.
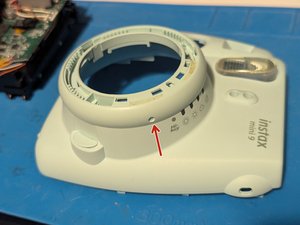
Now rotate it to the indoor setting, just like in the shell replacement guide.
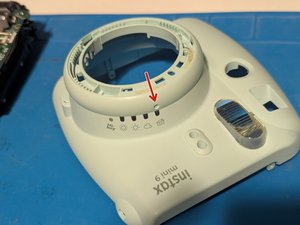
Hold the camera body at an angle so the spring extends straight up from the camera and slip it through the opening you see in this picture.
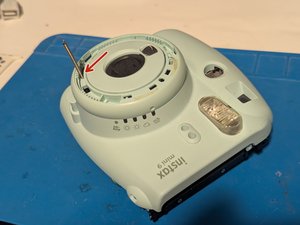
At this point you can now proceed with Step 9 and reconnect the spring to the brightness ring. From there you should be all set!
Был ли этот ответ полезен?
Thank you very much that you took your time to help, couldnt have done it without you.
Filo
Awesome, Filo! Congratulations on a successful repair; by doing so you've helped eliminate waste and contributed to making the world a better place. Every little bit helps and I want to thank you on behalf of the entire repair community for taking the time and effort to fix something instead of just throwing it away and buying a new thing.
As @oldturkey03 so eloquently says, "Repair is war on Entropy!"
За последние 24 часов: 2
За последние 7 дней: 9
За последние 30 дней: 62
За всё время: 664

