Этот перевод был сделан машиной и пока не проверен человеком. Знаешь этот язык? Оцени его.
Введение
В этом руководстве показано, как заменить аккумулятор в контроллере ASUS ROG Raikiri Pro. Если ваш контроллер не включается или аккумулятор слишком быстро разряжается, воспользуйтесь этим руководством для замены.
Исправный аккумулятор обеспечивает питание контроллера. К сожалению, аккумуляторы не вечны и со временем могут потребовать замены. Если аккумулятор не держит заряд или вовсе не заряжается, его замена может быть лучшим решением.
Если вы обнаружили вздутый аккумулятор, пожалуйста, соблюдайте соответствующие меры предосторожности перед продолжением работ.
Перед началом ремонта отсоедините контроллер ASUS ROG Raikiri Pro от зарядного устройства или консоли и выключите его.
Выберете то, что вам нужно
-
-
-
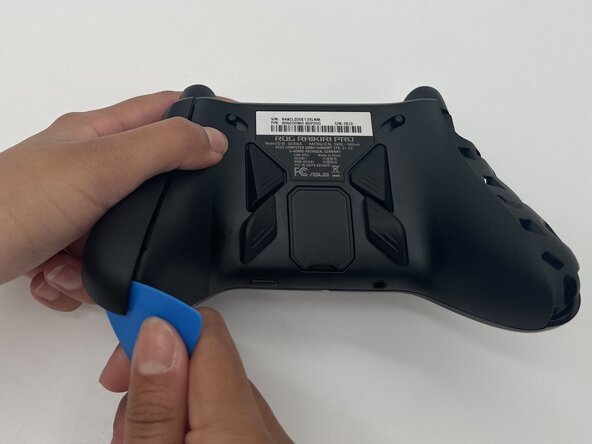
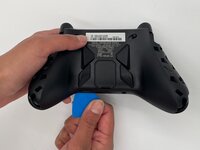
Вставьте кончик медиатора в зазор крышки верхней левой рукоятки.
-
Проведите им вниз, чтобы высвободить защелки, соединяющие крышку рукоятки с контроллером.
-
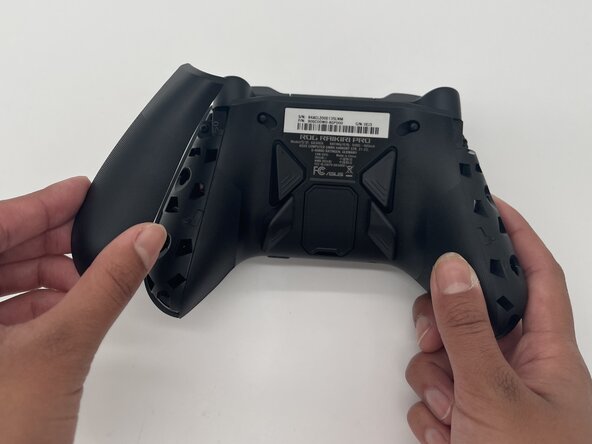
Снимите крышку левой рукоятки.
-
Повторите эти действия, чтобы снять крышку правой рукоятки.
 Спросите у FixBot
-
-
-
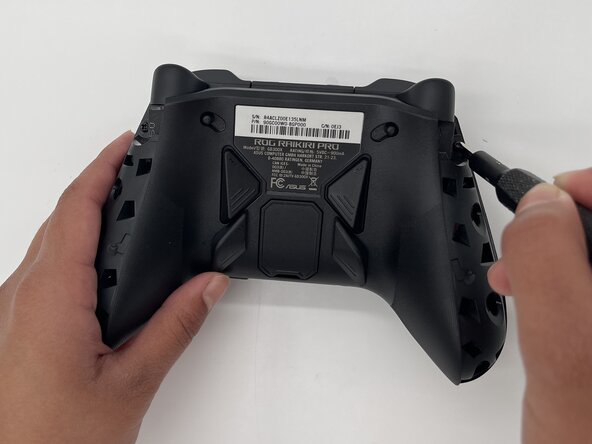
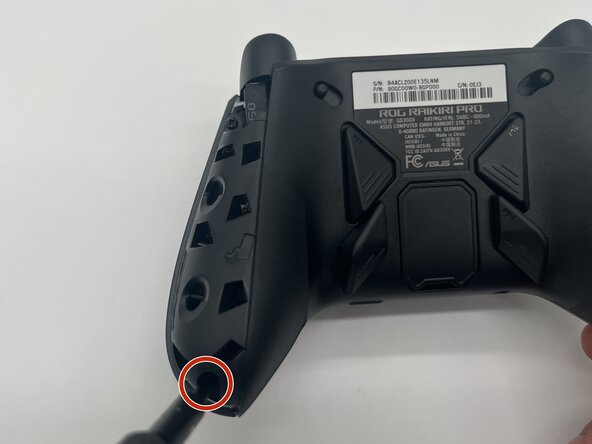
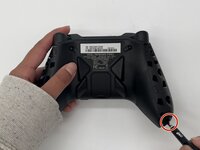
С помощью отвертки Phillips #1 выкрутите 11-мм винт из верхней части каждой ручки.
-
-
-
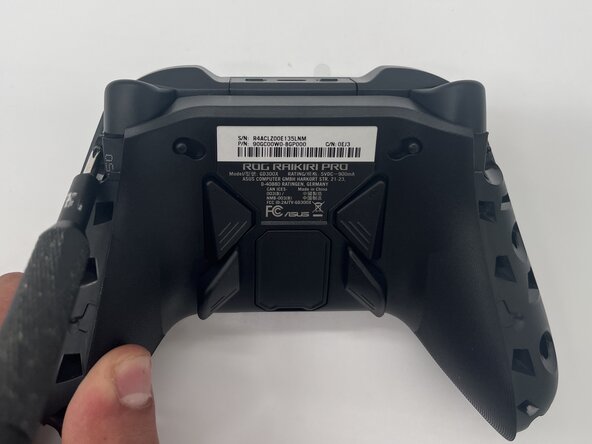
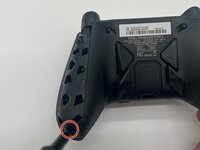
С помощью крестовой отвертки Phillips #1 открутите 11-мм винт из нижнего угла каждой ручки.
-
-
-
-
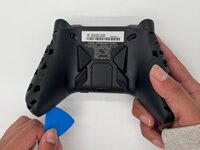
Вставьте кончик медиатора или лопатки в стык центральной панели задней части корпуса.
-
Аккуратно проведите медиатором слева направо вдоль стыка, чтобы отсоединить фиксаторы, соединяющие верхнюю и нижнюю части контроллера.
-
Разделите верхнюю и нижнюю части устройства.
-
-
-
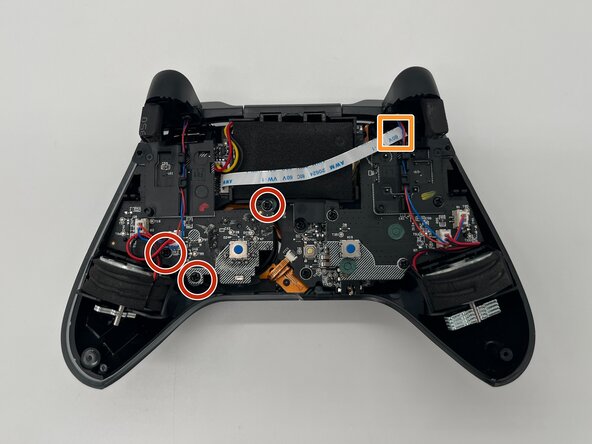
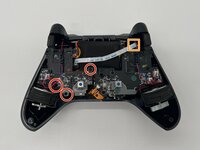
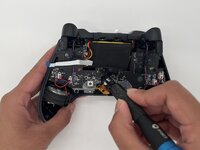
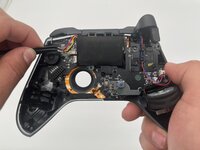
С помощью отвертки Phillips #1 открутите три винта длиной 8 мм, которыми закреплена левая плата.
-
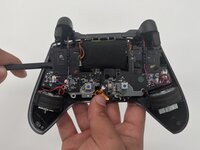
Отсоедините шлейф, который проходит поверх аккумулятора.
-
-
-
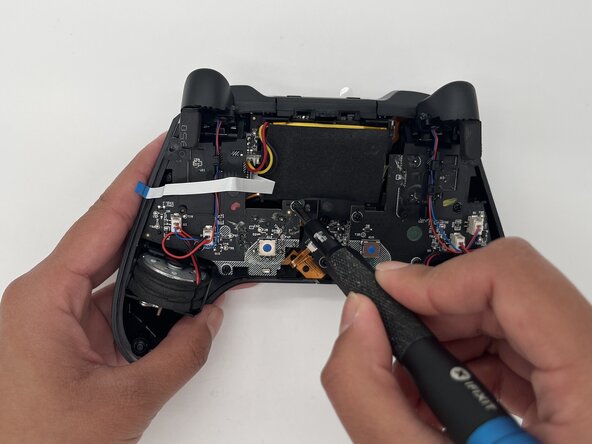
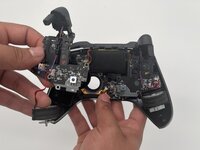
Используйте пластиковую лопатку, чтобы аккуратно извлечь плату и левый вибромотор.
-
-
-
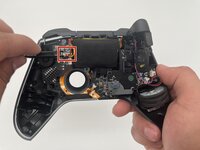
Используйте пинцет, чтобы отсоединить разъем аккумулятора от платы.
-
-


Для сборки устройства выполните эти инструкции в обратном порядке. Утилизируйте электронные отходы в сертифицированном центре по переработке электроники по стандарту R2 или e-Stewards.
Отменить: Я не выполнил это руководство.
Еще один человек закончил это руководство.
Особая благодарность этим переводчикам:
100%

Translation Bot помогает нам починить мир! Хотите внести свой вклад?
Начните переводить ›

Команда

University of North Texas, Team 1-3, Kilpatrick Spring 2025 Участник University of North Texas, Team 1-3, Kilpatrick Spring 2025
UNT-KILPATRICK-S25S1G3
3 членов
Автор 55 руководств