Перейти к основному содержанию
Присоединяйся к сообществу ремонтников - Создай аккаунт

Astro A50 2016 Headset Motherboard Replacement

Выберете то, что вам нужно

    1. Astro A50 2016 Headset Motherboard Replacement, Headset Speakers: шаг 1, изображение 1 из 2 Astro A50 2016 Headset Motherboard Replacement, Headset Speakers: шаг 1, изображение 2 из 2
      • Remove the magnetic ear pads by gently pulling them away from the headset. Be careful not to remove the left earpad, which houses the microphone, and ensure you're only removing the right earpad.

      Спросите у FixBot

      Добавить комментарий

    2. Astro A50 2016 Headset Motherboard Replacement: шаг 2, изображение 1 из 1
      • Squeeze the plastic opening tool between the black plastic and foam pad on non mic side and then pry upwards to remove the felt pads covering the speaker.

      Спросите у FixBot

      Добавить комментарий

    3. Astro A50 2016 Headset Motherboard Replacement: шаг 3, изображение 1 из 1
      • Remove the four 6mm Phillips 1 screws.

      Спросите у FixBot

      Добавить комментарий

    4. Astro A50 2016 Headset Motherboard Replacement: шаг 4, изображение 1 из 1
      • Lift the speaker module up off the device.

      Спросите у FixBot

      Добавить комментарий

    1. Astro A50 2016 Headset Motherboard Replacement, Headset Motherboard: шаг 5, изображение 1 из 1
      • Remove the four 6mm Phillips 1 screws.

      Спросите у FixBot

      Добавить комментарий

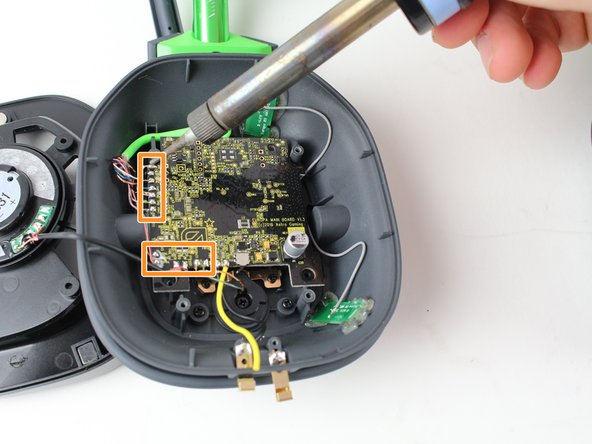
    2. Astro A50 2016 Headset Motherboard Replacement: шаг 6, изображение 1 из 2 Astro A50 2016 Headset Motherboard Replacement: шаг 6, изображение 2 из 2
      Спросите у FixBot

      Добавить комментарий

    3. Astro A50 2016 Headset Motherboard Replacement: шаг 7, изображение 1 из 1
      • Use the plastic opening tool to pry off the black tape covering the gray wires

      Спросите у FixBot

      Добавить комментарий

    4. Astro A50 2016 Headset Motherboard Replacement: шаг 8, изображение 1 из 1
      • Lift the motherboard out of the headset and gently disconnect the gray wires from the motherboard.

      Спросите у FixBot

      Добавить комментарий

Заключение

To reassemble your device, follow these instructions in reverse order.

Отменить: Я не выполнил это руководство.

3 человек успешно провели ремонт по этому руководству.

Brian Menard

Участник с: 10/01/17

306 Репутация

1 руководство автора

Команда

Cal Poly, Team S15-G1, Livingston Fall 2017 Участник Cal Poly, Team S15-G1, Livingston Fall 2017

CPSU-LIVINGSTON-F17S15G1

3 членов

Автор 23 руководств

2 Комментарии к руководству

Any chance I could get the E250336. USB board part from you guys? I need one.

Theron Miller - Ответить Поделиться

I am having a very tough time finding this Part online. Thanks!

Theron Miller - Ответить Поделиться

Добавить комментарий

Статистика просмотров:

За последние 24 часов: 2

За последние 7 дней: 16

За последние 30 дней: 60

За всё время: 4,938