Перейти к основному содержанию
Присоединяйся к сообществу ремонтников - Создай аккаунт

Audio Technica ATH-AD500 Driver Replacement

Выберете то, что вам нужно

    1. Audio Technica ATH-AD500 Driver Replacement, Speaker Assembly: шаг 1, изображение 1 из 1
      • Remove the ear pads by peeling them away from the grill.

      Спросите у FixBot

      Добавить комментарий

    2. Audio Technica ATH-AD500 Driver Replacement: шаг 2, изображение 1 из 1
      • Remove all four 1cm screws on the inside of the headphone using a #1 Phillips head.

      Спросите у FixBot

      Добавить комментарий

    3. Audio Technica ATH-AD500 Driver Replacement: шаг 3, изображение 1 из 1
      • Remove the speaker from the grill by pulling it out.

      • Remove the speaker carefully so you do not rip the wires out.

      Спросите у FixBot

      Добавить комментарий

    1. Audio Technica ATH-AD500 Driver Replacement, Driver: шаг 4, изображение 1 из 1
      • With a #0 phillips head, unscrew the three, 1 cm screws which are holding the driver (red wafer) in its bracket.

      Спросите у FixBot

      Добавить комментарий

    2. Audio Technica ATH-AD500 Driver Replacement: шаг 5, изображение 1 из 1
      • Pull the driver out of its bracket.

      Спросите у FixBot

      Добавить комментарий

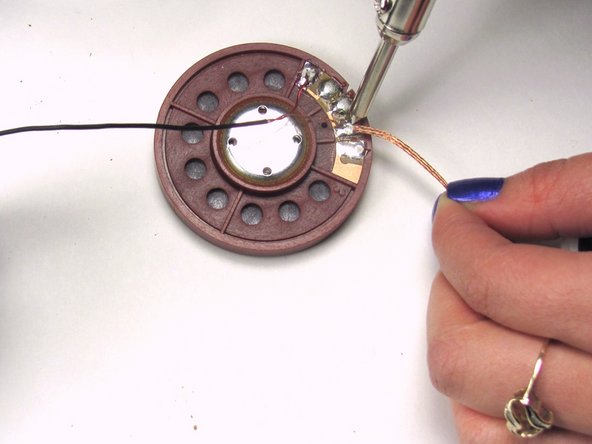
    3. Audio Technica ATH-AD500 Driver Replacement: шаг 6, изображение 1 из 2 Audio Technica ATH-AD500 Driver Replacement: шаг 6, изображение 2 из 2
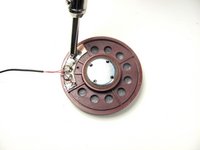
      • Remove the two wires, red and yellow, by de-soldering them from the driver using a soldering iron and desoldering wick. Reference Как паять и выпаивать соединения.

      • The areas where you solder will be hot so wait until the solder joints are cool before handling the wires again.

      Спросите у FixBot

      Добавить комментарий

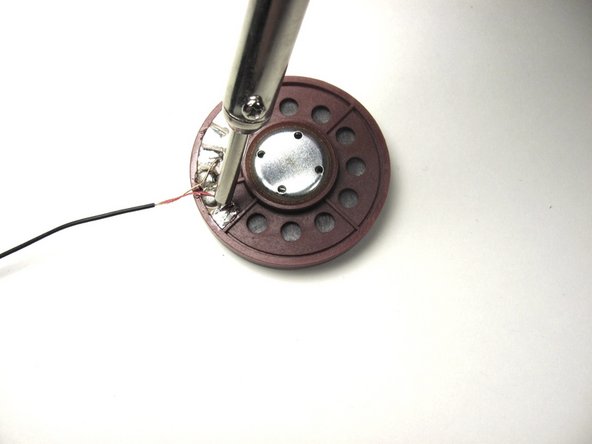
    4. Audio Technica ATH-AD500 Driver Replacement: шаг 7, изображение 1 из 2 Audio Technica ATH-AD500 Driver Replacement: шаг 7, изображение 2 из 2
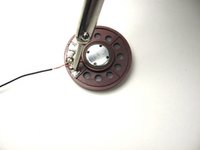
      • Connect the existing wires to the new driver by re-soldering the wires using the soldering iron.

      • Using the copper as a reference, re-solder the yellow wire to the top left solder joint and the red to the bottom left solder joint.

      • The areas where you solder will be hot so wait until the solder joints are cool before handling the wires again.

      Спросите у FixBot

      Добавить комментарий

Заключение

To reassemble your device, follow these instructions in reverse order.

Отменить: Я не выполнил это руководство.

2 человек успешно провели ремонт по этому руководству.

Nick Levy

Участник с: 01/13/13

183 Репутация

1 руководство автора

Команда

Cal Poly, Team 17-19, Forte Winter 2013 Участник Cal Poly, Team 17-19, Forte Winter 2013

CPSU-FORTE-W13S17G19

6 членов

Автор 35 руководств

2 Комментарии к руководству

where can i buy a replacement driver?

acidxgangster - Ответить Поделиться

You can order parts directly from PARTS@ATUS.COM

Nick Levy - Ответить Поделиться

Добавить комментарий

Статистика просмотров:

За последние 24 часов: 0

За последние 7 дней: 9

За последние 30 дней: 40

За всё время: 11,777