Введение
If your device won't turn on or doesn't hold a charge for very long, you might need to replace the battery. This guide will provide the steps to remove and install a battery in your Azpen A909.
Выберете то, что вам нужно
-
-
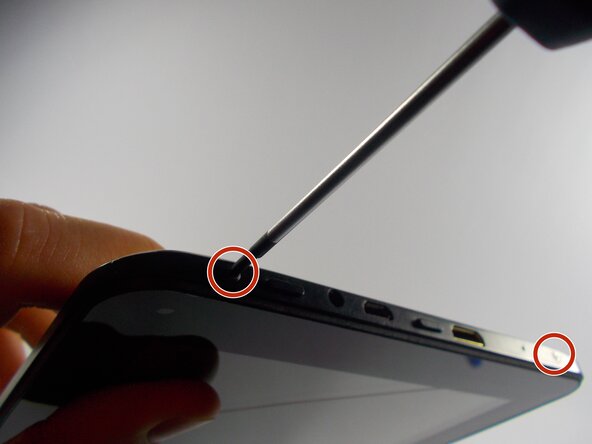
Begin by unscrewing the two 1.4 mm diameter Phillips #00 head screws at the top of the device.
 Спросите у FixBot
-
-
-
Next, gently pry the cover off with a plastic opening tool or a similar instrument by loosening all of the anchoring points. Two of the anchoring points are circled in the image. Avoid excessive bending or pivoting, since doing so may break the anchoring points.
-
-
-
-
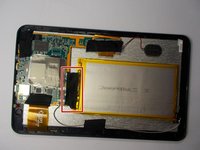
After prying open all of the anchoring points, the cover will lift off of the tablet.
-
-
-
Remove the tape located at the end of the battery carefully
-
-
-
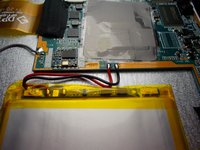
Using a plastic opening tool, gently pry the edges battery off of the backside of the touchscreen display. Start at the end of the battery opposite the connecting wires.
-
Once the edges are free, slowly work inward with the opening tool until the battery is free. This may take some time, since copious amounts of adhesive were used to anchor the battery in place.
-
-
-
Pick a connection point and place the soldering iron on top of the wick above the existing solder ball.
-
Hold the soldering iron in place until the solder melts into the wick.
-
Repeat the same procedure on the remaining connector.
-
Lift the old battery off of the touchscreen. Make sure that all the solder has been removed before pulling the wires away from the board. The wires should come free with little to no resistance.
-


To reassemble your device, follow these instructions in reverse order.
Команда

UMass Dartmouth, Team 3-5, Duarte Spring 2015 Участник UMass Dartmouth, Team 3-5, Duarte Spring 2015
UMASSD-DUARTE-S15S3G5
3 членов
Автор 12 руководств