Перейти к основному содержанию
Присоединяйся к сообществу ремонтников - Создай аккаунт

DJI Phantom 4 Shell Replacement

Выберете то, что вам нужно

    1. DJI Phantom 4 Shell Replacement, Remove Propellers: шаг 1, изображение 1 из 1
      • Push down and twist the propellers counter-clockwise to release from the drone.

      Спросите у FixBot

      Добавить комментарий

    2. DJI Phantom 4 Shell Replacement, Remove Battery: шаг 2, изображение 1 из 2 DJI Phantom 4 Shell Replacement, Remove Battery: шаг 2, изображение 2 из 2
      • Firmly press the battery tabs on top and bottom of the battery and slide out the battery.

      Спросите у FixBot

      Добавить комментарий

    3. DJI Phantom 4 Shell Replacement, Remove Gimbal Lock: шаг 3, изображение 1 из 1
      • If gimbal lock is still on, remove it from the drone.

      Спросите у FixBot

      Добавить комментарий

    4. DJI Phantom 4 Shell Replacement, Remove the Shell's Main Screws: шаг 4, изображение 1 из 2 DJI Phantom 4 Shell Replacement, Remove the Shell's Main Screws: шаг 4, изображение 2 из 2
      • Using a T8 screwdriver, remove the eight Torx screws from the plastic shell.

      Спросите у FixBot

      Добавить комментарий

    5. DJI Phantom 4 Shell Replacement, Remove Gimbal Assembly Screws: шаг 5, изображение 1 из 3 DJI Phantom 4 Shell Replacement, Remove Gimbal Assembly Screws: шаг 5, изображение 2 из 3 DJI Phantom 4 Shell Replacement, Remove Gimbal Assembly Screws: шаг 5, изображение 3 из 3
      • Using a T6 screwdriver, remove all eight screws on the grey gimbal assembly.

      Спросите у FixBot

      Добавить комментарий

    6. DJI Phantom 4 Shell Replacement, Remove Gimbal Assembly: шаг 6, изображение 1 из 1
      • Using a plastic spudger or pick, gently pry the gimbal assembly from the drone.

      • Do not try to pull the gimbal assembly away from drone just yet—there are cables that must be unplugged first.

      Спросите у FixBot

      Добавить комментарий

    7. DJI Phantom 4 Shell Replacement, Remove the Gimbal Cable's Screws & Bracket: шаг 7, изображение 1 из 2 DJI Phantom 4 Shell Replacement, Remove the Gimbal Cable's Screws & Bracket: шаг 7, изображение 2 из 2
      • Using a Phillips #000 screwdriver, remove the two screws and the gimbal bracket.

      Спросите у FixBot

      Добавить комментарий

    8. DJI Phantom 4 Shell Replacement, Unplug the Gimbal: шаг 8, изображение 1 из 1
      • Using your fingers or needle-nose pliers, gently unplug the left (red box) cable by pushing in the white clips on the sides and sliding the cable out.

      • Using a spudger, unplug the 3-in-1 cable on the right (orange box) by gently prying up.

      Спросите у FixBot

      Добавить комментарий

    9. DJI Phantom 4 Shell Replacement, Remove the Antenna Screws & Bracket: шаг 9, изображение 1 из 2 DJI Phantom 4 Shell Replacement, Remove the Antenna Screws & Bracket: шаг 9, изображение 2 из 2
      • Using a Phillips #000 screwdriver, remove the two screws and the antenna bracket.

      Спросите у FixBot

      Добавить комментарий

    10. DJI Phantom 4 Shell Replacement, Unplug Antenna Cables: шаг 10, изображение 1 из 2 DJI Phantom 4 Shell Replacement, Unplug Antenna Cables: шаг 10, изображение 2 из 2
      • Using a spudger, gently disconnect the four antenna cables.

      • Remember the order in which the antenna cables are plugged in, or refer to this step during reassembly.

      Спросите у FixBot

      Добавить комментарий

    11. DJI Phantom 4 Shell Replacement, Remove Plastic Clip Screws: шаг 11, изображение 1 из 2 DJI Phantom 4 Shell Replacement, Remove Plastic Clip Screws: шаг 11, изображение 2 из 2
      • Using a Phillips #000 screwdriver, remove the two screws located on the white plastic tabs.

      Спросите у FixBot

      Добавить комментарий

    12. DJI Phantom 4 Shell Replacement, Bend Metal Clips Up: шаг 12, изображение 1 из 2 DJI Phantom 4 Shell Replacement, Bend Metal Clips Up: шаг 12, изображение 2 из 2
      • Using a spudger, carefully bend the two metal clips upwards.

      • Be gentle and do not break the clips. You will need to bend them back down upon reassembly.

      Спросите у FixBot

      Добавить комментарий

    13. DJI Phantom 4 Shell Replacement, Remove LED Cover and Sticker: шаг 13, изображение 1 из 3 DJI Phantom 4 Shell Replacement, Remove LED Cover and Sticker: шаг 13, изображение 2 из 3 DJI Phantom 4 Shell Replacement, Remove LED Cover and Sticker: шаг 13, изображение 3 из 3
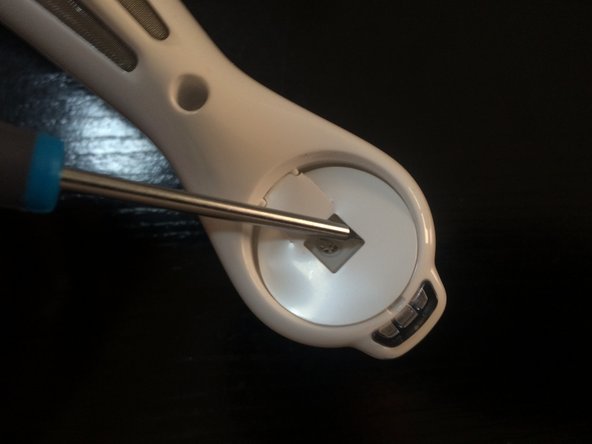
      • Using a spudger or flathead screwdriver, gently pry up the LED cover.

      • Using a spudger or flathead screwdriver, carefully pry up the underlying sticker.

      • PRO TIP: Stick the sticker to the smooth side of the plastic LED cover to keep it clean and from losing stick. PRO TIP on reassembly: be sure to align the stickers so the tab fits in the snap slot.

      • Repeat this step on all four LED covers.

      Спросите у FixBot

      Добавить комментарий

    14. DJI Phantom 4 Shell Replacement, Remove Shell/Motor T8 Screws: шаг 14, изображение 1 из 1
      • Using a T8 screwdriver, remove the 3 screws that attach the shell and motors together.

      • Repeat this step on all 4 motors.

      Спросите у FixBot

      Добавить комментарий

    15. DJI Phantom 4 Shell Replacement, Separate Body Shell: шаг 15, изображение 1 из 2 DJI Phantom 4 Shell Replacement, Separate Body Shell: шаг 15, изображение 2 из 2
      • Using a spudger or pick, carefully pry your way around the seam, undoing the clips that attach the shell together.

      • PRO TIP: If you are replacing the shell because your old shell is trashed, don't worry about cracking or damaging the broken shell. Just go for it.

      • Do not try to pull the shell completely apart just yet, there are some cables that must be unplugged first.

      Спросите у FixBot

      Добавить комментарий

    16. DJI Phantom 4 Shell Replacement, Unplug 2 Cables: шаг 16, изображение 1 из 1
      • Using your fingers or needle-nose pliers, gently unplug the cables by pushing in the white clips on the sides and sliding the cables out.

      Спросите у FixBot

      Добавить комментарий

    17. DJI Phantom 4 Shell Replacement, LED Rivets: шаг 17, изображение 1 из 2 DJI Phantom 4 Shell Replacement, LED Rivets: шаг 17, изображение 2 из 2
      • Using a knife or flathead screwdriver, remove the melted plastic rivets holding down the LED board. Be careful to not damage the LED.

      • Carefully pry up the LED board from the drone shell.

      • Repeat on all four wings.

      • During reassembly use a dull soldering iron tip to remount the LED board to the new shell.

      Спросите у FixBot

      Добавить комментарий

    18. DJI Phantom 4 Shell Replacement, Wire Glue: шаг 18, изображение 1 из 1
      • Using a small screwdriver, carefully pry up the motor and LED cables where they are glued down to the shell.

      • Repeat on all four wings.

      Спросите у FixBot

      Добавить комментарий

    19. DJI Phantom 4 Shell Replacement: шаг 19, изображение 1 из 3 DJI Phantom 4 Shell Replacement: шаг 19, изображение 2 из 3 DJI Phantom 4 Shell Replacement: шаг 19, изображение 3 из 3
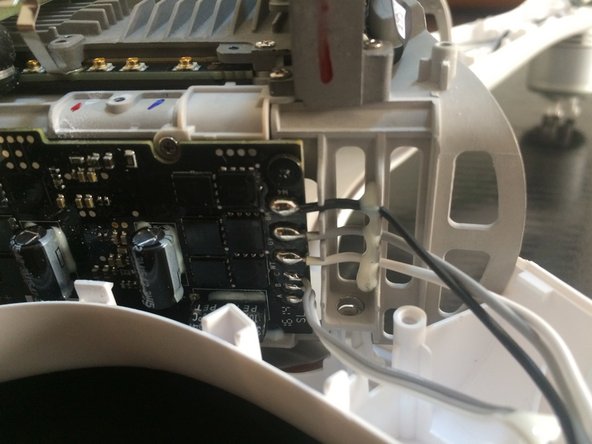
      • Desolder all 12 of the motor wires that connect to the drones mother boards.

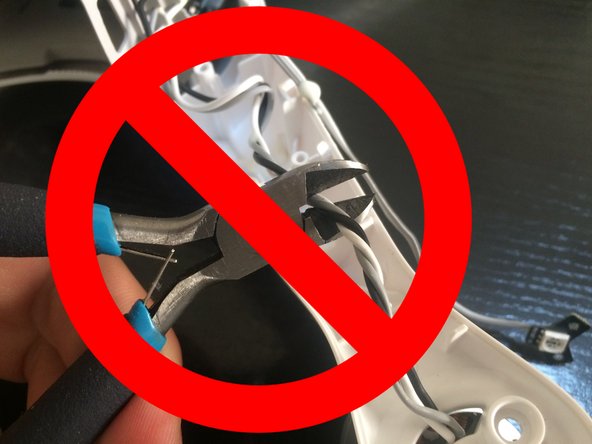
      • DO NOT cut the cables with wire cutters—they are enameled wire and are a pain in the butt to solder back together and have them still work. Do yourself a favor and just desolder them from the board.

      • For reassembly, note the order of the cables. While the drone is upside down, black is the top wire, grey is middle, and white is bottom.

      Спросите у FixBot

      Добавить комментарий

    20. DJI Phantom 4 Shell Replacement, The Brains: шаг 20, изображение 1 из 3 DJI Phantom 4 Shell Replacement, The Brains: шаг 20, изображение 2 из 3 DJI Phantom 4 Shell Replacement, The Brains: шаг 20, изображение 3 из 3
      • Using a T8 screw driver, remove the four screws that mount the battery bay and brains from the upper shell.

      • Carefully remove the brains out of the upper shell.

      Спросите у FixBot

      Добавить комментарий

    21. DJI Phantom 4 Shell Replacement, Shielding: шаг 21, изображение 1 из 2 DJI Phantom 4 Shell Replacement, Shielding: шаг 21, изображение 2 из 2
      • Carefully peel the shielding sticker from the upper shell. Note that you can't remove it all the way until you remove three screws.

      • Using a Phillips #000 driver, remove the three screws that are mounting the board to the upper drone shell.

      Спросите у FixBot

      Добавить комментарий

    22. DJI Phantom 4 Shell Replacement, Legs & Antenna Cables: шаг 22, изображение 1 из 3 DJI Phantom 4 Shell Replacement, Legs & Antenna Cables: шаг 22, изображение 2 из 3 DJI Phantom 4 Shell Replacement, Legs & Antenna Cables: шаг 22, изображение 3 из 3
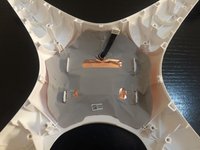
      • Carefully pry off the screw covers on the legs that are attached to the lower shell.

      • Using a T6 screwdriver, remove the two screws. Repeat on all four corners.

      • Take note on where you are removing the cables from, and install them in the new lower shell in the same way you found them.

      Спросите у FixBot

      Добавить комментарий

Заключение

To reassemble your device, follow these instructions in reverse order.

Отменить: Я не выполнил это руководство.

48 человек успешно провели ремонт по этому руководству.

ForumHermit

Участник с: 08/16/13

1 811 Репутация

Автор 2 руководств

26 Комментарии к руководству

**Note that if you crashed your drone and are replacing the body shell, there may be more problems with your drone internally. I replaced my drone shell and kept getting ESC status errors when I would try and take off. I had to send my drone in to DJI to have them fix it. They ended up replacing three of the motors (they were a bit stiff to turn so I wasn't surprised), the ESC board (left), and the left and right landing gear modules. That all cost me $215 USD which was mostly for the two hours of labor, the parts were cheap.

ForumHermit - Ответить Поделиться

hreat guide but why do you need the heat Gun/shrink?? I'd add a glue gun to secure the motor wires in the arms again...

john racovelli - Ответить Поделиться

Yeah sorry about that @wahoo66, I've removed them from the guide now but I had them in there because I made the mistake of cutting the motor wires instead of just unsoldering them so I used heat shrink tubing and a hot air gun on mine but I don't recommend people doing what I did.

ForumHermit - Ответить Поделиться

Great guide thanks or putting it together, it helped me transplant my P4 to a new shell.

To note #22 my landing gear actually had T6 screws not phillips.

Thanks again.

julio Benitez - Ответить Поделиться

Thank you Julio! I’ve just corrected this to saying T6. I’m glad this guide was helpful for you.

ForumHermit - Ответить Поделиться

Добавить комментарий

Статистика просмотров:

За последние 24 часов: 7

За последние 7 дней: 34

За последние 30 дней: 136

За всё время: 25,136