Введение
If your Digiland DL1168A tablet often overheats, charges slowly, shuts down suddenly, or doesn't hold a charge as well as it used to, it may be time to open it up and replace the battery. This is not a hard repair, but you will need an iFixit opening tool and a soldering iron (see Tools list).
Be safe while soldering: work on a fire-resistant surface in a well-ventilated area, wear fire-resistant clothes that cover your arms and legs, and use eye protection.
Work carefully, as the battery is held in place with strong glue that is difficult to get off. If the battery is swollen, be extremely careful, as damaging a swollen battery could release toxic gas and/or start a fire.
Always use caution when working with electrical components. Shut the tablet completely off before starting, back up your data, and have a fireproof container (such as a bucket of sand) on hand to safely store the dead battery.
Never throw a battery away with general waste. Find a recycling center or electronic retailer who can dispose of them safely.
Выберете то, что вам нужно
-
-
-
Using an opening tool, begin softly prying open device by first inserting it in between the front and back panels.
-
Continue prying the edges while moving around the device's perimeter until the back can be easily removed.
 Спросите у FixBot
-
-
-
-
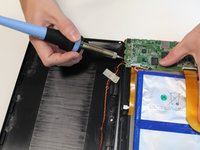
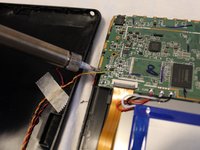
Desolder the four wires connecting the rear case to the motherboard.
-
Disconnect the wires from the motherboard.
-
Remove the rear case from the device.
-
-
-
-
-
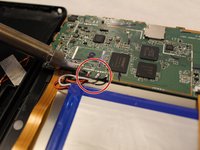
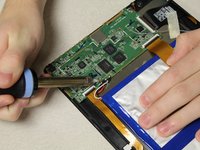
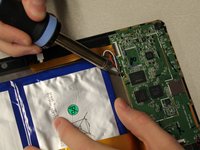
Desolder the three positive, negative, and neutral red, black, and white wires from the motherboard that are connected to the battery.
-
-
-
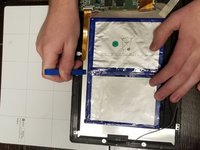
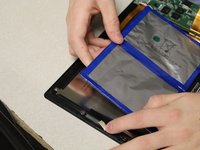
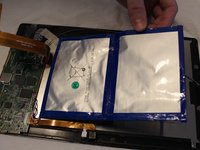
Using an opening tool, separate the battery from the tablet.
-
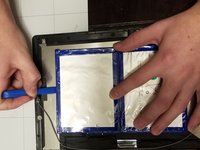
Follow the edge of the battery to loosen the glue.
-
-
-
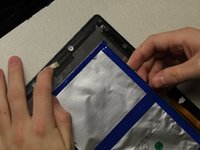
Once the glue is loosened, pry the battery away from the screen.
-
-








To reassemble your device, follow these instructions in reverse order.
Отменить: Я не выполнил это руководство.
2 человек успешно провели ремонт по этому руководству.

Команда

Grand Valley State University, Team S1-G1, DeVasto Fall 2019 Участник Grand Valley State University, Team S1-G1, DeVasto Fall 2019
GVSU-DEVASTO-F19S1G1
4 членов
Автор 4 руководств
