Введение
Следуйте этому руководству, чтобы заменить сенсорную панель на игровом контроллере Sony DualShock 4 CUH-ZCT2 PlayStation.
Выберете то, что вам нужно
-
-
-
С помощью крестовой отвертки открутите четыре винта длиной 6,4 мм с задней панели.
 Спросите у FixBot
-
-
-
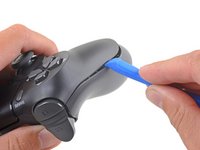
Вставьте инструмент для вскрытия корпусов в зазор между передней и задней панелью, начиная с внешнего края любой из рукояток.
-
Аккуратно подденьте заднюю панель, отделяя её от передней, пока они не начнут разъединяться.
-
-
-
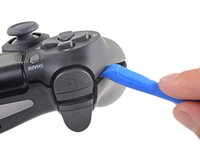
Используйте инструмент для вскрытия корпусов, чтобы разделить панели, освободив пластиковые защелки по периметру контроллера.
-
-
-
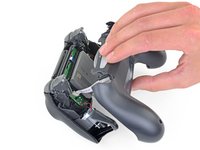
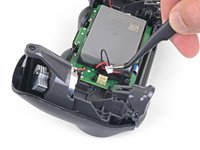
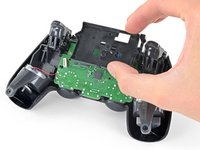
Потяните заднюю панель прямо от контроллера.
-
-
-
Инструмент, используемый на этом этапе:Tweezers$4.99
-
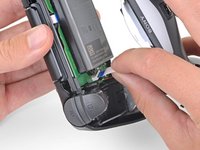
Пальцами аккуратно потяните шлейф прямо из его разъема на материнской плате.
-
-
-
-
Инструмент, используемый на этом этапе:Tweezers$4.99
-
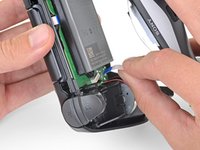
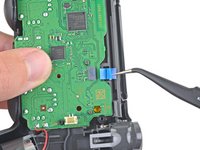
Используйте пинцет, чтобы потянуть разъем питания аккумулятора строго вверх и отсоединить его от материнской платы.
-
-
-
-
-
С помощью крестовой отвертки открутите винт длиной 6,4 мм, удерживающий кронштейн аккумулятора.
-
-
-
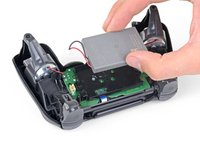
Снимите кронштейн аккумулятора.
-
-
Инструмент, используемый на этом этапе:Tweezers$4.99
-
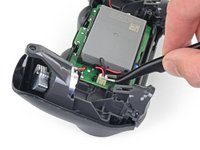
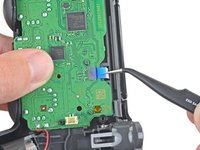
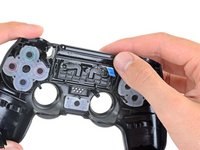
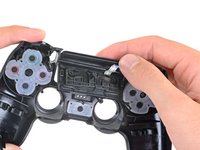
Используйте пинцет, чтобы отсоединить шлейф сенсорной панели.
-
-
-
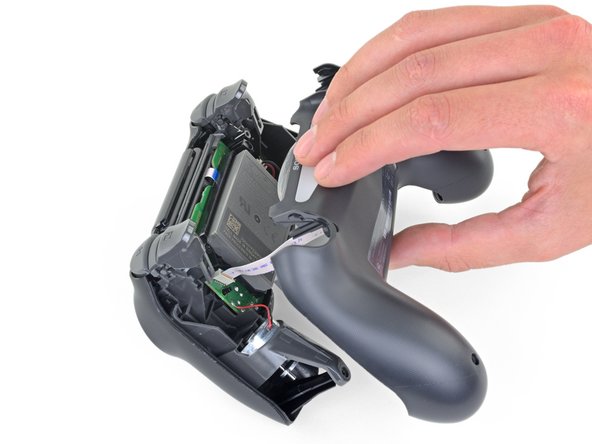
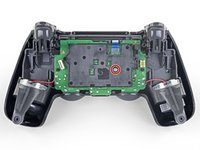
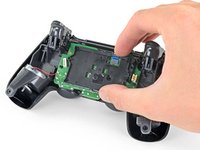
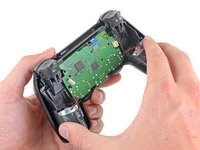
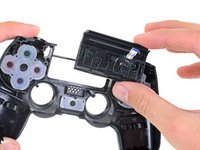
Отсоедините блок материнской платы с каркасом от передней панели.
-
-
-
-
-
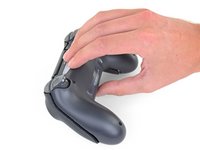
Надавите на нижнюю часть тачпада с передней стороны контроллера, чтобы отделить его от передней части корпуса.
-
Извлеките тачпад из рамки, удерживающей его на передней части корпуса.
-
-


Для сборки устройства выполните вышеописанные шаги в обратном порядке.
Сдайте электронные отходы в сертифицированный пункт переработки R2 или e-Stewards.
Ремонт пошел не по плану? Обратитесь за помощью в поиске неисправностей к нашему сообществу Answers.
Отменить: Я не выполнил это руководство.
2 человек успешно провели ремонт по этому руководству.
Особая благодарность этим переводчикам:
100%

Translation Bot помогает нам починить мир! Хотите внести свой вклад?
Начните переводить ›
