Введение
Have a faulty battery with charging problems or just poor battery life? This guide will help you step by step in replacing your battery. Note soldering will be required, please follow this wonderful guide for helpful tips.
Выберете то, что вам нужно
-
-
Push the screen out through the back of the metal ring enclosure.
-
-
-
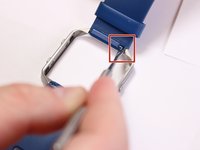
Locate the metal pin behind the wristband located on the edge of metal ring.
-
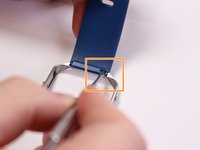
Insert the pointed end of the metal spudger into the pin hold and push it into the blue rectangle enclosure.
-
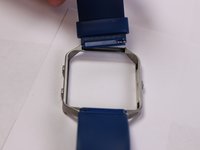
Remove wristband.
-
-
-
-
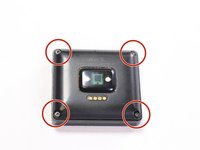
Place device screen face down and locate the four screws attaching the back cover.
-
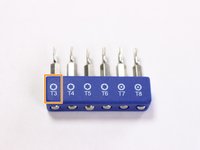
Use a T3 torx head or T3 torx screwdriver to remove the four screws.
-
-
-
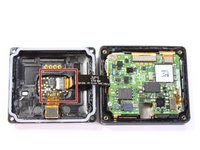
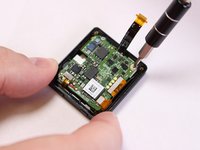
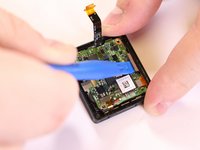
Grab the back, lift and open like a book to expose the motherboard. Locate the ribbon connector on the left.
-
Use a plastic spudger tool on the ribbon connected from the heart rate monitor to the motherboard.
-
Insert and lift the plastic opening tool to release the ribbon.
-
-
-
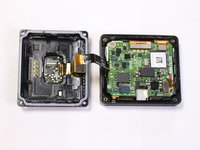
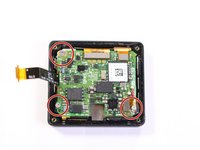
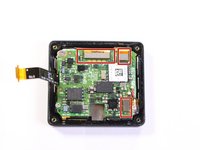
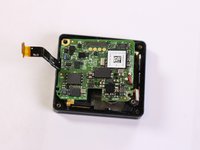
Separate the back and set aside, locate the three screws attaching the motherboard.
-
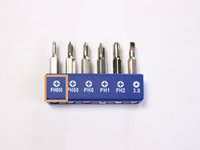
Use a PH000 head or a PH000 screwdriver to remove the three screws.
-
-
-
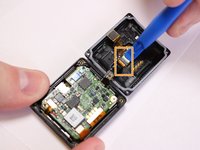
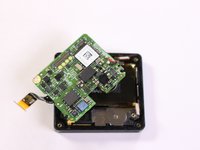
Use a plastic spudger tool on the ribbons connected to the motherboard.
-
Insert the tool under the ribbon and lift to release the connection.
-
-
-
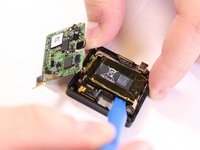
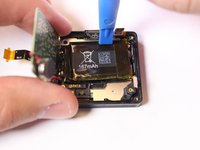
Lift and push the motherboard to the side to uncover the 167mAh battery.
-
Use a plastic spudger tool to pry out the battery from its adhesive plastic underneath.
-
Lift up and pull downward to remove battery. Switch to the top portion of the battery and push downward to pry out battery.
-
-
-
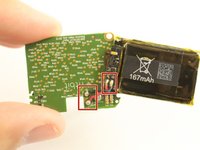
Flip the motherboard backwards and locate the metal pins from the battery soldered to the board.
-
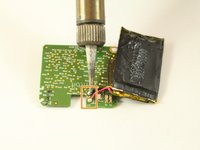
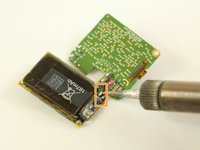
Desolder the connection to remove the battery, desolder the battery connector itself if desired as well.
-
Follow this guide on how to solder and desolder connectors Soldering Guide
-


To reassemble your device, follow these instructions in reverse order.
Отменить: Я не выполнил это руководство.
62 человек успешно провели ремонт по этому руководству.
Команда

USF Tampa, Team S3-G3, Sullivan Spring 2017 Участник USF Tampa, Team S3-G3, Sullivan Spring 2017
USFT-SULLIVAN-S17S3G3
4 членов
Автор 15 руководств
55 Комментарии к руководству
Where can I buy this battery?
Please contact fred@doble.com.br
no answer for:
Where can I buy this battery?
Looking for this battery as well; mine lasted exactly 1 year. 7 days now down to hours, the surge did the same thing, maybe my last Fitbit watch ever! Disappointed to say the least.
I found a battery, 3.7 volt at 165mAh in the same style, should be close enough but I do not have the size of the factory battery, if anyone has taken theirs apart, can you post up the measurements in mm? thanks
I can't find the battery anywhere either. Would love some advice. Tried Amazon, AliExpress, eBay and Google in general.