Перейти к основному содержанию
Присоединяйся к сообществу ремонтников - Создай аккаунт

Framework Laptop 12 Pre-built Quick Start Guide

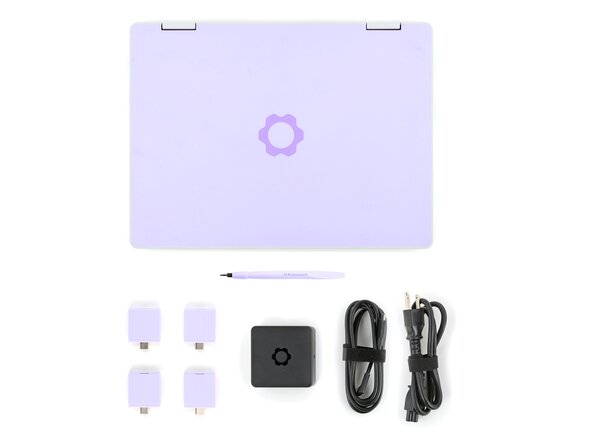
  1. Framework Laptop 12 Pre-built Quick Start Guide, Unbox your Framework Laptop: шаг 1, изображение 1 из 2 Framework Laptop 12 Pre-built Quick Start Guide, Unbox your Framework Laptop: шаг 1, изображение 2 из 2
    • Unbox your Framework Laptop and make sure you've received all the items:

    • Framework Laptop 12

    • Framework Screwdriver

    • Expansion Cards you selected during purchase

    • Framework Power Adapter, USB-C Cable, and AC Cable

    Спросите у FixBot
  2. Framework Laptop 12 Pre-built Quick Start Guide, Set your laptop on a clean surface: шаг 2, изображение 1 из 1
    • Set your Framework Laptop face-down on a clean work surface.

    Спросите у FixBot
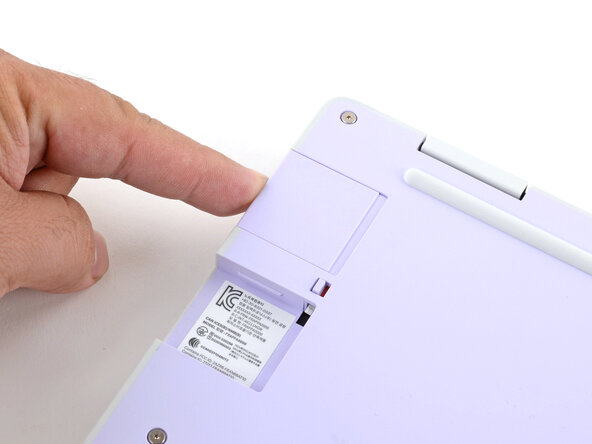
  3. Framework Laptop 12 Pre-built Quick Start Guide, Install the Expansion Cards: шаг 3, изображение 1 из 3 Framework Laptop 12 Pre-built Quick Start Guide, Install the Expansion Cards: шаг 3, изображение 2 из 3 Framework Laptop 12 Pre-built Quick Start Guide, Install the Expansion Cards: шаг 3, изображение 3 из 3
    • Slide an Expansion Card into the Expansion Card slot.

    • All official Expansion Cards work fully in all slots, so you can install them however you wish!

    • You don't need to unlock the latches to install the Expansion Cards—only when you want to remove them.

    • The Expansion Cards should click in place, and the front edge should be flush with the laptop.

    • Repeat the procedure with the remaining expansion cards.

    Спросите у FixBot
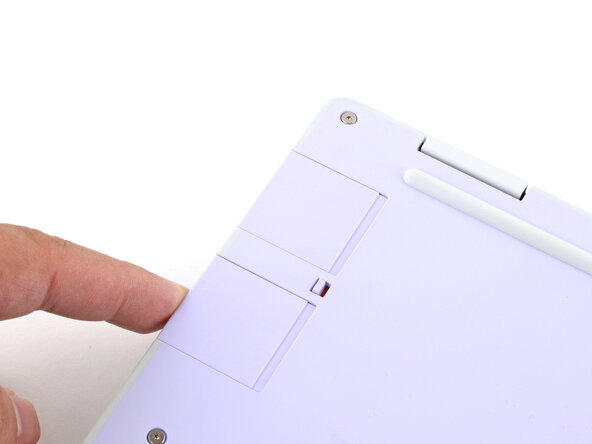
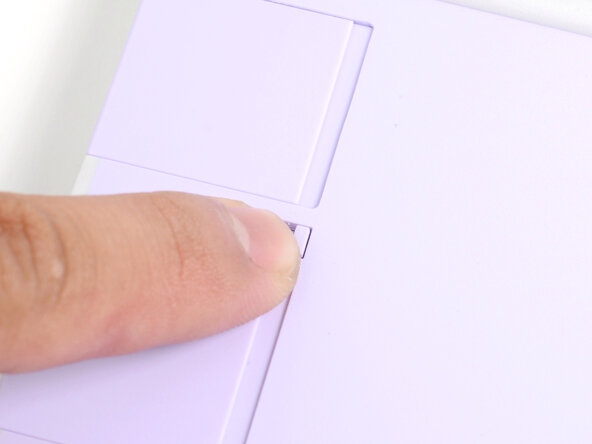
  4. Framework Laptop 12 Pre-built Quick Start Guide, Lock the Expansion Card slots: шаг 4, изображение 1 из 2 Framework Laptop 12 Pre-built Quick Start Guide, Lock the Expansion Card slots: шаг 4, изображение 2 из 2
    • If there's a red bar showing under each Expansion Card latch, use your finger to flip the latch and lock the Expansion Card into its slot.

    • Locking the Expansion Card slots help keep the cards in place when you unplug cables from them.

    Спросите у FixBot
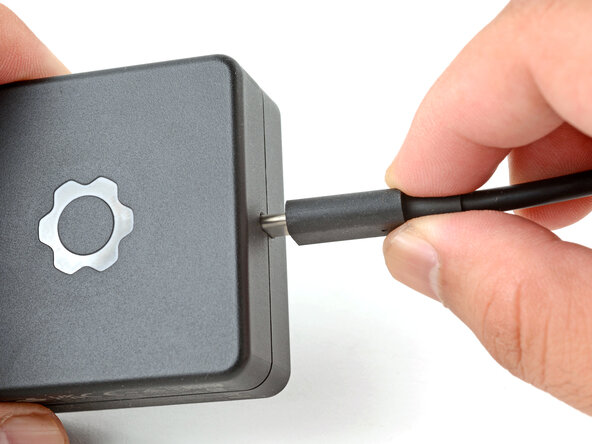
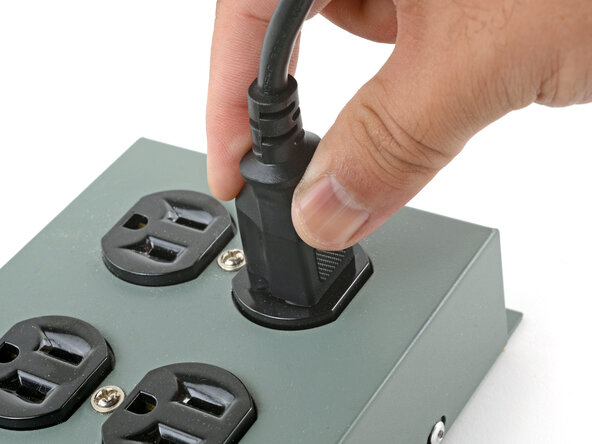
  5. Framework Laptop 12 Pre-built Quick Start Guide, Assemble the Framework Power Adapter: шаг 5, изображение 1 из 3 Framework Laptop 12 Pre-built Quick Start Guide, Assemble the Framework Power Adapter: шаг 5, изображение 2 из 3 Framework Laptop 12 Pre-built Quick Start Guide, Assemble the Framework Power Adapter: шаг 5, изображение 3 из 3
    • Plug the AC Cable into the Power Adapter.

    • Plug the USB-C Cable into the Power Adapter.

    • You can plug either end of the USB-C cable into the adapter.

    • Plug the AC Cable into a power outlet.

    Спросите у FixBot
  6. Framework Laptop 12 Pre-built Quick Start Guide, Plug in the laptop: шаг 6, изображение 1 из 1
    • Your Framework Laptop ships in shipping mode, where the battery is disabled until you plug the laptop in for the first time.

    • Plug the USB-C cable into any USB-C port on your laptop.

    Спросите у FixBot
  7. Framework Laptop 12 Pre-built Quick Start Guide, Turn on the laptop: шаг 7, изображение 1 из 1
    • Your Framework Laptop is ready for use! Open the lid and press the power button along the right edge of the laptop.

    Спросите у FixBot
Заключение

For drivers, firmware, and software updates, check out this page.

If you need help, contact Framework support.

Arthur Shi

Участник с: 01/03/18

335 951 Репутация

Автор 848 руководств

Команда

iFixit Участник iFixit

Staff

123 членов

Автор 25 720 руководств

0 Комментарии к руководству

Добавить комментарий

Статистика просмотров:

За последние 24 часов: 0

За последние 7 дней: 5

За последние 30 дней: 40

За всё время: 434