Введение
After many cycles of charging and discharging, batteries become fatigued and lose their capacity to hold a charge. Manufacturing defects and improper storage can also lead to your watch battery not being as efficient as it once was. This straightforward guide will walk you through the steps of replacing your battery whatever the cause of its failure.
This procedure will fix any current problems you have with your battery. We also recommend you take the time to learn about proper charging and storage techniques to get the maximum life cycle out of your battery. Some of the basic steps points include:
- Store the device in a room temperature space out of direct sunlight
- Charge the device daily or at least every other day
- Do not let it discharge below 5%
Otherwise we hope this process goes well for you, good luck!
Выберете то, что вам нужно
-
-
-
Hold the the metal screwdriver, with a T5 Torx bit, in your dominant hand.
-
Hold the rubber screwdriver, with a Hex T6 Torx bit, in your other hand.
-
While holding the rubber screwdriver in place, simultaneously unscrew the pin (counterclockwise) with the metal screwdriver in your dominant hand.
 Спросите у FixBot
-
-
-
Once the 1mm screw is removed, reinsert the metal screwdriver in that same hole.
-
Gently push the strap's pin out. It will begin to protrude from the other end.
-
Use your fingers to grab the exposed pin and slide it free. The strap should now be disconnected from the device.
-
-
-
-
-
Place a heated iOpener over the display to loosen the adhesive.
-
After about a minute, the iOpener may be removed.
-
-
-
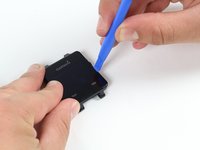
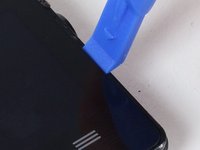
Place the blue plastic opening tool in-between the screen and plastic casing of the watch and slowly pry up one side of the screen.
-
-
-
-
Once the first side has come free, wedge the blue pick in between the screen and watch unit on that side.
-
Complete one pass around the perimeter of the screen to break the adhesive bond on all four sides.
-
-
-
Use the blue plastic opening tool to pry up the side of the glass. Raise it to a point where your fingernail can fit in the gap.
-
Do the same on the opposite side of the device until you have a good grip of the screen.
-
-
-
Obtain a careful grip of the screen from two of its sides.
-
Slowly lift the screen off of the case. Separate it just enough so as not to damage the connection to the motherboard.
-
-
-
Detach the orange tab that connects the screen to the motherboard with a gentle uplift using a plastic opening tool.
-
Upon completing this step, the screen should be free from the rest of the device.
-
-
-
-
-
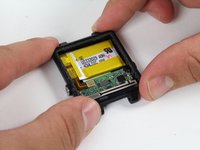
Follow previous guides until you've exposed the battery as shown.
-
Begin by removing the battery connector tab.
-
-
-
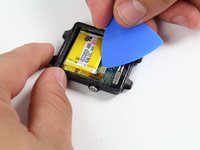
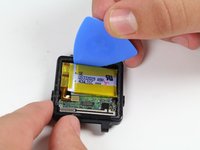
Use a plastic opening pick to gently pry out the battery as shown.
-
-
-
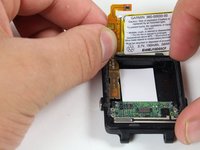
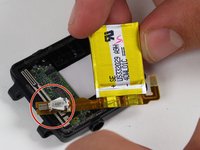
With the battery loose from the case, rotate it to expose the attached tab
-
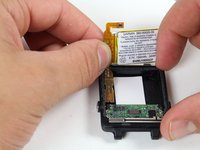
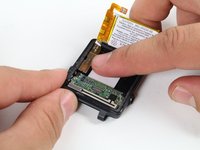
Gently pry up the attached tab with a fingernail.
-
-








To reassemble your device, follow these instructions in reverse order.
Отменить: Я не выполнил это руководство.
17 человек успешно провели ремонт по этому руководству.

Команда

Cal Poly, Team 1-21, Maness Fall 2015 Участник Cal Poly, Team 1-21, Maness Fall 2015
CPSU-MANESS-F15S1G21
4 членов
Автор 17 руководств
29 Комментарии к руководству
But battery buy where?
where to buy battery?
I have the Same question... where can i buy the replacement?
I've tried everywhere to find a battery for my vivoactive, with no luck. Where should I look to find a battery? HELP!
Battery is a 3.7 V, 150 mAh Li-Polymer type.
