Перейти к основному содержанию
Присоединяйся к сообществу ремонтников - Создай аккаунт

HP Touchsmart IQ506 RAM (Memory) Replacement

Выберете то, что вам нужно

    1. HP Touchsmart IQ506 RAM (Memory) Replacement, Change note: шаг 1, изображение 1 из 2 HP Touchsmart IQ506 RAM (Memory) Replacement, Change note: шаг 1, изображение 2 из 2
      Инструмент, используемый на этом этапе:
      Essential Electronics Toolkit
      $29.95
      • Due to the EET missing several components present in the Pro Tech Go and only being $20 cheaper, the EET has been removed. The EET will work for this guide as-is, but if you are shopping for a new toolkit to complete this guide, the Pro Tech Go (new or refurbished, refurbished is ~$32 cheaper), or Pro Tech ($79 new/~$59.95 refurb) is the current recommended toolkit for this guide.

      • If you are interested in a refurbished kit stock levels change frequently but can be found here.

      Спросите у FixBot

      Добавить комментарий

    1. HP Touchsmart IQ506 RAM (Memory) Replacement, Unplug the system: шаг 2, изображение 1 из 2 HP Touchsmart IQ506 RAM (Memory) Replacement, Unplug the system: шаг 2, изображение 2 из 2
      • Unplug the power brick from the system.

      Спросите у FixBot

      Добавить комментарий

    2. HP Touchsmart IQ506 RAM (Memory) Replacement, Remove the RAM door: шаг 3, изображение 1 из 3 HP Touchsmart IQ506 RAM (Memory) Replacement, Remove the RAM door: шаг 3, изображение 2 из 3 HP Touchsmart IQ506 RAM (Memory) Replacement, Remove the RAM door: шаг 3, изображение 3 из 3
      • Unscrew the RAM door using a Phillips #1 screwdriver. Snap the RAM door off from the bottom and slide it off.

      Спросите у FixBot

      Добавить комментарий

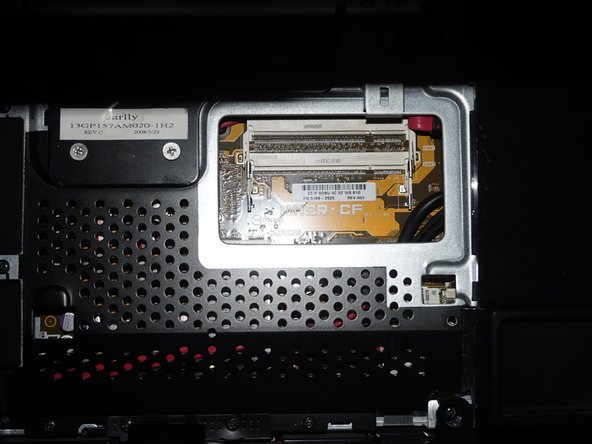
    3. HP Touchsmart IQ506 RAM (Memory) Replacement, Remove the RAM: шаг 4, изображение 1 из 2 HP Touchsmart IQ506 RAM (Memory) Replacement, Remove the RAM: шаг 4, изображение 2 из 2
      • With the RAM exposed, remove the RAM from the slots on the system by pushing the tabs back. Once you do this the RAM will pop up and you can remove it.

      • Install the new RAM. Make sure you line the tab up on the memory with the slot in the system. It should only go in one way.

      Спросите у FixBot

      Добавить комментарий

Заключение

To reassemble your device, follow these instructions in reverse order.

Отменить: Я не выполнил это руководство.

Nick

Участник с: 11/10/09

105 443 Репутация

Автор 72 руководств

0 Комментарии к руководству

Добавить комментарий

Статистика просмотров:

За последние 24 часов: 1

За последние 7 дней: 3

За последние 30 дней: 33

За всё время: 1,195