Перейти к основному содержанию
Присоединяйся к сообществу ремонтников - Создай аккаунт

HTC Evo 4G Front Panel Replacement

Выберете то, что вам нужно

  1. HTC Evo 4G Front Panel Replacement, Rear Panel: шаг 1, изображение 1 из 1
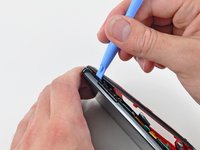
    • Gently insert an iPod opening tool between the rear panel and the inner rear frame near the headphone jack.

    • Use your iPod opening tool to pry up the rear case around the perimeter of the Evo.

    Спросите у FixBot

    Добавить комментарий

  2. HTC Evo 4G Front Panel Replacement: шаг 2, изображение 1 из 1
    • Lift the rear panel off of the inner rear frame.

    Спросите у FixBot

    Добавить комментарий

  3. HTC Evo 4G Front Panel Replacement, Battery: шаг 3, изображение 1 из 2 HTC Evo 4G Front Panel Replacement, Battery: шаг 3, изображение 2 из 2
    • Using the tip of your finger, lift the battery from the end closest to the camera.

    • Remove the battery from the rear inner frame.

    Спросите у FixBot

    Добавить комментарий

  4. HTC Evo 4G Front Panel Replacement, MicroSD card: шаг 4, изображение 1 из 1
    • Use the flat end of a spudger to pry up the red MicroSD retainer attached to the inner frame.

    • The retainer will move about 1 mm and stop. Do not attempt to completely remove the MicroSD card retainer.

    Спросите у FixBot

    Добавить комментарий

  5. HTC Evo 4G Front Panel Replacement: шаг 5, изображение 1 из 1
    Инструмент, используемый на этом этапе:
    Tweezers
    $4.99
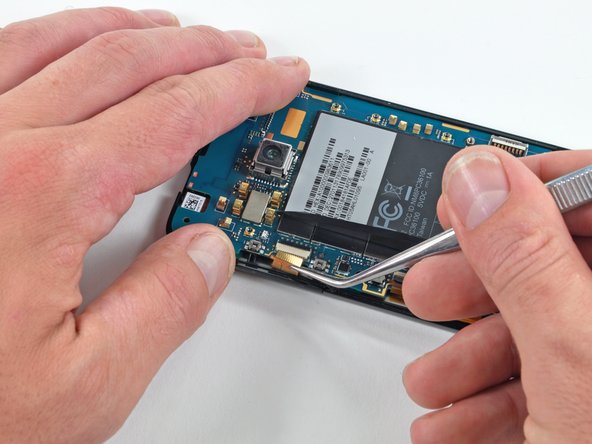
    • Use a pair of tweezers to carefully pull the MicroSD card out of its slot in the inner rear frame.

    Спросите у FixBot

    Добавить комментарий

  6. HTC Evo 4G Front Panel Replacement, Rear Inner Frame: шаг 6, изображение 1 из 1
    • Remove six T5 Torx screws securing the rear inner frame to the inner case.

    Спросите у FixBot

    Добавить комментарий

  7. HTC Evo 4G Front Panel Replacement: шаг 7, изображение 1 из 1
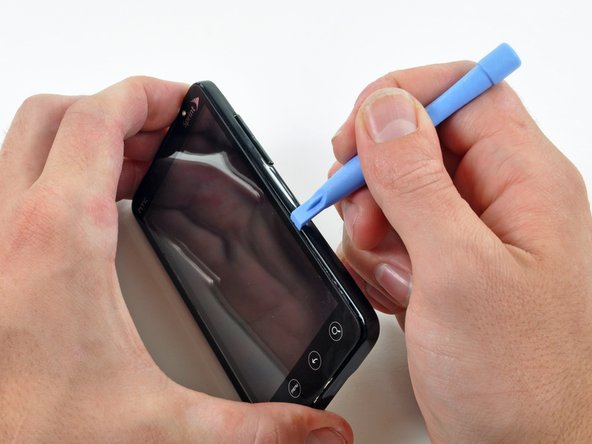
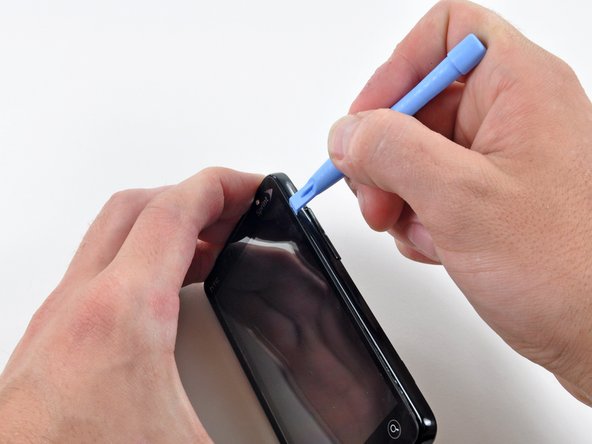
    • Gently insert an iPod opening tool between the rear inner frame and its plastic surround near the Micro HDMI port.

    • Carefully pry the top edge of the rear inner frame away from the front surround of the Evo.

    Спросите у FixBot

    Добавить комментарий

  8. HTC Evo 4G Front Panel Replacement: шаг 8, изображение 1 из 2 HTC Evo 4G Front Panel Replacement: шаг 8, изображение 2 из 2
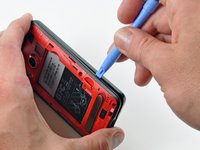
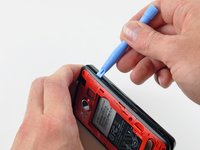
    • Insert the iPod opening tool between the rear inner frame and its plastic surround and pry up at several points along the left edge of the Evo.

    Спросите у FixBot

    Добавить комментарий

  9. HTC Evo 4G Front Panel Replacement: шаг 9, изображение 1 из 3 HTC Evo 4G Front Panel Replacement: шаг 9, изображение 2 из 3 HTC Evo 4G Front Panel Replacement: шаг 9, изображение 3 из 3
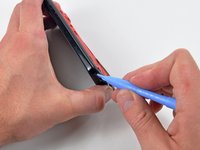
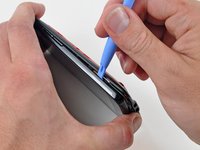
    • Continue the prying procedure, now focusing on detaching the plastic surround from the bottom of the Evo.

    • Pry up the rear inner frame along the right edge using the method described in previous steps.

    • Eventually work around the entire perimeter of the rear inner frame until it is lifted slightly from the inner case.

    Спросите у FixBot

    Добавить комментарий

  10. HTC Evo 4G Front Panel Replacement: шаг 10, изображение 1 из 1
    • Remove the rear inner frame from the rest of the Evo.

    Спросите у FixBot

    Добавить комментарий

  11. HTC Evo 4G Front Panel Replacement, Motherboard: шаг 11, изображение 1 из 1
    • Remove the single Phillips screw securing the motherboard to the inner case near the headphone jack.

    Спросите у FixBot

    Добавить комментарий

  12. HTC Evo 4G Front Panel Replacement: шаг 12, изображение 1 из 1
    • Use the flat end of a spudger to pry the motherboard off the posts securing it to the metal display tray.

    • Do not try to completely remove the motherboard just yet. It is still attached by three ribbon cables.

    Спросите у FixBot

    Добавить комментарий

  13. HTC Evo 4G Front Panel Replacement: шаг 13, изображение 1 из 1
    • Carefully peel the device information sticker off the left edge of the motherboard and EMI shield to reveal three connectors covered with tape.

    • It is not necessary to peel the entire device information sticker off the EMI shield.

    Спросите у FixBot

    Добавить комментарий

  14. HTC Evo 4G Front Panel Replacement: шаг 14, изображение 1 из 1
    • Fold the device information sticker up against the top of the motherboard to keep it out of the way while you work.

    • Remove the pieces of tape covering the following ribbon cables:

    • Front-facing camera

    • Front panel ribbon cable

    • Display ribbon cable

    Спросите у FixBot

    Добавить комментарий

  15. HTC Evo 4G Front Panel Replacement: шаг 15, изображение 1 из 2 HTC Evo 4G Front Panel Replacement: шаг 15, изображение 2 из 2
    Инструмент, используемый на этом этапе:
    Tweezers
    $4.99
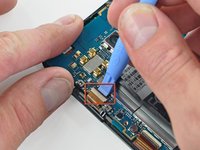
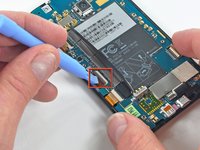
    • Using the tip of an iPod opening tool, flip up the front-facing camera ribbon cable retaining flap.

    • Be very careful and gentle with these flaps. They are very easy to break or dislodge and equally difficult to reinstall.

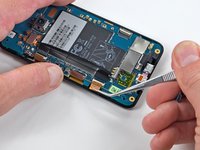
    • Use a pair of tweezers to pull the front-facing camera ribbon cable straight out of its socket.

    Спросите у FixBot

    Добавить комментарий

  16. HTC Evo 4G Front Panel Replacement: шаг 16, изображение 1 из 2 HTC Evo 4G Front Panel Replacement: шаг 16, изображение 2 из 2
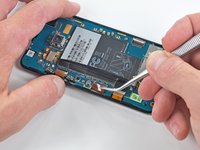
    • Using the tip of an iPod opening tool, flip up the front panel ribbon cable retaining flap.

    • Use a pair of tweezers to pull the front panel ribbon cable straight out of its socket.

    Спросите у FixBot

    Добавить комментарий

  17. HTC Evo 4G Front Panel Replacement: шаг 17, изображение 1 из 2 HTC Evo 4G Front Panel Replacement: шаг 17, изображение 2 из 2
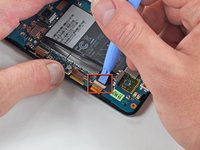
    • Using the tip of an iPod opening tool, flip up the display ribbon cable retaining flap.

    • Grasp the display ribbon cable with a pair of tweezers and pull it straight out of its socket.

    Спросите у FixBot

    Добавить комментарий

  18. HTC Evo 4G Front Panel Replacement: шаг 18, изображение 1 из 1
    • Carefully lift the motherboard out of the inner case, minding any cables that may get caught.

    • Be mindful of the top power button and side rocker switch, which may fall out of the front case when the board is removed.

    Спросите у FixBot

    Добавить комментарий

  19. HTC Evo 4G Front Panel Replacement, Front Facing Camera: шаг 19, изображение 1 из 1
    • Gently lift the front-facing camera out of its recess in the inner case and remove it from the Evo.

    Спросите у FixBot

    Добавить комментарий

  20. HTC Evo 4G Front Panel Replacement, Front Panel: шаг 20, изображение 1 из 1
    • In the following steps, you will use a heat gun to soften the adhesive securing the outer black border around the underside of the front glass panel to the inner case.

    • With the heat gun set to low, start by heating the outer black border near the upper left corner of the glass panel.

    • Try not to excessively heat the outer plastic edge of the Evo.

    • Due to the heat applied, it is normal for a layer of condensation to develop on the inside of the glass panel and/or the outside of the LCD. It can be removed with glass cleaner once the glass is separated from the display.

    Спросите у FixBot

    Добавить комментарий

  21. HTC Evo 4G Front Panel Replacement: шаг 21, изображение 1 из 1
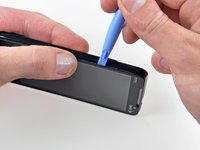
    • Gently insert an iPod opening tool between the glass front panel and its plastic surround near the upper top left corner of the Evo.

    • Carefully pry up the glass, being careful not to bend it excessively.

    • The key is to work slowly and gently to avoid breaking internal components.

    Спросите у FixBot

    Добавить комментарий

  22. HTC Evo 4G Front Panel Replacement: шаг 22, изображение 1 из 1
    • Use a heat gun to soften the adhesive along the left side of the front glass panel.

    Спросите у FixBot

    Добавить комментарий

  23. HTC Evo 4G Front Panel Replacement: шаг 23, изображение 1 из 2 HTC Evo 4G Front Panel Replacement: шаг 23, изображение 2 из 2
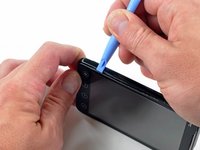
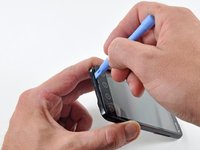
    • Insert the iPod opening tool between the front panel and its plastic surround and pry up at several points along the left edge of the Evo.

    Спросите у FixBot

    Добавить комментарий

  24. HTC Evo 4G Front Panel Replacement: шаг 24, изображение 1 из 2 HTC Evo 4G Front Panel Replacement: шаг 24, изображение 2 из 2
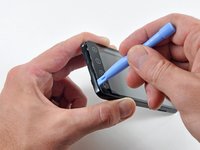
    • Continue the heating and prying procedure, now focusing on detaching the bottom of the front panel from the plastic surround.

    • Pry along the bottom edge of the Evo to further separate the front panel from the rest of the device.

    Спросите у FixBot

    Добавить комментарий

  25. HTC Evo 4G Front Panel Replacement: шаг 25, изображение 1 из 1
    • Use a heat gun to soften the adhesive along the right side of the front glass panel.

    Спросите у FixBot

    Добавить комментарий

  26. HTC Evo 4G Front Panel Replacement: шаг 26, изображение 1 из 3 HTC Evo 4G Front Panel Replacement: шаг 26, изображение 2 из 3 HTC Evo 4G Front Panel Replacement: шаг 26, изображение 3 из 3
    • Pry up the front panel along the right edge using the method described in previous steps.

    • Eventually work around the entire perimeter of the front panel until it is lifted slightly from the inner case.

    • Don't try to completely remove the front panel just yet. Its ribbon cable is still attached to the inner case.

    Спросите у FixBot

    Добавить комментарий

  27. HTC Evo 4G Front Panel Replacement: шаг 27, изображение 1 из 1
    • Peel the front panel ribbon cable off the adhesive securing it to the metal underside of the inner case.

    Спросите у FixBot

    Добавить комментарий

  28. HTC Evo 4G Front Panel Replacement: шаг 28, изображение 1 из 2 HTC Evo 4G Front Panel Replacement: шаг 28, изображение 2 из 2
    • Lift the front panel out of the inner case, minding the cable still routed through the bottom of the Evo.

    • Carefully de-route the front panel ribbon cable through the slot in the inner case.

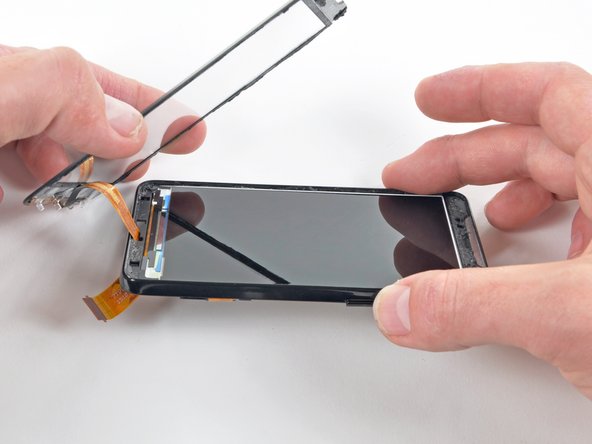
    • Remove the front panel.

    • Notice the four (4) clear plastic hooks that are adhered behind the menu buttons. Look closely. Each one is shaped differently and in a particular orientation.

    • If the replacement front panel does not have these installed already, carefully remove and transfer them from the old panel to the replacement.

    Спросите у FixBot

    Добавить комментарий

Заключение

To reassemble your device, follow these instructions in reverse order.

Отменить: Я не выполнил это руководство.

65 человек успешно провели ремонт по этому руководству.

0 Комментарии к руководству

Добавить комментарий

Статистика просмотров:

За последние 24 часов: 1

За последние 7 дней: 6

За последние 30 дней: 30

За всё время: 122,988