Перейти к основному содержанию
Присоединяйся к сообществу ремонтников - Создай аккаунт
Hover-1 Nomad Battery Replacement

Выберете то, что вам нужно

    1. Hover-1 Nomad Battery Replacement, Outer Shell: шаг 1, изображение 1 из 3 Hover-1 Nomad Battery Replacement, Outer Shell: шаг 1, изображение 2 из 3 Hover-1 Nomad Battery Replacement, Outer Shell: шаг 1, изображение 3 из 3
      • Break the two warranty stickers by poking a screwdriver through them or peeling them off.

      • Remove the following twenty screws by rotating the screwdriver counterclockwise:

      • Eight 16.2mm Phillips #2 screws

      • Eight 15mm Phillips #2 screws

      • Four 19.1mm Phillips #2 screws

      • The holes containing most of the screws are deep and narrow. A screwdriver with interchangable bits will not be able to reach them.

      • Do not over-tighten the screws during reassembly. Over-tightened screws can crack the plastic channels holding the shell to the frame of the hoverboard.

      Спросите у FixBot

      Добавить комментарий

    2. Hover-1 Nomad Battery Replacement: шаг 2, изображение 1 из 3 Hover-1 Nomad Battery Replacement: шаг 2, изображение 2 из 3 Hover-1 Nomad Battery Replacement: шаг 2, изображение 3 из 3
      • Use a nylon spudger to pry the metal handle away from the outer shell.

      • Rotate the metal handle toward the center of the hoverboard to unlock the plate from the retaining clips.

      • Lift the hoverboard off the metal handle.

      • Repeat for the handle on the other side of the hoverboard.

      Спросите у FixBot

      Добавить комментарий

    3. Hover-1 Nomad Battery Replacement: шаг 3, изображение 1 из 1
      • Lift the plastic cover on each side up and away from the device.

      • Multiple wires connect the circuit boards to the outer shell. Remove the shell gently to avoid damaging the wires or components.

      Спросите у FixBot

      Добавить комментарий

    4. Hover-1 Nomad Battery Replacement: шаг 4, изображение 1 из 2 Hover-1 Nomad Battery Replacement: шаг 4, изображение 2 из 2
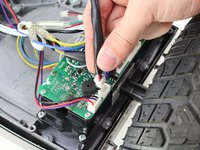
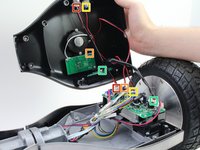
      • Disconnect the following wires by pinching the connector tabs and pulling the plugs out of the connectors:

      • Charging port wires

      • Speaker assembly wires

      • Power button wires

      • Headlight wires

      • Only the headlight wires need to be disconnected from the other circuit board.

      • Ensure the wires are connected to the correct ports on the circuit board during reassembly.

      Спросите у FixBot

      Добавить комментарий

    1. Hover-1 Nomad Battery Replacement, Gyroscope Sensor Boards: шаг 5, изображение 1 из 1
      • Cut the two zip ties around the bundle of wires with cutting pliers.

      • The zip tie is secured tightly around the wires. Be careful not to nick or cut any of the wires while removing the zip tie.

      • Do not puncture or cut the lithium-ion battery. Especially with a battery this large, the battery can catch fire or explode if damaged.

      Спросите у FixBot

      Добавить комментарий

    2. Hover-1 Nomad Battery Replacement: шаг 6, изображение 1 из 2 Hover-1 Nomad Battery Replacement: шаг 6, изображение 2 из 2
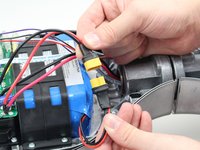
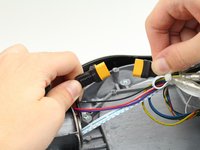
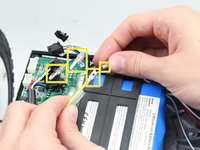
      • Disconnect the circuit boards from the battery by pulling both battery connectors apart.

      Спросите у FixBot

      Добавить комментарий

    3. Hover-1 Nomad Battery Replacement: шаг 7, изображение 1 из 3 Hover-1 Nomad Battery Replacement: шаг 7, изображение 2 из 3 Hover-1 Nomad Battery Replacement: шаг 7, изображение 3 из 3
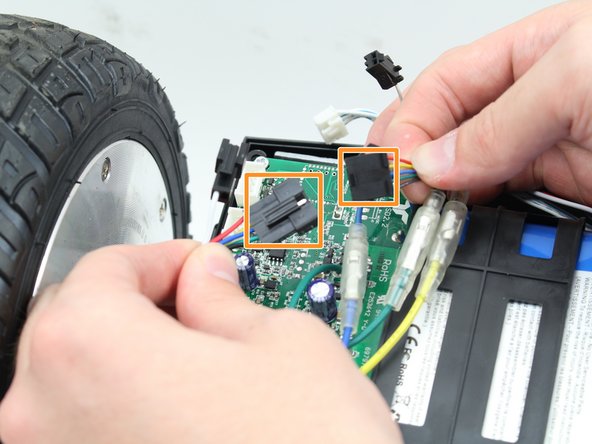
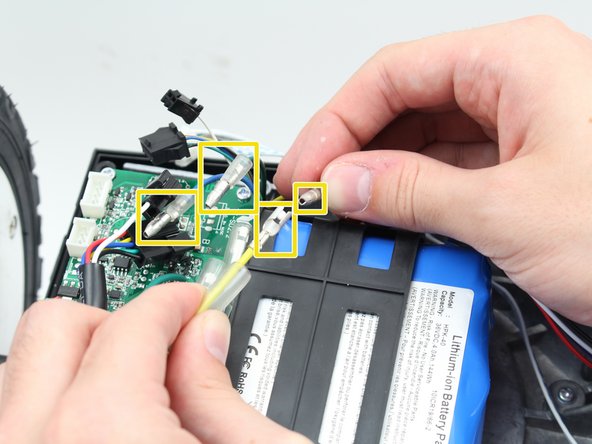
      • Disconnect the following wires connecting the circuit boards to the sensors and motors:

      • Disconnect the white connectors by pinching the tab and pulling up on the connectors.

      • Disconnect the black connectors by pulling the two sides apart.

      • Disconnect the green, yellow, and blue cables by pulling back the plastic shielding and pulling the ends apart.

      Спросите у FixBot

      Добавить комментарий

    4. Hover-1 Nomad Battery Replacement: шаг 8, изображение 1 из 1
      • Remove the four 14mm Phillips #1 screws in the corners of each circuit board by turning the screwdriver counterclockwise.

      Спросите у FixBot

      Добавить комментарий

    5. Hover-1 Nomad Battery Replacement: шаг 9, изображение 1 из 1
      • Remove the circuit board by pulling it up and out of the hoverboard.

      Спросите у FixBot

      Добавить комментарий

    1. Hover-1 Nomad Battery Replacement, Battery: шаг 10, изображение 1 из 2 Hover-1 Nomad Battery Replacement, Battery: шаг 10, изображение 2 из 2
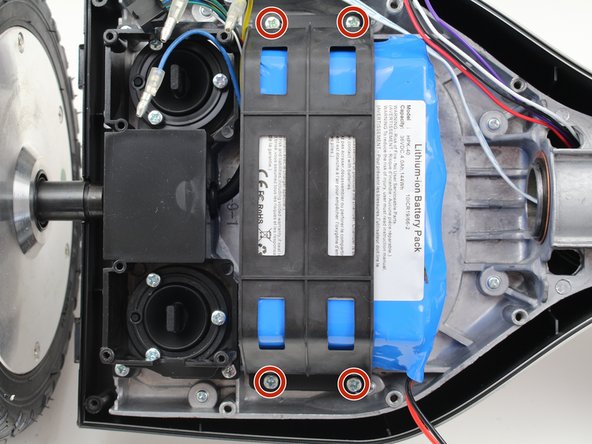
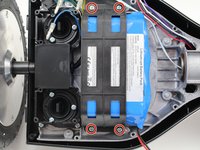
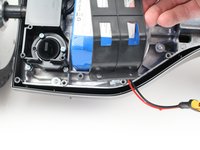
      • Remove the four 15mm screws from the battery cage with a Phillips #2 screwdriver.

      • Do not puncture or cut the lithium-ion battery. Especially with a battery this large, the battery can catch fire or explode if damaged.

      Спросите у FixBot

      Добавить комментарий

    2. Hover-1 Nomad Battery Replacement: шаг 11, изображение 1 из 2 Hover-1 Nomad Battery Replacement: шаг 11, изображение 2 из 2
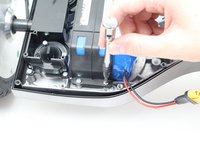
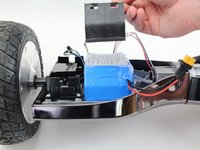
      • Lift the battery cage up and off the battery.

      Спросите у FixBot

      Добавить комментарий

    3. Hover-1 Nomad Battery Replacement: шаг 12, изображение 1 из 1
      • Remove the battery by lifting it off the hoverboard frame.

      • The battery is attached to the frame with an adhesive strip. It can be removed by hand with some force.

      Спросите у FixBot

      Добавить комментарий

Заключение

To reassemble your device, follow these instructions in reverse order.

Отменить: Я не выполнил это руководство.

Еще один человек закончил это руководство.

Samuel Frazee

Участник с: 10/08/18

1 015 Репутация

Автор 7 руководств

Команда

Cal Poly, Team S15-G1, White Fall 2018 Участник Cal Poly, Team S15-G1, White Fall 2018

CPSU-WHITE-F18S15G1

4 членов

Автор 7 руководств

0 Комментарии к руководству

Добавить комментарий

Статистика просмотров:

За последние 24 часов: 1

За последние 7 дней: 8

За последние 30 дней: 42

За всё время: 1,853