Введение
Follow this guide if you need to replace the fan in your Lenovo Thinkpad T560 laptop (model 43025).
The fan blows air inside the laptop to cool off several internal components. If the fan is too dirty or some parts of the fan have worn out, then the fan will not blow air efficiently, which will cause your laptop to overheat. Removing and/or replacing the fan may be necessary if your laptop is overheating or if the fan is noisy.
For troubleshooting information related to your laptop overheating, go to the troubleshooting page.
Before replacing the fan, make sure to turn off your laptop and disconnect from the power adapter.
Выберете то, что вам нужно
-
-
-
Using the Phillips #0 screwdriver, remove the eight 7 mm screws holding the back panel to the T560.
 Спросите у FixBot
-
-
-
Use the iFixit opening tool to pry the back panel off your T560.
-
Work your way around the perimeter of the device to undo the clips and detach the back panel.
-
-
-
-
-
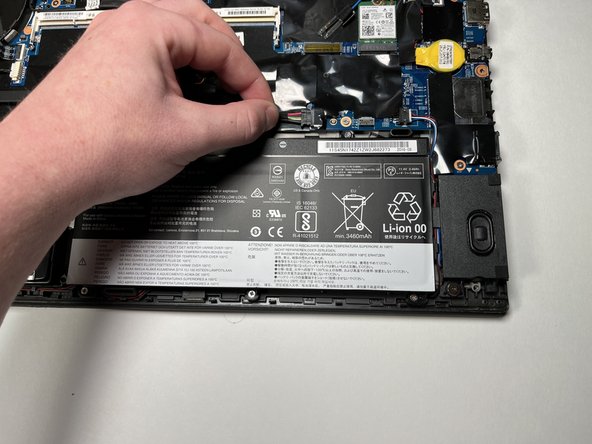
Disconnect the battery connector from the motherboard by pulling it out of the port.
-
-
-
-
Using the Phillips #0 screwdriver, remove the five 3.5 mm screws securing the battery.
-
Remove the battery.
-
-
-
-
-
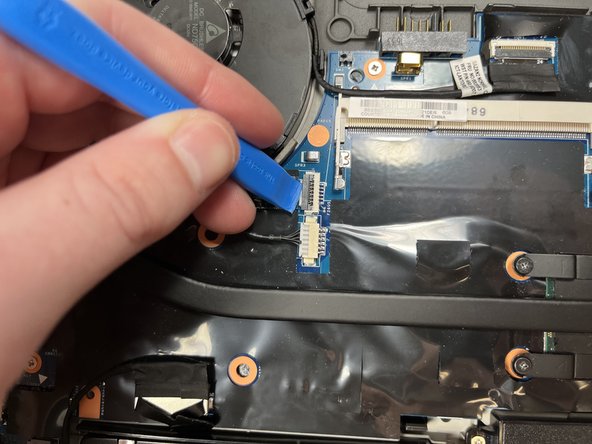
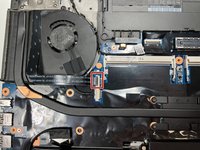
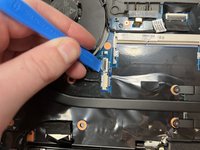
Using the iFixit opening tool, unlatch the power button's connection to the motherboard.
-
Remove the ribbon cable from the connector.
-
-
-
Using the Phillips #0 screwdriver, remove the four 3.5 mm screws securing the heatsink.
-
-
-
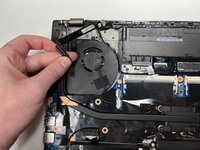
Using the Phillips #0 screwdriver, unscrew the 3.5mm screw securing the fan to the case.
-
Remove the fan and conjoined heatsink.
-
-







To reassemble your device, follow these instructions in reverse order.

Команда

Clemson, Team 1-3, Hunter Spring 2022 Участник Clemson, Team 1-3, Hunter Spring 2022
CLEM-HUNTER-S22S1G3
5 членов
Автор 44 руководств
