Введение
If the screen on your OnePlus 6 is cracked, shattered, or otherwise damaged, this guide will demonstrate how to replace it and get your phone back to its former glory.
If your display is badly cracked, covering it with a layer of clear packing tape may allow the suction cup to adhere. Alternatively, very strong tape may be used instead of the suction cup. If all else fails, you can superglue the suction cup to the broken screen.
Discharge your battery to at least 25% capacity and turn off your device before beginning.
Выберете то, что вам нужно
-
-
Turn on the heat gun to a low heat and and gently heat the curved edges on the back of the phone.
-
Wedge the opening picks between the front and back panel and slide them around the perimeter to break the adhesive securing the back cover.
-
Repeat until the back panel is fully released.
 Спросите у FixBot
-
-
-
Gently lift up the back panel, with care not to damage the fingerprint sensor ribbon cable.
-
-
Инструмент, используемый на этом этапе:Tweezers$4.99
-
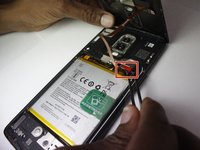
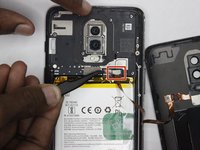
Use a pair of tweezers to gently pull up on the red tab and disconnect the cable from the device.
-
Completely remove the back panel from the device.
-
-
-
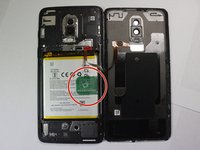
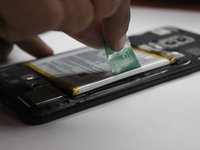
Grip the green tab connected to the battery and pull the battery directly up and out.
-
-
-
Use a Phillips #000 screwdriver to remove the eight screws.
-
Carefully lift the speaker up and out of the chassis.
-
-
-
-
Properly orient the new speaker unit and use a Phillips #000 screwdriver to replace the eight screws removed from the previous step.
-
-
-
Place the battery back into the phone and connect it to the same port, making sure to firmly press the connection down into place.
-
Place the red cover back over the top of the port.
-
-
-
Strip the existing adhesive, and place new adhesive around the entire perimeter of the back cover.
-
Replace the back cover and hold it down for about a minute to to let the adhesive set.
-
-
Инструмент, используемый на этом этапе:Tweezers$4.99
-
Use tweezers to gently pull away the tab securing the audio jack to the speaker assembly.
-
-
-
After removing the band, gently lift the audio jack out of the phone.
-
-
-
Remove the white and black leads by gently lifting them up with tweezers.
-
Lift the band connector on the left side of the assembly up with tweezers to disconnect it.
-
Lift the band connector at the top of the assembly up with tweezers to disconnect it.
-
-
-
Using tweezers, lift the circuit board from the assembly and remove it.
-
-
-
Use a heat gun set to its lowest temperature, gently heat the perimeter of the screen to loosen the adhesive.
-
Wedge an opening pick between the screen and the chassis, then slide it around the entire perimeter of the screen to break the adhesive.
-
Gently pry the screen away from the chassis.
-
-
-
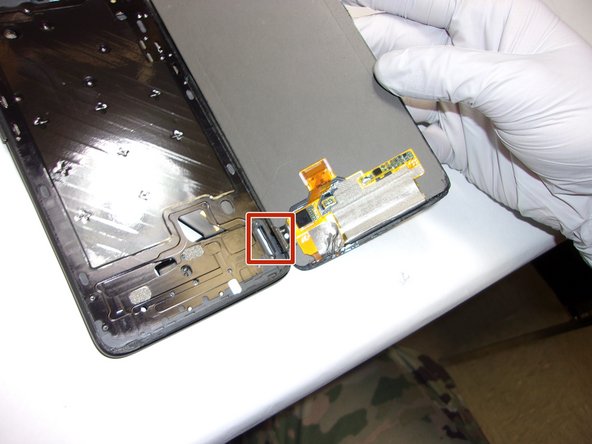
After gently prying the screen from the frame, carefully thread the tab through the bracket to remove the screen from the phone.
-






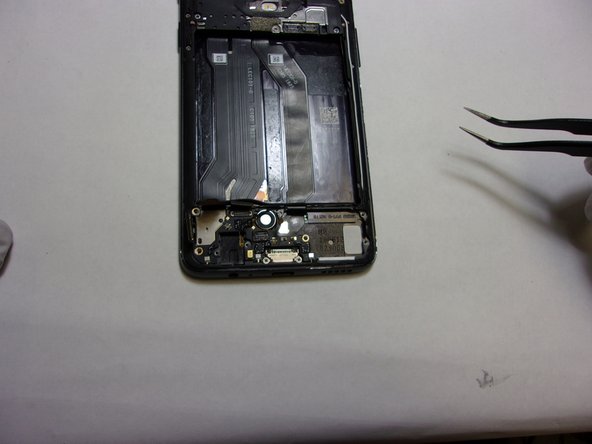


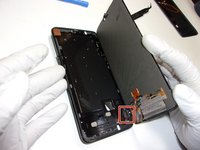
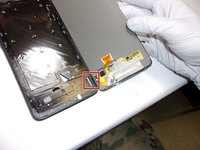
To reassemble your device, follow these instructions in reverse order.
Отменить: Я не выполнил это руководство.
4 человек успешно провели ремонт по этому руководству.

Команда

The Citadel Military College of South Carolina, Team 7-8, Eggleston Spring 2022 Участник The Citadel Military College of South Carolina, Team 7-8, Eggleston Spring 2022
CMCSC-EGGLESTON-S22S7G8
3 членов
Автор 6 руководств
2 Комментарии к руководству
Works great, thank you very much. I changed the microphone with this instruction.
Hi there!
The screen replacement works great with this howto.
But - sadly - my phone is now experiencing a huge battery drain. When fully charged it's dead after almost 6 ours. Also the fingerprint-reader is just working when the screen is on.
Does anyone has an idea howto solve this issues?
Thanks in advance!
