Перейти к основному содержанию
Присоединяйся к сообществу ремонтников - Создай аккаунт

Palm Zire m150 Control Button Replacement

Выберете то, что вам нужно

  1. Palm Zire m150 Control Button Replacement, Control Button: шаг 1, изображение 1 из 2 Palm Zire m150 Control Button Replacement, Control Button: шаг 1, изображение 2 из 2
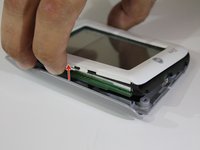
    • Lift up the flap on the Palm Zire M150.

    • For the purpose of this guide and being able to see clearly, we removed the flap completely. You can keep your flap on if you wish.

    • If you wish to remove it, gently lift up on the flap and pull horizontally. It should come off without an issue.

    Спросите у FixBot

    Добавить комментарий

  2. Palm Zire m150 Control Button Replacement: шаг 2, изображение 1 из 1
    • Take the screwdriver from the IFixit toolkit and use the T6 bit. Unscrew the the top two 3mm screws above where the flap was connected to the device.

    Спросите у FixBot

    Добавить комментарий

  3. Palm Zire m150 Control Button Replacement: шаг 3, изображение 1 из 2 Palm Zire m150 Control Button Replacement: шаг 3, изображение 2 из 2
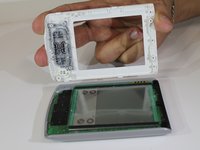
    • Gently pull the top half and bottom half off the device apart using both hands so that it looks like the second photo.

    • You can use your finger nails to pry apart the top half and the bottom half of the device. If that doesn't work, use the opening picks from the toolkit.

    Спросите у FixBot

    Добавить комментарий

  4. Palm Zire m150 Control Button Replacement: шаг 4, изображение 1 из 1
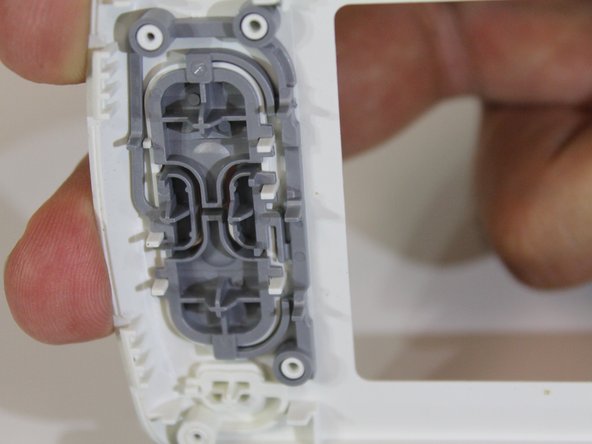
    • This is the button that you are going to be replacing. Grab the grey button and pull it apart from the device.

    • If you are not replacing the button and you are just cleaning it, make sure you are gentle when you pull it from the device so that you don't break the button.

    • You can use compressed air to clean them or an alcohol wipe.

    Спросите у FixBot

    Добавить комментарий

  5. Palm Zire m150 Control Button Replacement: шаг 5, изображение 1 из 1
    • The button is now off of the device. If you are cleaning it, use the compressed air or the alcohol wipe.

    • If installing a new button, throw away the one you just took off and snap the new one back on the white piece.

    Спросите у FixBot

    Добавить комментарий

Заключение

To reassemble your device, follow these instructions in reverse order.

Отменить: Я не выполнил это руководство.

Еще один человек закончил это руководство.

Kate

Участник с: 01/26/16

528 Репутация

Автор 5 руководств

Команда

USF Sarasota-Manatee, Team 1-3, Stewart Spring 2016 Участник USF Sarasota-Manatee, Team 1-3, Stewart Spring 2016

USFSM-STEWART-S16S1G3

5 членов

Автор 7 руководств

1 Комментарий к руководству

Kate what hairy arms you have lol

Jimfixer - Ответить Поделиться

Добавить комментарий

Статистика просмотров:

За последние 24 часов: 0

За последние 7 дней: 8

За последние 30 дней: 36

За всё время: 795