Введение
Follow this guide to replace the battery and frame assembly on your Samsung Tab S7+ 5G with a genuine Samsung part.
Note: this guide is for the 5G version. For the Wi-Fi version, click here.
This guide is written for the genuine Samsung battery and frame assembly. The assembly consists of frame with the battery pre-installed in it. Be sure you have the right part before you begin the repair.
In order to replace the battery and frame assembly, you must remove the screen. The screen has sensitive components, so there's a risk you'll damage it during the procedure. Be sure to apply plenty of heat and be extremely careful during the prying stage.
Before you begin, refer to the Samsung Self-Repair document for safety information.
If your battery is swollen, take appropriate precautions. Before disassembling your device, completely discharge the battery. This reduces the risk of a dangerous thermal event if the battery is accidentally damaged during the repair.
Note: Retaining water resistance after the repair will depend on how well you reapply the adhesive, but your device will lose its IP (Ingress Protection) rating.
Выберете то, что вам нужно
-
-
Apply a heated iOpener to the bottom edge of the device for three minutes to loosen the adhesive underneath.
-
-
-
There's a long circuit board attached to the screen that sits parallel to the bottom edge.
-
This image shows an example of a damaged display separating from the glass panel.
-
-
-
Once the screen is warm to touch, apply a suction handle to the bottom edge of the screen and as close to the edge as possible.
-
Lift the screen with the suction handle to create a small gap between the screen and the frame.
-
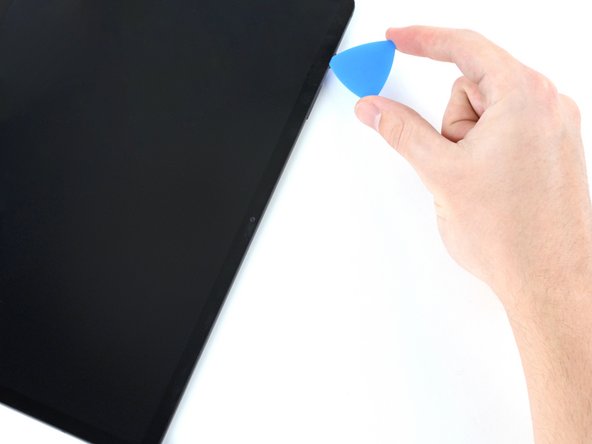
Insert an opening pick into the gap between the frame and the screen.
-
Leave the opening pick in place to prevent the adhesive from resealing.
-
-
-
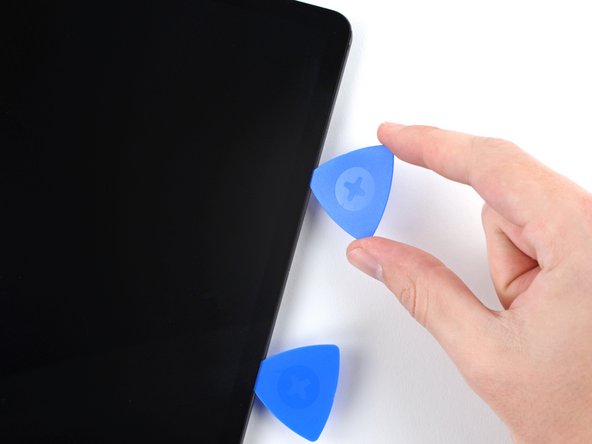
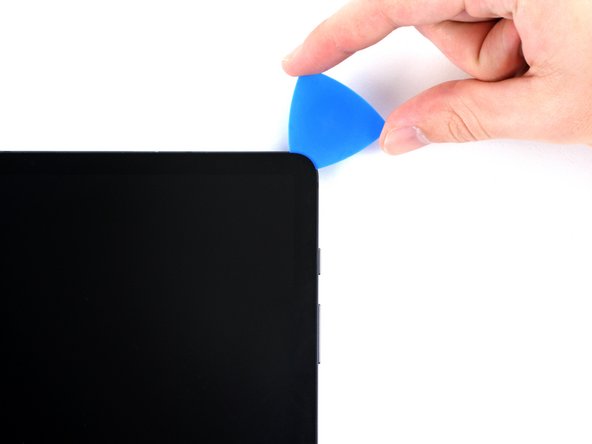
Insert a new opening pick into the gap you created.
-
Slide the new pick along the bottom edge of the device towards the bottom-right corner.
-
-
-
Apply a heated iOpener to the right edge of the device for two minutes to loosen the adhesive underneath.
-
-
-
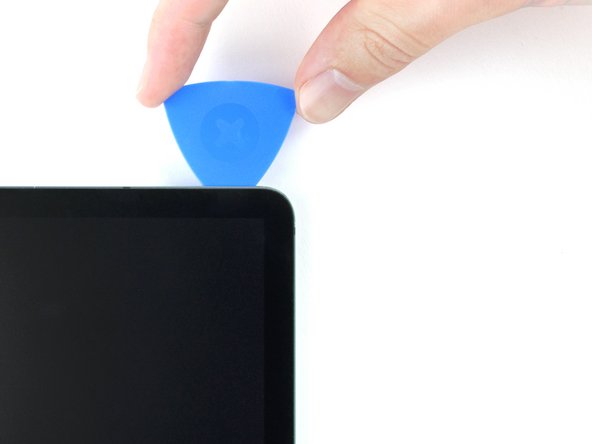
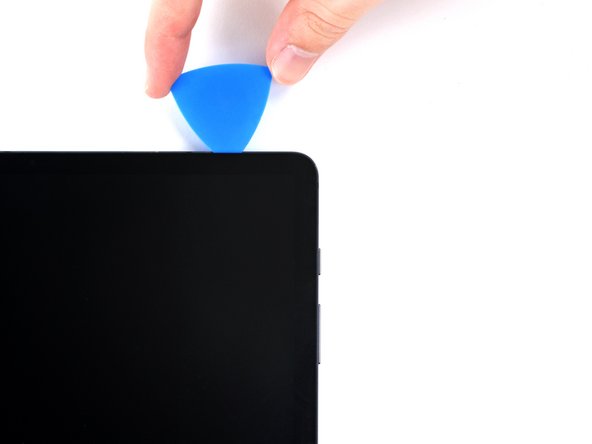
Rotate the opening pick around the bottom-right corner of the device.
-
Leave the opening pick in place to prevent the adhesive from resealing.
-
-
-
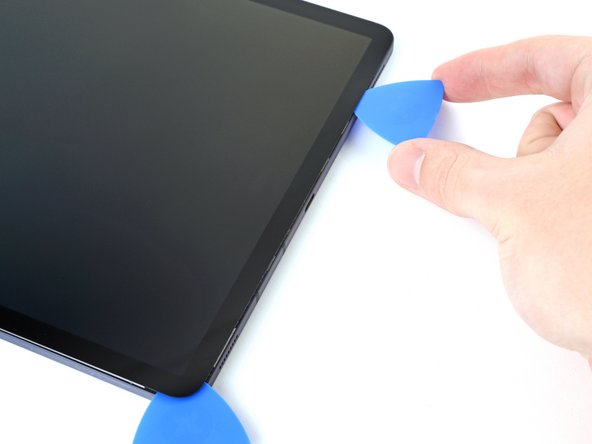
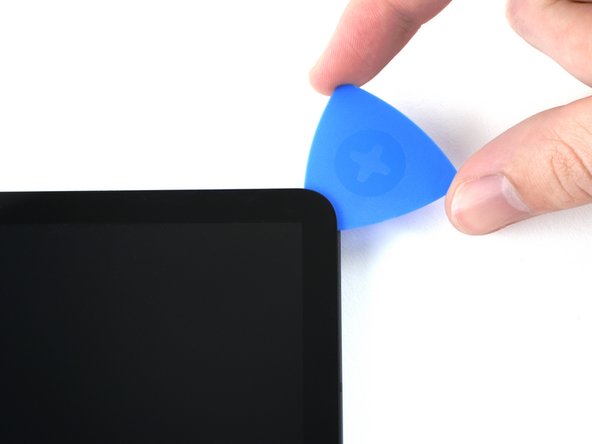
Insert a new opening pick into the gap you created at the bottom right corner.
-
Slide the new pick along the right edge of the device towards the top-right corner.
-
-
-
Apply a heated iOpener to the top edge of the device for two minutes to loosen the adhesive underneath.
-
-
-
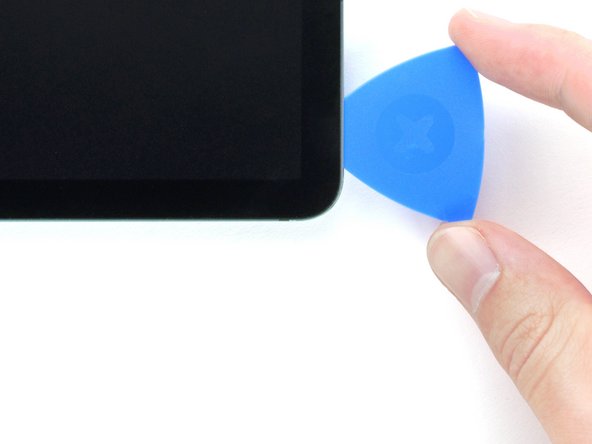
Rotate the opening pick around the top-right corner of the device.
-
Leave the opening pick in place to prevent the adhesive from resealing.
-
-
-
Insert a new opening pick into the gap you created.
-
Slide the new pick along the top edge of the device towards the top-left corner.
-
-
-
Apply a heated iOpener to the left edge of the device to loosen the adhesive underneath.
-
-
-
Rotate the opening pick around the top-left corner of the device.
-
Leave the opening pick in place to prevent the adhesive from resealing.
-
-
-
Insert a new opening pick into the gap you created.
-
Slide the new pick along the left edge of the device towards the bottom-left corner.
-
-
-
Rotate the opening pick around the bottom-left corner of the device.
-
Leave the opening pick in place to prevent the adhesive from resealing.
-
-
-
With the top of the device facing you, lift the bottom edge of the screen up and away from you like you're opening a book.
-
Rest the screen upside down before continuing.
-
This is a good point to power on your tablet and test all functions before sealing it up. Be sure to power your tablet back down completely before you continue working.
-
Remove any adhesive chunks with a pair of tweezers or your fingers. Use some high concentration (over 90%) isopropyl alcohol to wipe away any adhesive residue.
-
If you're using Samsung custom-cut adhesives, follow this guide. If you're using double-sided tape, follow this guide.
-
-
-
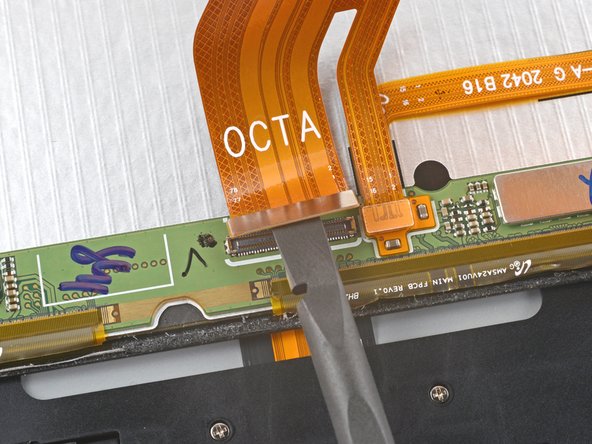
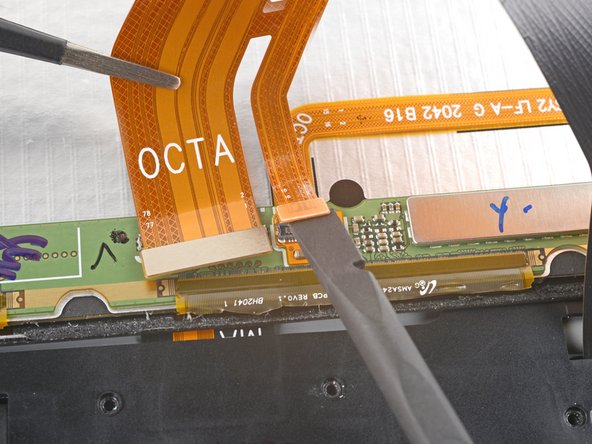
Use the flat end of a spudger to pry up and disconnect the display cable's press connector from the back of the screen.
-
-
-
Use tweezers, or your fingers, to hold the display cable in place.
-
Use the flat end of a spudger to pry up and disconnect the fingerprint sensor's press connector attached to the display cable.
-
-
-
Use a Phillips #00 screwdriver to remove the fifty 3 mm-long screws securing the frame bracket to the frame.
-
Bottom-left = 9 screws
-
Bottom-right = 14 screws
-
Top-right = 12 screws
-
Top-left = 15 screws
-
-
-
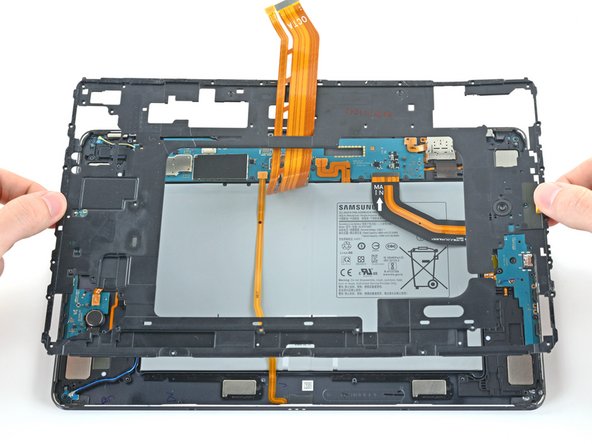
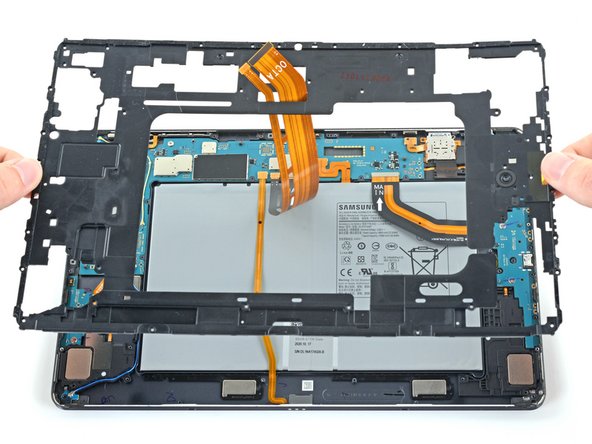
Lift the frame bracket away from the frame, making sure to thread the display cable through its slot.
-
-
-
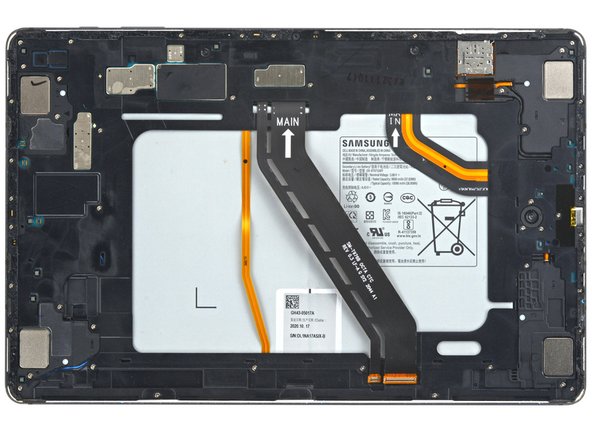
Use the flat end of a spudger to pry up and disconnect the battery's press connector from the motherboard.
-
-
-
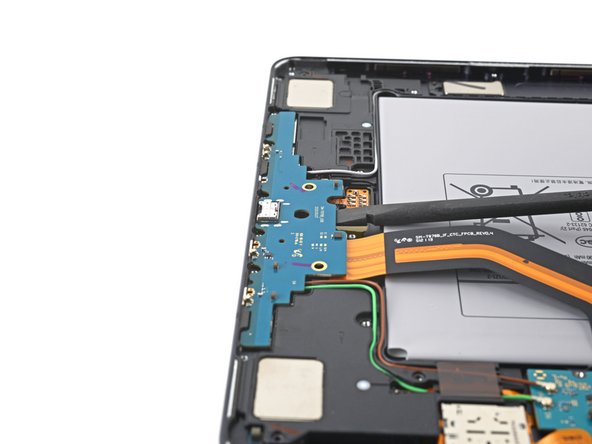
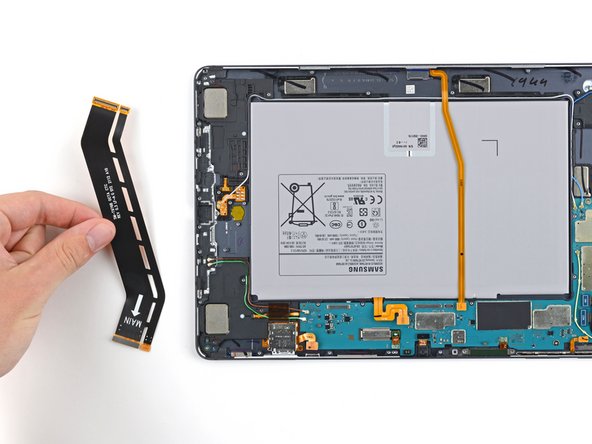
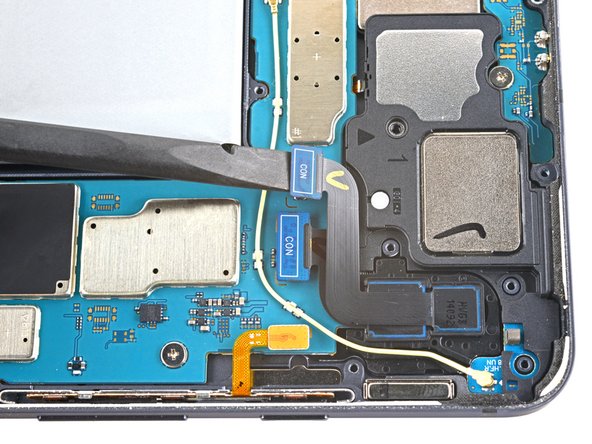
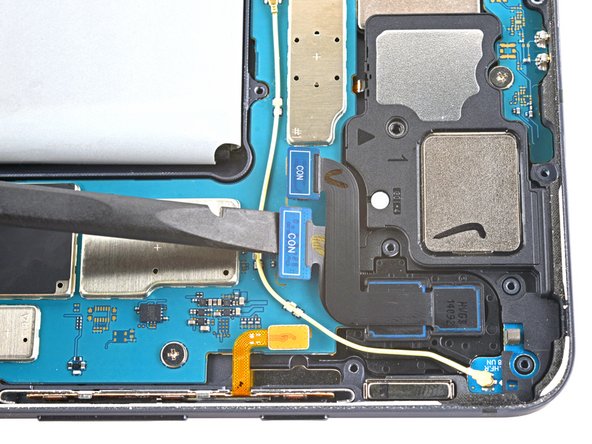
Use the flat end of a spudger to pry up and disconnect the daughterboard interconnect cable's press connector from the motherboard.
-
-
-
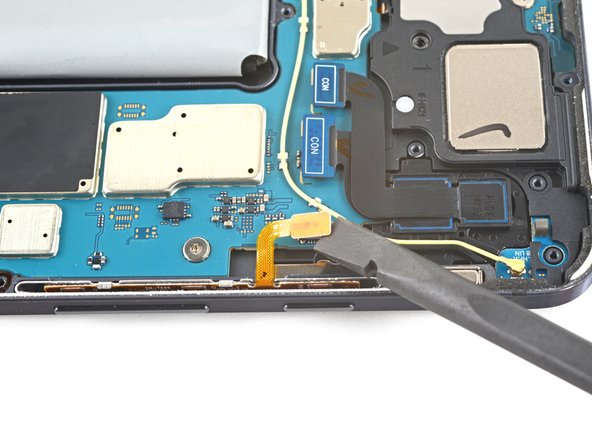
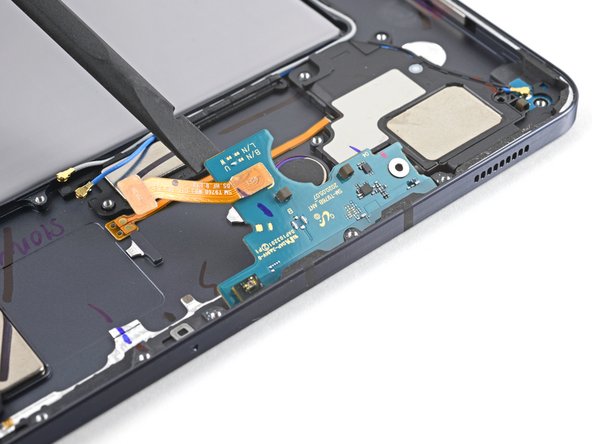
Use a Phillips #00 screwdriver to remove the two 2 mm screws securing the charging daughterboard to the frame.
-
-
-
Insert a spudger between the charging daughterboard and the frame.
-
Pry up with the spudger to release the clips securing the charging daughterboard.
-
-
-
-
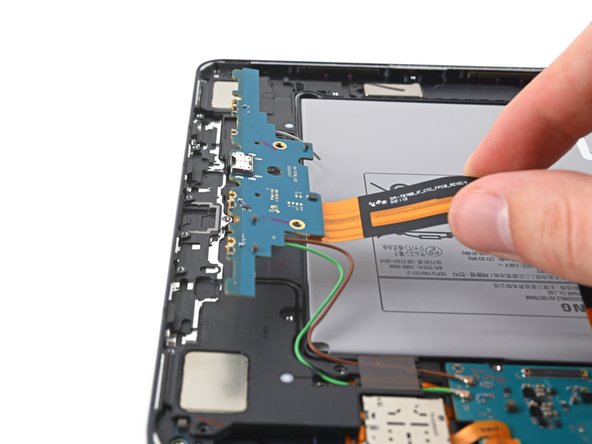
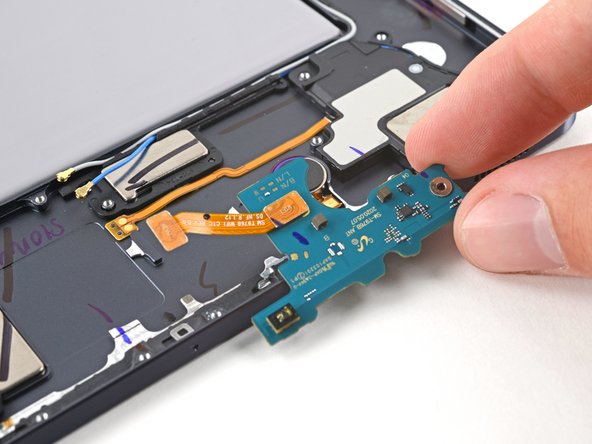
Use your fingers to pull the charging daughterboard from its slot in the frame.
-
Turn the charging board upside down, making sure not to twist the coaxial cables too far.
-
-
-
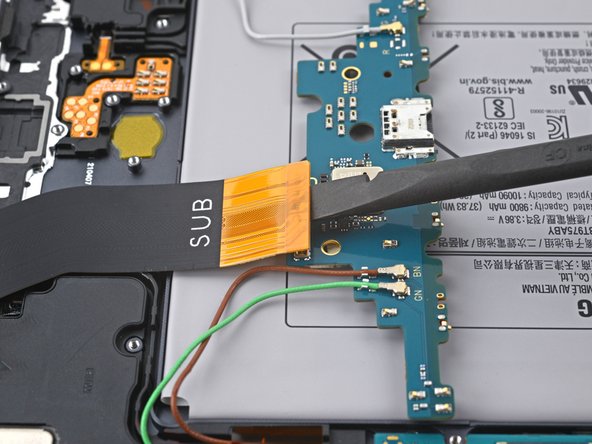
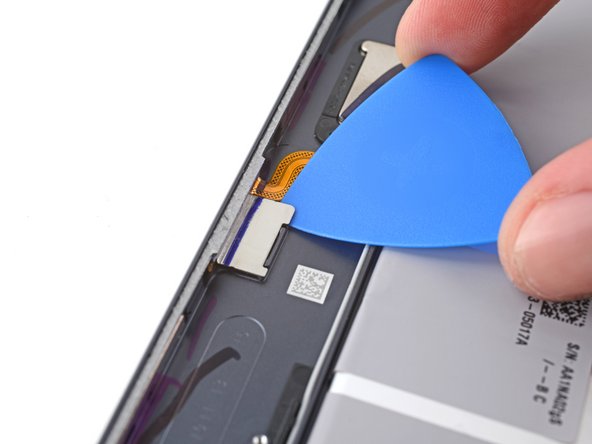
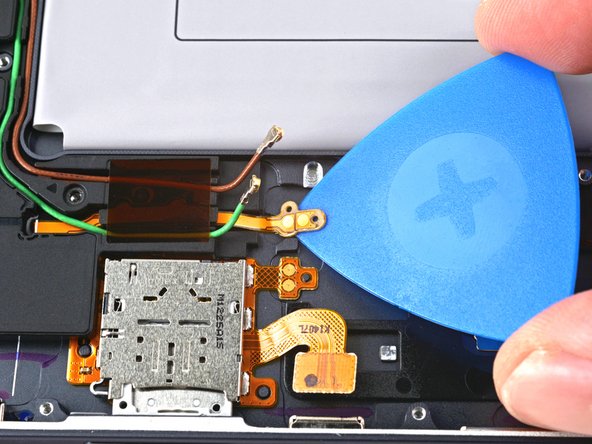
Use the flat end of a spudger to pry up and disconnect the interconnect cable's press connector secured to the charging daughterboard.
-
Use tweezers, or your fingers, to remove the interconnect cable.
-
-
-
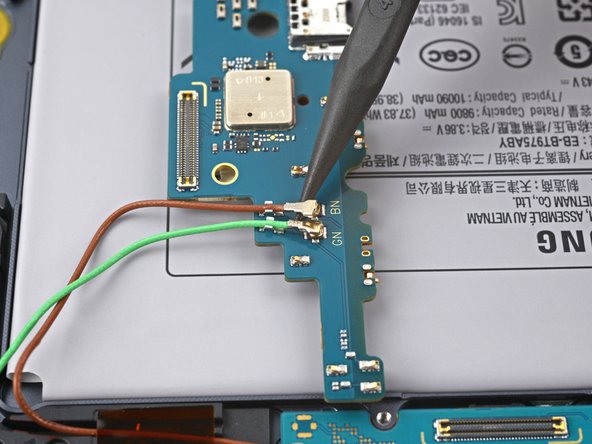
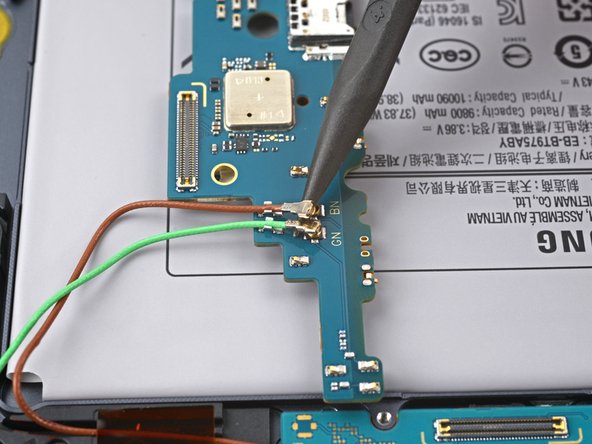
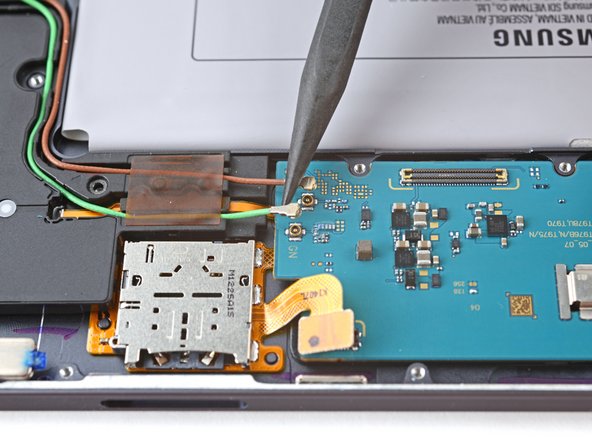
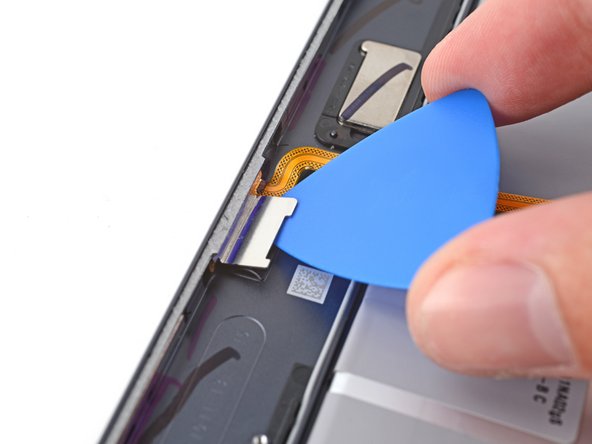
Use the point of a spudger to carefully pry up and disconnect the brown and green coaxial cable from the bottom of the daughterboard.
-
-
-
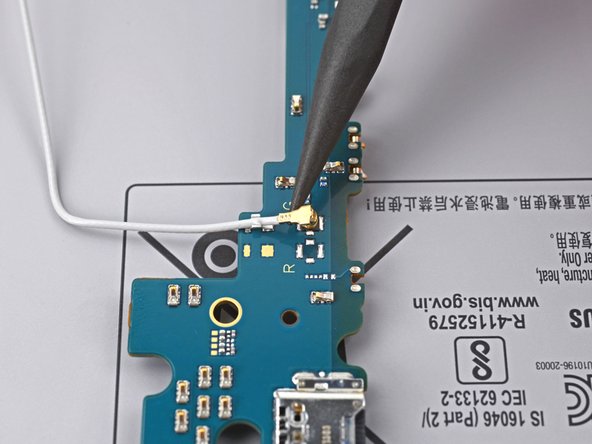
Use the point of a spudger to carefully pry up and disconnect the white coaxial cable from the top of the daughterboard.
-
-
-
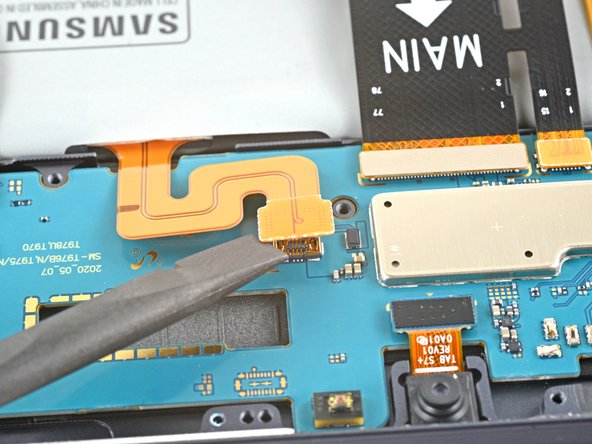
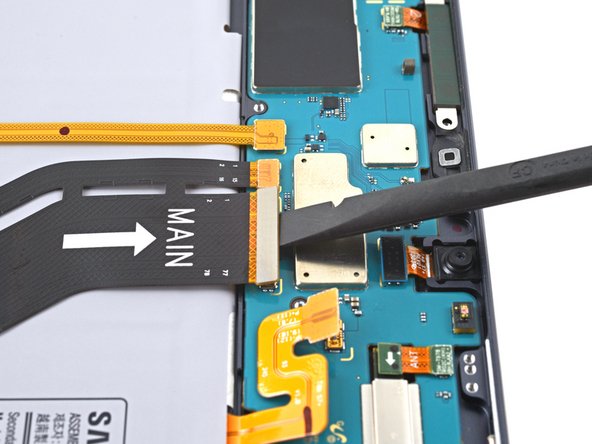
Use the flat end of a spudger to pry up and disconnect the display cable's press connector secured to the motherboard.
-
Repeat for the fingerprint sensor cable attached to display cable.
-
-
-
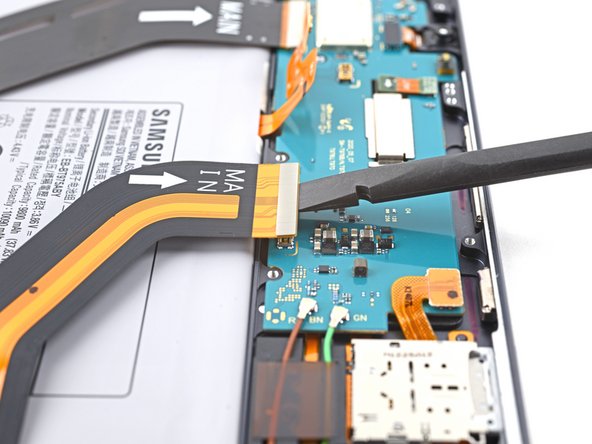
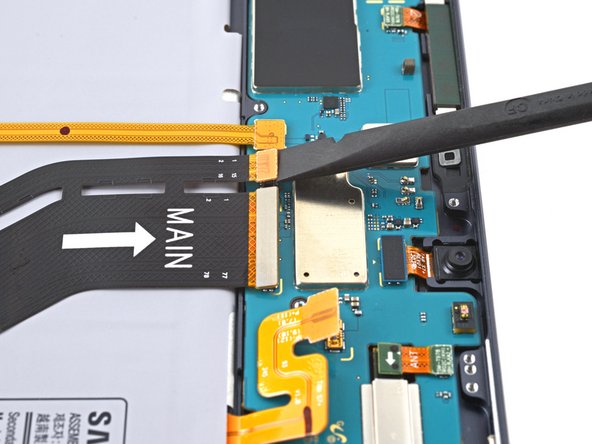
Use the flat end of a spudger to pry up and disconnect the keyboard dock port cable's press connector secured to the motherboard.
-
-
-
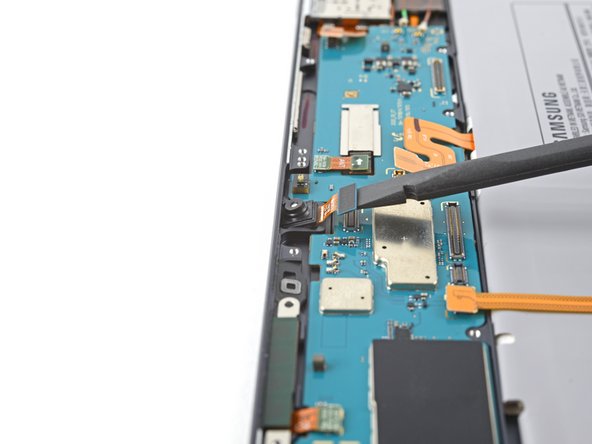
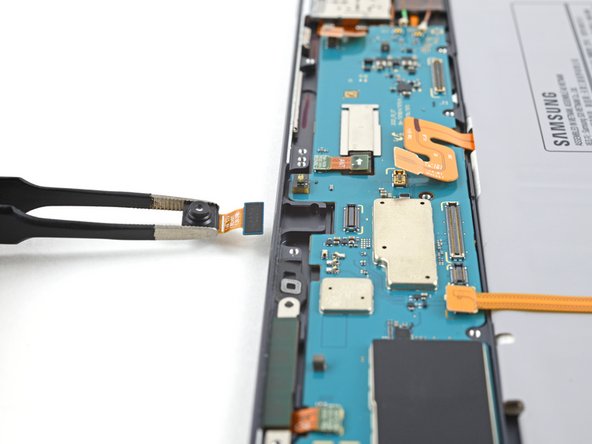
Use the flat end of a spudger to pry up and disconnect the front camera's press connector secured to the motherboard.
-
Use tweezers, or your fingers, to remove the front camera.
-
-
-
Use the flat end of a spudger to pry up and disconnect the microSD card reader's press connector secured to the motherboard.
-
-
-
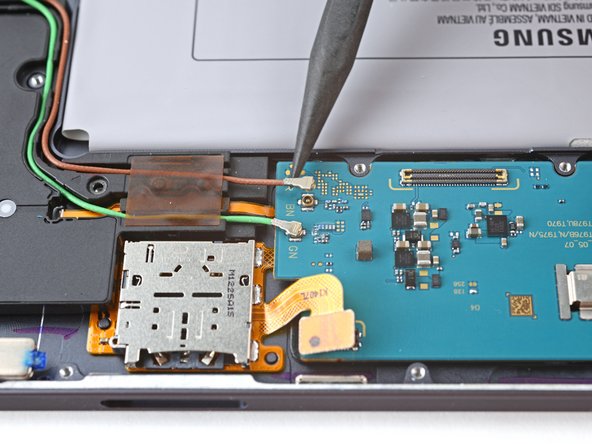
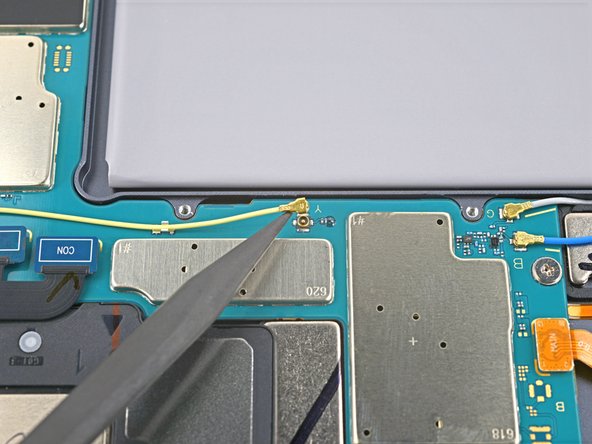
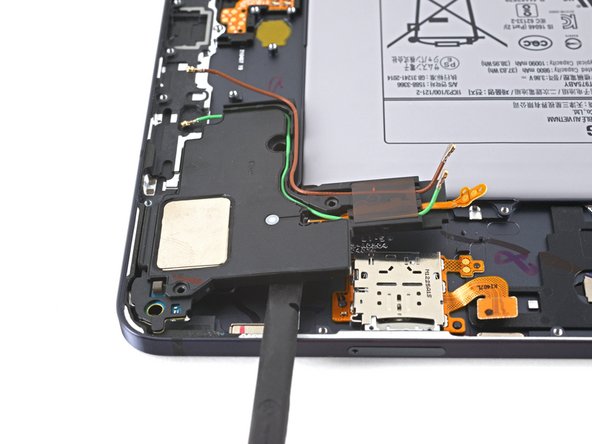
Use the point of a spudger to carefully pry up and disconnect the green coaxial cable from the left side of the motherboard.
-
Repeat this process for the brown coaxial cable.
-
-
-
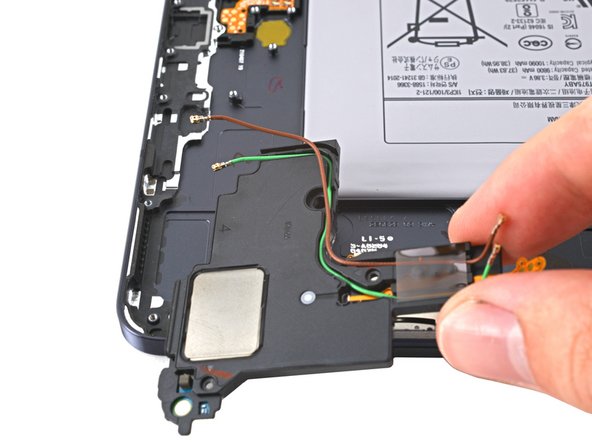
Use the flat end of a spudger to pry up and disconnect the 5G mmWave antenna's press connector secured to the motherboard.
-
-
-
Use tweezers to pull the antenna out of the frame by its bracket.
-
Remove the 5G mmWave antenna.
-
-
-
Use the flat end of a spudger to pry up and disconnect the rear camera's two press connectors secured to the motherboard.
-
-
-
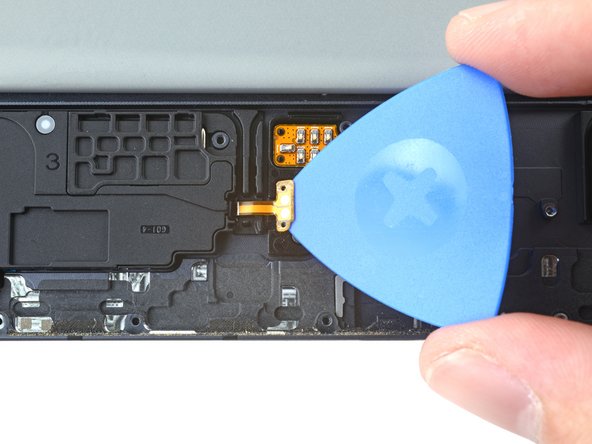
Use the flat end of a spudger to pry up and disconnect the power button cable's press connector secured to the motherboard.
-
-
-
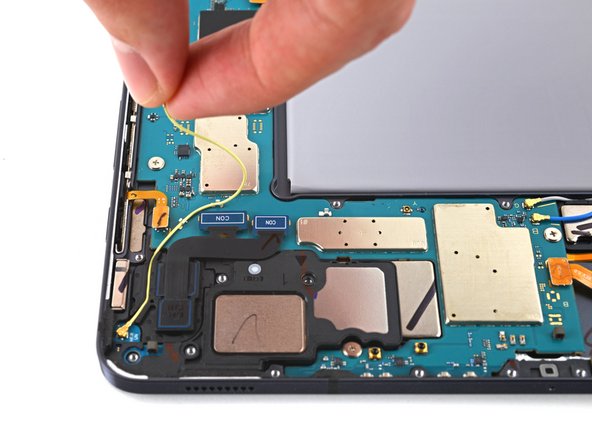
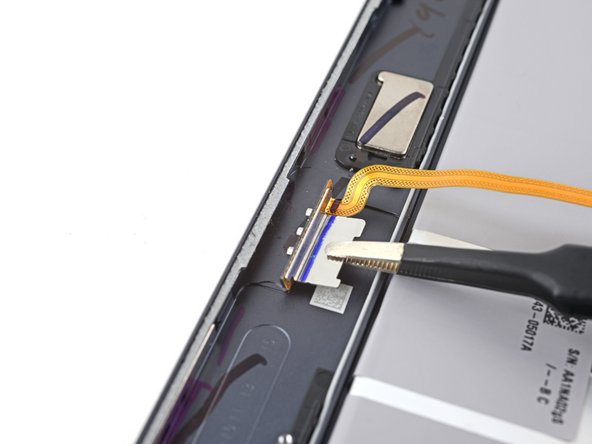
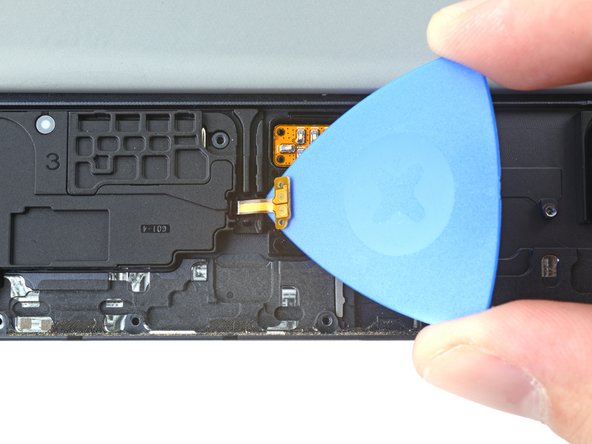
Use the point of a spudger to carefully pry up and disconnect the bottom-right loudspeaker's yellow coaxial cable from the motherboard.
-
-
-
Pull the coaxial cable away from the frame, making sure the cable is completely unthreaded from the motherboard.
-
-
-
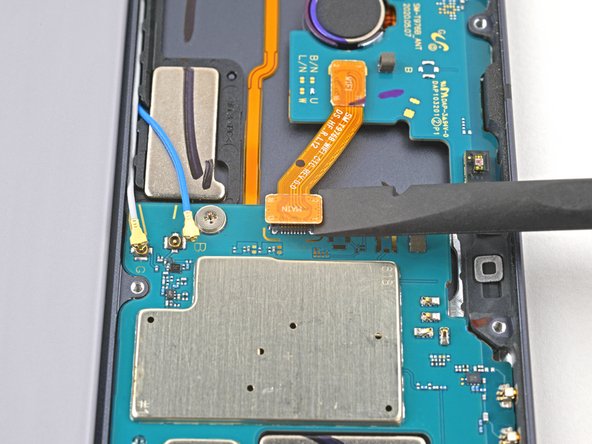
Use the flat end of a spudger to pry up and disconnect the interconnect cable's press connector secured to the motherboard.
-
-
-
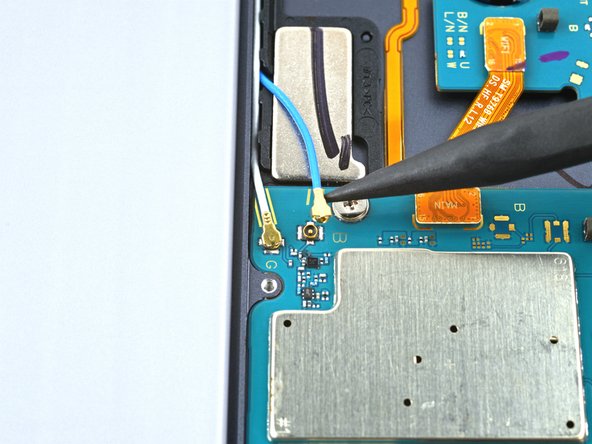
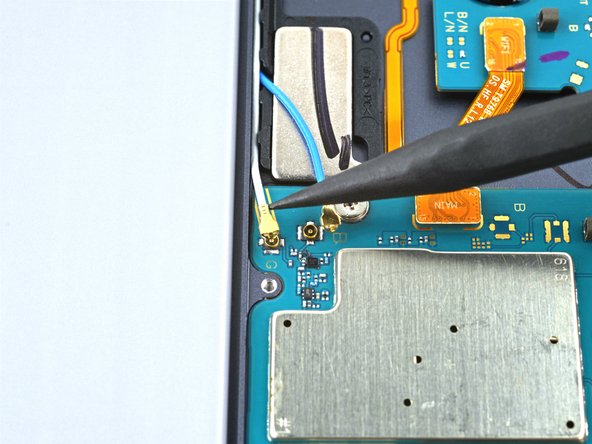
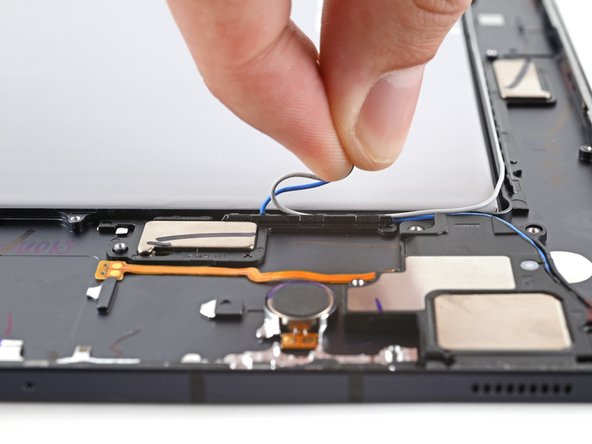
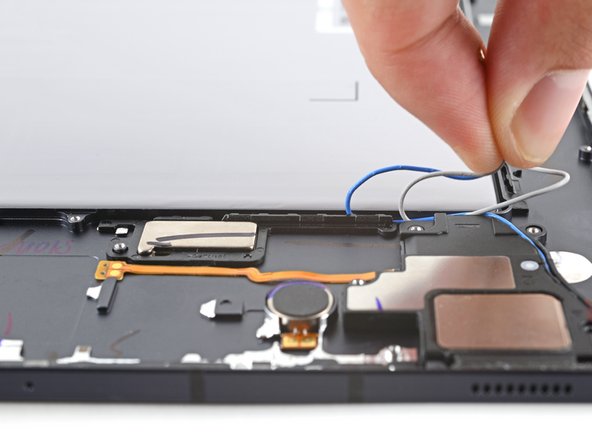
Use the point of a spudger to carefully pry up and disconnect the top-right loudspeaker's blue coaxial cable from the motherboard.
-
Repeat this process for the white coaxial cable.
-
-
-
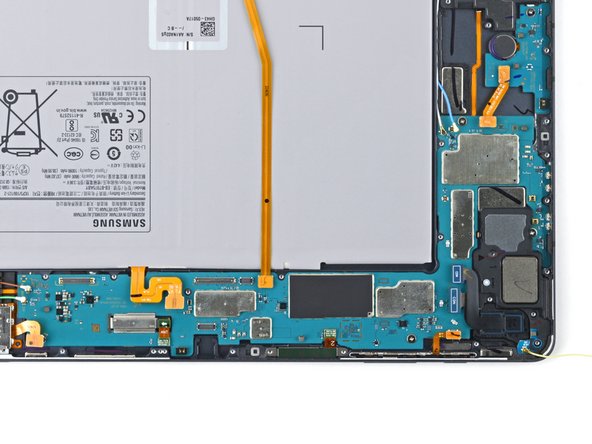
Use a Phillips #00 screwdriver to remove the three 2 mm screws securing the motherboard to the frame.
-
-
-
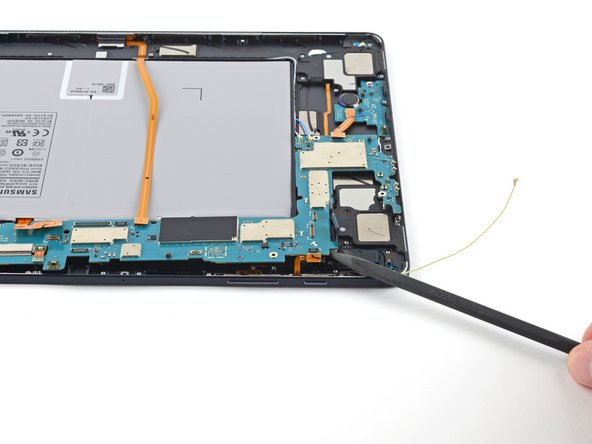
Insert a spudger into a gap between the motherboard and the frame.
-
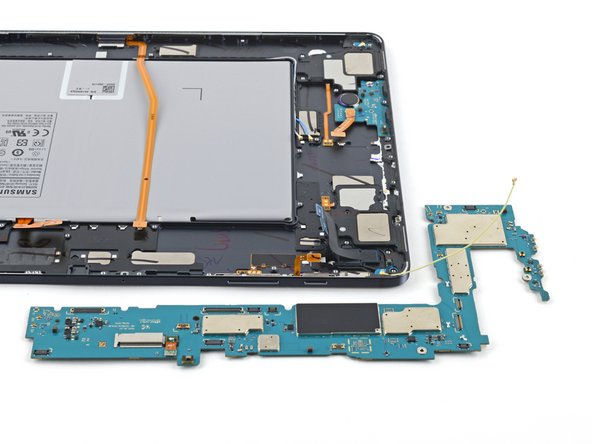
Pry up with the spudger to release the motherboard from its clips.
-
Remove the motherboard.
-
-
-
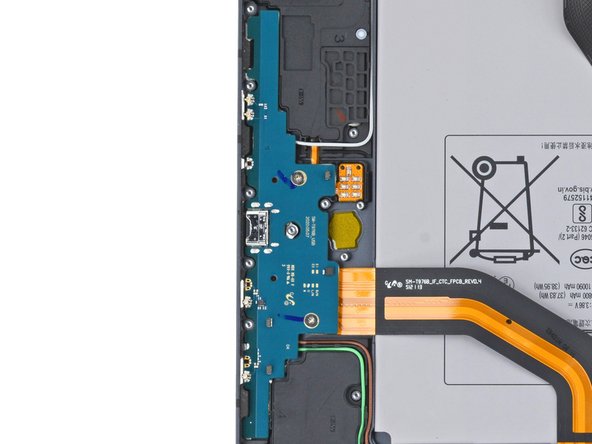
Use a Phillips #00 screwdriver to remove the 2 mm-long screw securing the antenna board to the frame.
-
-
-
Insert a spudger into a gap between the antenna board and the frame.
-
Pry up with the spudger to separate the antenna board from the frame.
-
Remove the antenna board.
-
-
-
Apply a heated iOpener to the top of the device for 90 seconds.
-
-
-
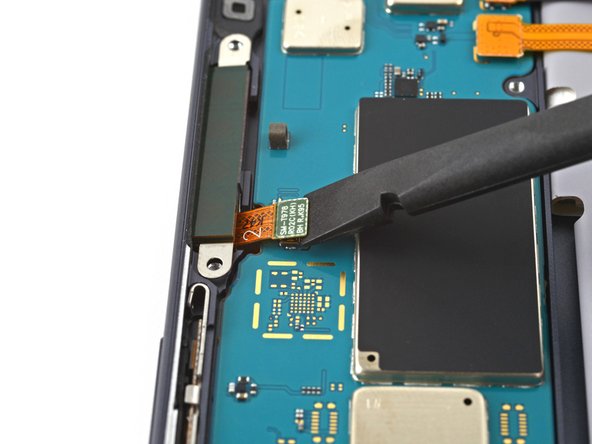
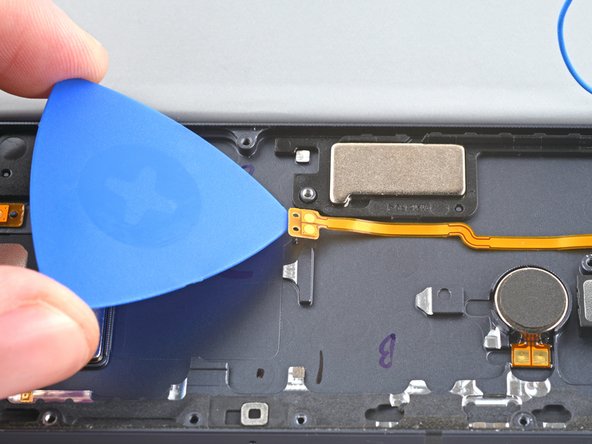
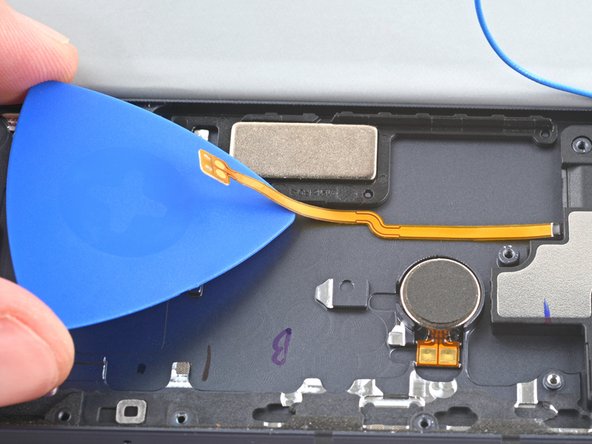
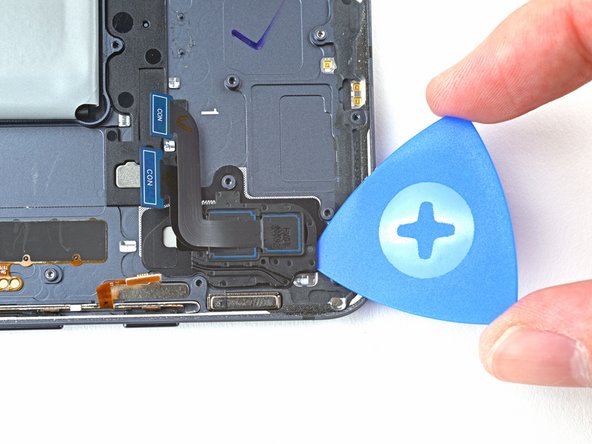
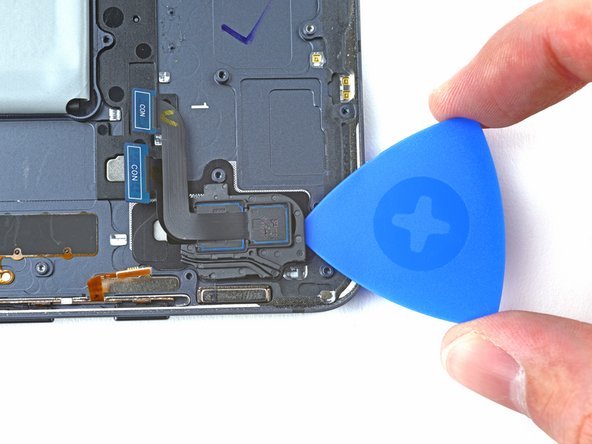
Insert the tip of an opening pick between the frame and the keyboard dock port cable's metal bracket.
-
Rotate the pick while prying up to separate the adhesive.
-
-
-
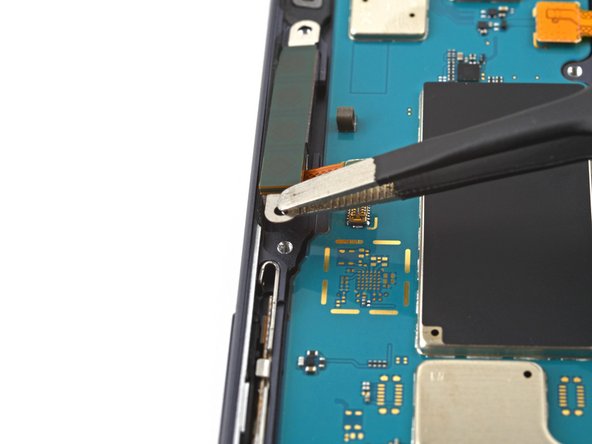
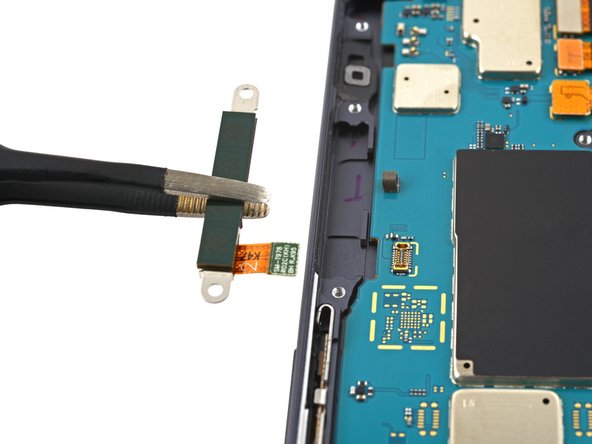
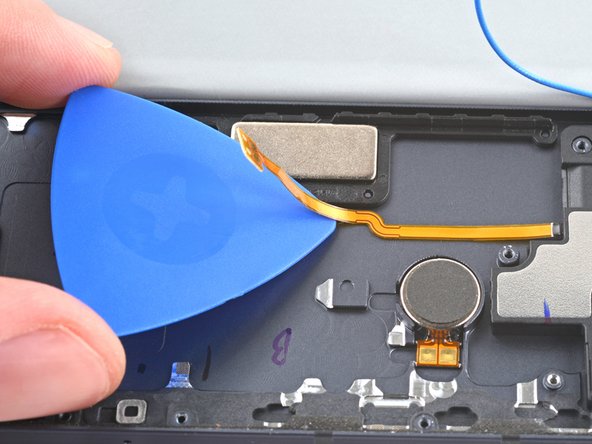
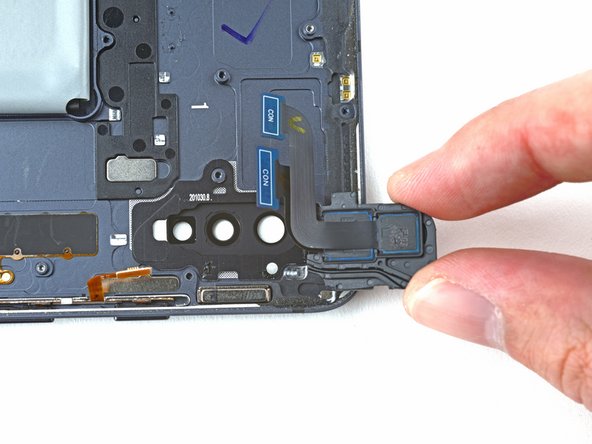
Use tweezers, or your fingers, to pull the keyboard dock port cable directly out of its slot.
-
Remove the keyboard dock port cable.
-
-
-
Apply a heated iOpener to the left edge of the device for two minutes.
-
-
-
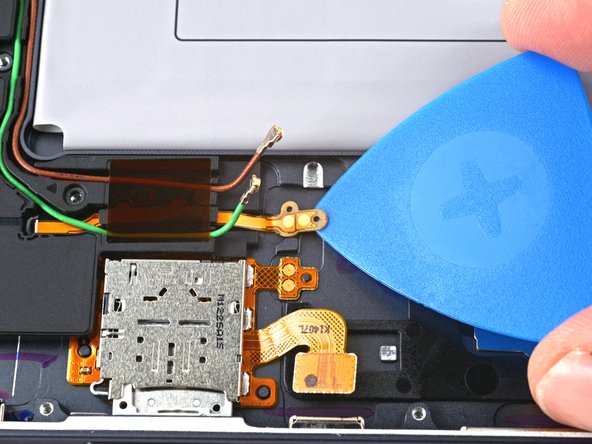
Insert an opening pick between the bottom-left loudspeaker's copper connector pads and the frame.
-
Pry up while slicing the adhesive to separate the pad from the frame.
-
-
-
Slice with the opening pick along the bottom of the connector's cable to completely separate it from the frame.
-
-
-
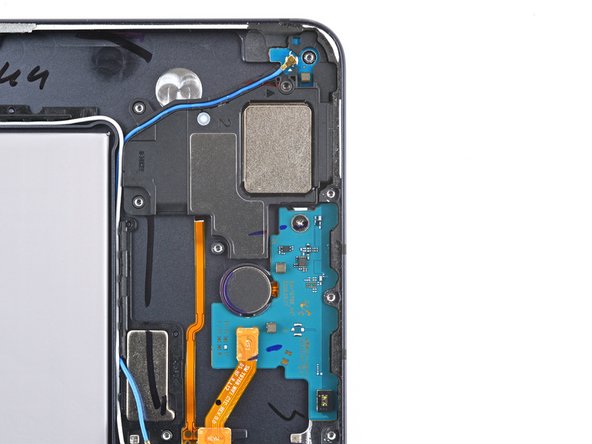
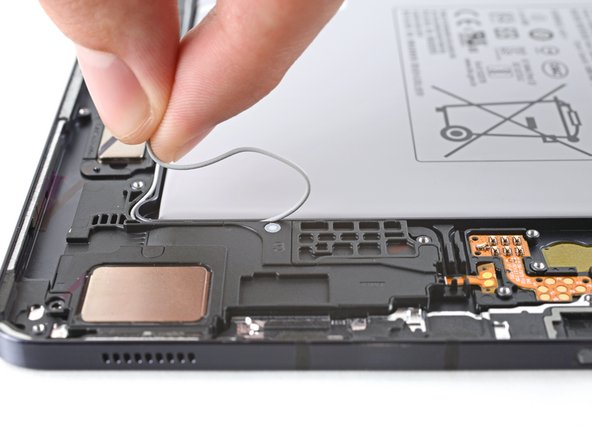
Use your fingers to unroute the blue and white coaxial cables from their groove in the frame.
-
-
-
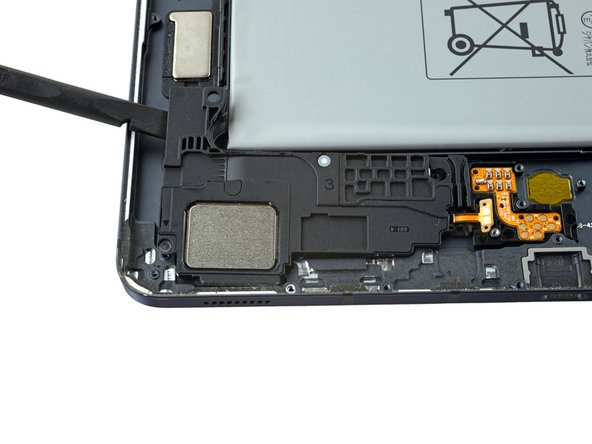
Use a spudger to pry up and separate the loudspeaker from the frame.
-
Remove the loudspeaker.
-
-
-
Insert an opening pick between the top-left loudspeaker cable and the frame.
-
Slice the adhesive while prying up with the pick to separate the cable from the frame.
-
-
-
Use a spudger to pry up and separate the top-left loudspeaker from the frame.
-
Remove the top-left loudspeaker.
-
-
-
Apply a heated iOpener to the top-left corner of the device for two minutes.
-
-
-
Insert an opening pick into a gap between the rear camera and the frame.
-
Rotate the pick around edges of the rear camera to slice the adhesive.
-
-
-
Pry up with the pick to separate the rear camera from the frame.
-
Remove the rear camera.
-
-
-
The top-right loudspeaker's connector is secured to the frame by adhesive. Use heat to avoid tearing the connector.
-
Apply a heated iOpener to the right edge of the device for two minutes.
-
-
-
Insert an opening pick between the loudspeaker's connector pads and the frame.
-
Slice the adhesive while prying up with the pick to separate the pads from the frame.
-
-
-
Use a spudger to pry up and separate the loudspeaker from the frame.
-
Remove the loudspeaker.
-
-
-
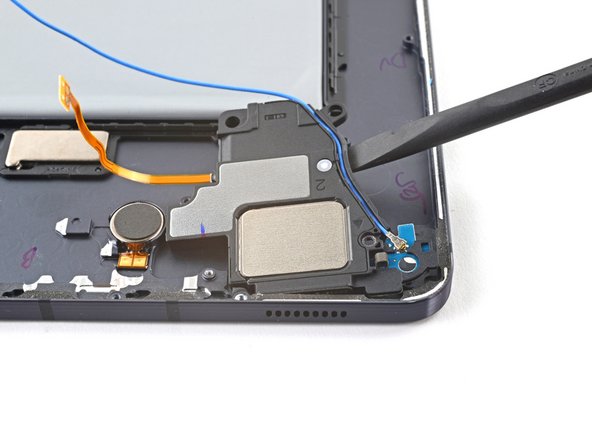
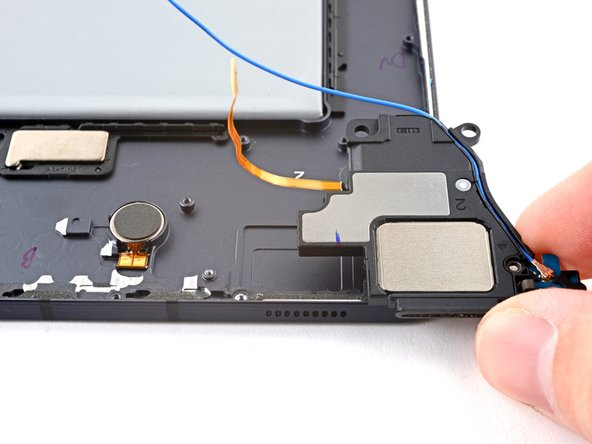
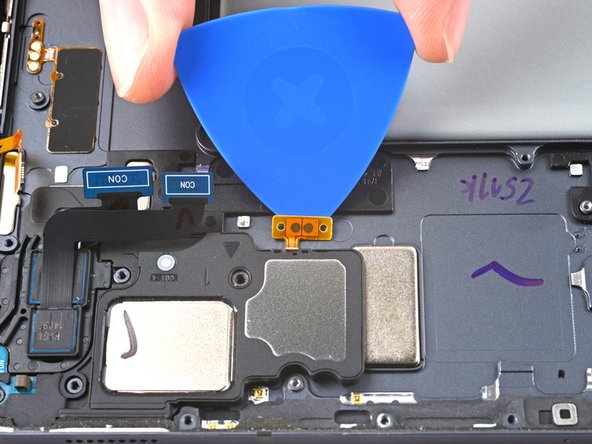
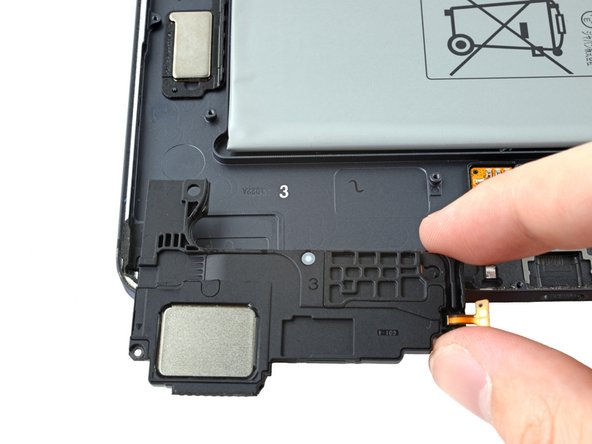
Insert an opening pick between the bottom-right loudspeaker cable and the frame.
-
Slice the adhesive while prying up with the pick to separate the cable from the frame.
-
-
-
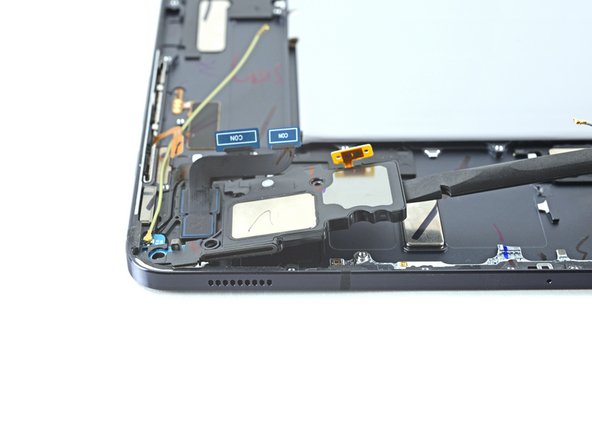
Use your fingers to unroute the white coaxial cable from its groove in the frame.
-
-
-
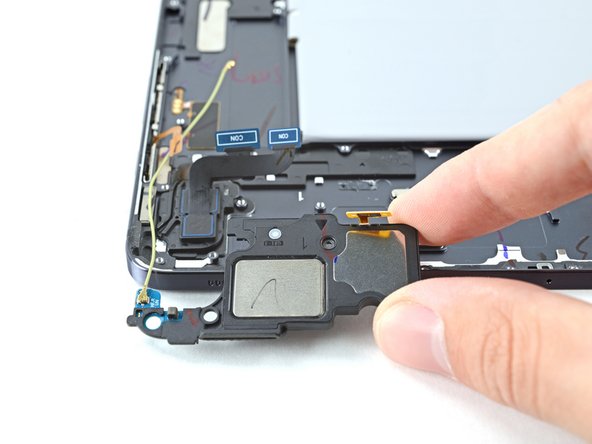
Use a spudger to pry up and separate the bottom-right loudspeaker from the frame.
-
Remove the bottom-right loudspeaker.
-
-
-
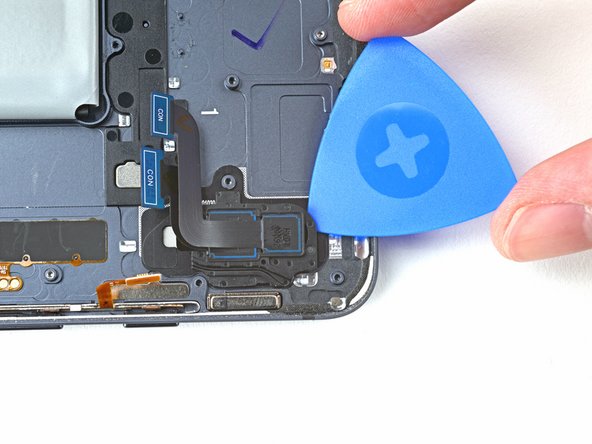
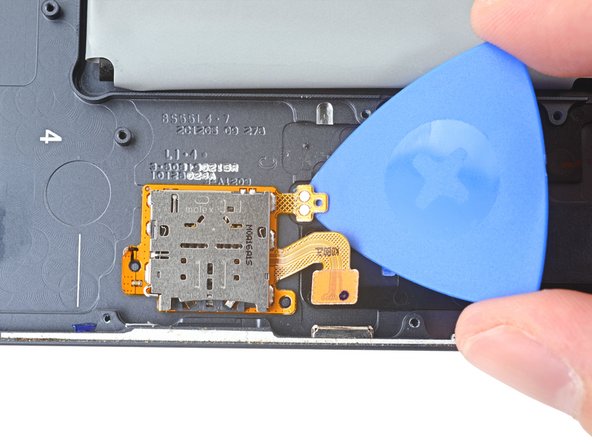
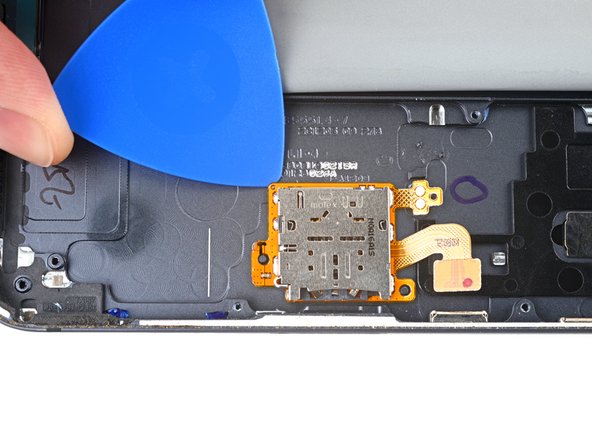
Insert a pick between the microSD reader's connector pads and the frame.
-
Pry up while slicing the adhesive to separate the pads from the frame.
-
-
-
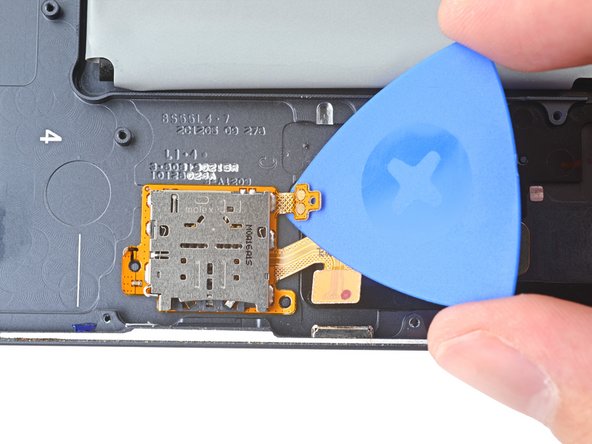
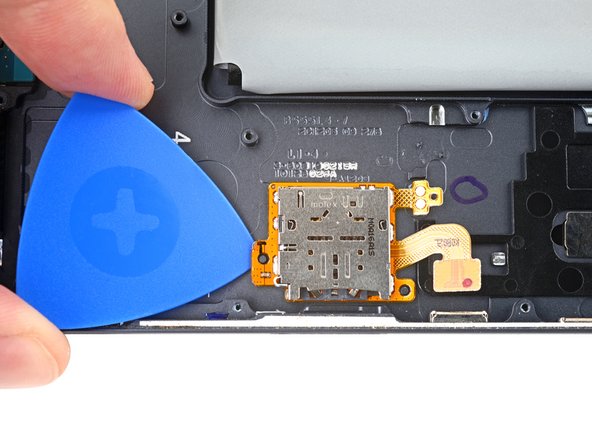
Insert a pick between the bottom-right peg hole and the frame.
-
Rotate the pick along the peg hole's perimeter to separate it from the frame.
-
-
-
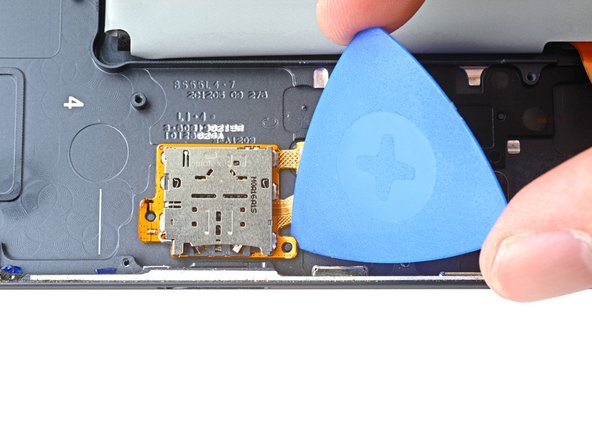
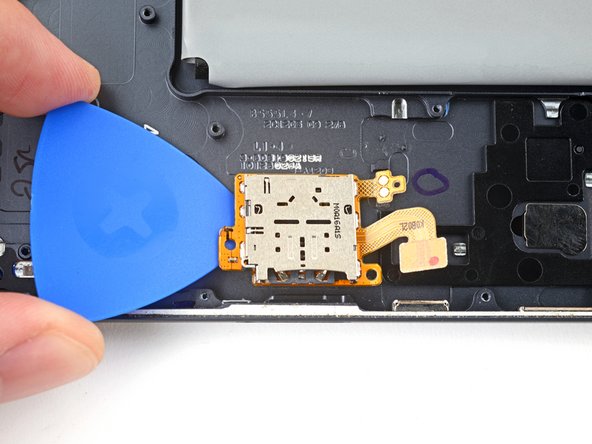
Insert a pick between the top of the microSD reader and the frame.
-
Rotate the pick around the perimeter of the microSD reader to slice the adhesive.
-
-
-
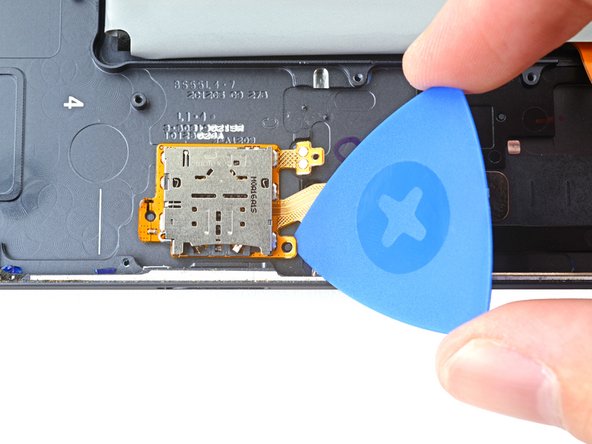
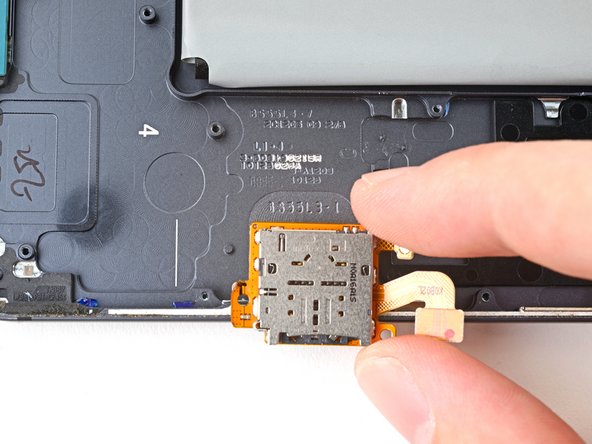
Insert an opening pick between the bottom-left peg hole and the frame.
-
Pry up with the pick to separate the microSD card reader from the frame.
-
Remove the microSD card reader.
-
-
-
You're now left with the battery and frame assembly.
-


To reassemble your device, follow the instructions in reverse order and perform the opposite actions, e.g., "reattach" instead of "removing." Skip steps that use heating and prying, and pay close attention to the 📌 bullets as you work through the steps.
After you've completed the repair, download the Samsung Members App from the Galaxy Store or the Play Store, and follow the Samsung Self-Repair document (beginning page 10) to make sure your device is fully functional.
Download the Self Repair Assistant on your device and follow the Samsung Self-Repair document (beginning page 11) to perform a battery cycle reset.
Take your e-waste to an R2 or e-Stewards certified recycler.
Repair didn’t go as planned? Try some basic troubleshooting, or ask our Answers community for help.
Отменить: Я не выполнил это руководство.
Еще один человек закончил это руководство.

