Введение
The battery provides the device with the power necessary to operate. The replacement of the battery may be necessary in cases where the device will not turn on or hold a charge.
The disassembly is relatively simple, but will require the use of a soldering iron to disconnect a couple of wires. Be sure to review the iFixit soldering guide if you do not have experience with soldering. It is also important that you do not bend the battery at any time during the disassembly, as this can cause a fire.
Выберете то, что вам нужно
-
-
-
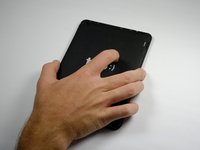
Flip your tablet over so that the back panel is facing up.
 Спросите у FixBot
-
-
-
Use a plastic opening tool to gently pry the back panel assembly apart from the front casing.
-
Start on one edge of the device by inserting the plastic opening tool between the back panel and the front casing using a gentle rocking motion.
-
-
-
Once you have successfully separated one edge of the back panel from the front casing, slide the plastic opening tool along the other edges to detach them as well.
-
-
-
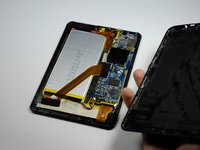
Remove the back panel from the rest of the tablet and set it aside.
-
-
-
-
The plastic volume button cover may fall out when you remove the back panel. Set it aside.
-
-
-
-
-
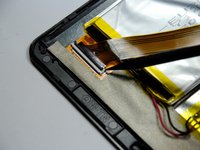
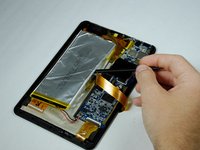
Remove the black tape covering the zero insertion force (ZIF) connector that holds down the end of the yellow colored ribbon wire that lies across the battery.
-
-
-
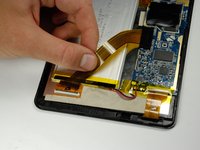
Wedge a spudger underneath the black flap on the ZIF connector and flip it up.
-
Once the flap is up, use your fingers to disconnect the end of the ribbon wire from the connector.
-
-
-
Carefully remove the yellow tape from the red and black wires connecting the battery to the motherboard.
-
-
-
Use the soldering iron to melt away the solder from the motherboard connections.
-
Once the solder is completely removed, pull the wires away from the motherboard.
-
-
-
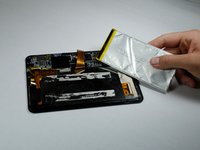
Use the spudger to gently dislodge the battery from the tablet.
-
-


To reassemble your device, follow these instructions in reverse order.
Отменить: Я не выполнил это руководство.
2 человек успешно провели ремонт по этому руководству.
Команда

Baylor, Team 4-1, Williams Fall 2015 Участник Baylor, Team 4-1, Williams Fall 2015
BU-WILLIAMS-F15S4G1
4 членов
Автор 10 руководств
1 Комментарий к руководству
trio stealth g4 10.1 v2 tablet replacement battery what battery is that number , please thank you