Введение
Используйте это руководство для установки комплекта для устранения «красного кольца смерти» (Red Ring of Death Fix Kit) от iFixit.
Прогрев материнской платы после завершения шага 48 этого руководства (перед установкой комплекта RROD) повышает шансы на успешное устранение ошибки «красного кольца».
Обратите внимание, что установка комплекта для устранения «красного кольца смерти» не влияет на первопричину дефекта, вызывающего проблему, поэтому данное решение следует рассматривать как временное.
ДАННЫЙ МЕТОД БОЛЕЕ НЕ РЕКОМЕНДУЕТСЯ ДЛЯ РЕМОНТА, ТАК КАК СО ВРЕМЕНЕМ ЭТО МОЖЕТ ПРИВЕСТИ К ИСКРИВЛЕНИЮ МАТЕРИНСКОЙ ПЛАТЫ!!!
Если вы хотите узнать больше о том, почему это вредно, посмотрите видео здесь, в котором подробно объясняется, почему этого больше не стоит делать.
Выберете то, что вам нужно
Видеообзор
-
-
-
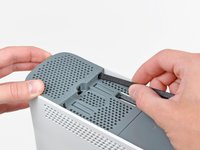
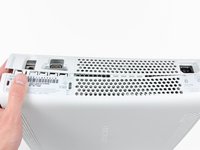
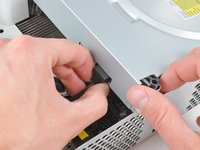
Возьмитесь за блок жесткого диска, нажмите кнопку фиксатора и приподнимите его передний край.
-
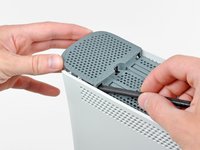
Извлеките блок жесткого диска через верхнее вентиляционное отверстие.
 Спросите у FixBot
-
-
-
-
Инструмент, используемый на этом этапе:Xbox 360 Opening Tool$4.99
-
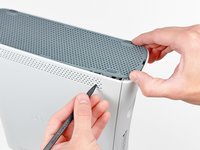
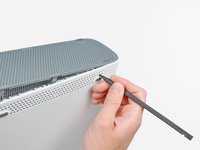
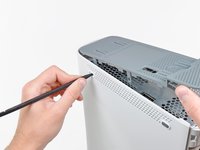
Вставьте плоский конец лопатки или край инструмента для открывания Xbox 360 в небольшую щель на переднем крае нижнего вентиляционного отверстия.
-
Подденьте передний край вентиляционной решетки, чтобы отделить его от лицевой панели.
-
-
-
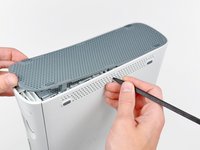
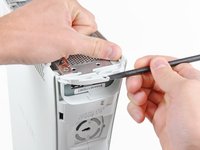
Чтобы освободить защелки, работайте с передней кромки нижнего вентиляционного отверстия.
-
Слегка приподняв переднюю кромку нижнего вентиляционного отверстия, кончиком пластиковой лопатки (spudger) надавите на защелки, ближайшие к передней части вентиляционного отверстия, по направлению внутрь консоли.
-
-
-
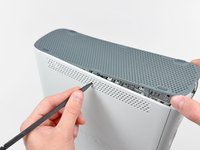
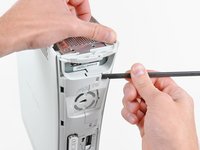
Повторите ту же процедуру, чтобы освободить два центральных фиксатора на нижнем вентиляционном отверстии.
-
-
-
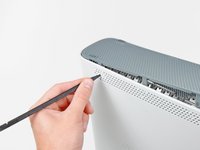
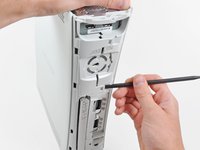
Используйте кончик лопатки (spudger), чтобы высвободить защелки на нижней вентиляционной решетке, ближайшей к задней части Xbox.
-
-
-
-
-
Вставьте плоский конец пластиковой лопатки между передней панелью и внешним корпусом рядом с кнопкой питания.
-
Проведите лопаткой вдоль края передней панели, чтобы освободить защелки, удерживающие ее на передней части консоли.
-
-
-
Повторите те же действия, что и ранее, чтобы отсоединить левую сторону лицевой панели.
-
-
-
-
-
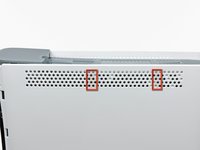
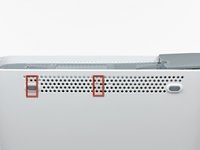
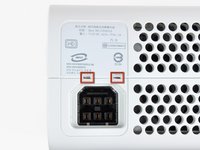
Верхняя вентиляционная решетка крепится к консоли с помощью защелок. Первые две защелки расположены под верхней решеткой ближе к передней панели, как показано на изображениях.
-
-
-
Вставьте плоский конец пластиковой лопатки в упомянутые ранее небольшие зазоры, чтобы освободить фиксаторы.
-
-
-
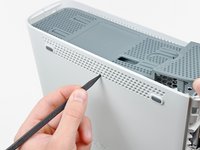
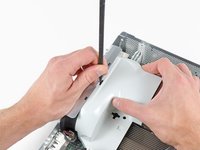
Чтобы освободить защелки, начните с середины верхней вентиляционной решетки.
-
Слегка приподнимая передний край верхней вентиляционной решетки, кончиком пластиковой лопатки нажмите на защелки, расположенные ближе к центру, по направлению внутрь консоли.
-
-
-
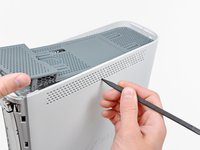
Используйте кончик пластиковой лопатки, чтобы освободить защелку на верхнем вентиляционном отверстии, расположенном ближе всего к задней части верхней крышки Xbox.
-
-
-
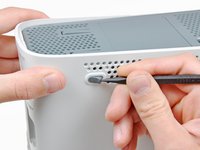
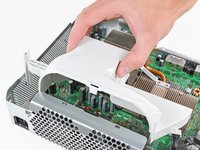
Используйте кончик лопатки, чтобы освободить фиксатор на верхней вентиляционной решетке ближе к задней части Xbox.
-
Снимите верхнюю вентиляционную решетку с 360.
-
-
-
-
-
Установите консоль вертикально верхним краем вниз.
-
Аккуратно снимите гарантийную наклейку с консоли.
-
-
-
Используйте плоский конец пластиковой лопатки (spudger), чтобы освободить следующие защелки:
-
Над передними портами USB.
-
Под передними портами USB.
-
Над разъемами для карт памяти.
-
-
-
Вставьте плоский конец пластиковой лопатки (spudger) и подденьте вверх, чтобы освободить последнюю оставшуюся защелку, расположенную над кнопкой извлечения.
-
-
-
-
Слегка приподнимите переднюю часть нижней крышки, чтобы убедиться, что передние защелки полностью освобождены.
-
-
-
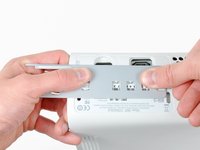
Вставьте инструмент для вскрытия Xbox 360 в защелки, крепящие нижний корпус к верхнему рядом с портами ввода-вывода.
-
Нажимая на инструмент, раздвиньте нижнюю и верхнюю части корпуса, чтобы разъединить фиксирующие защелки.
-
-
-
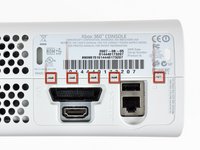
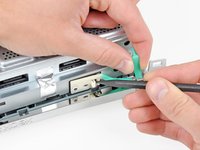
Разводя верхнюю и нижнюю части корпуса в разные стороны, с помощью кончика пластиковой лопатки (spudger) или пальца инструмента для открывания Xbox 360 нажмите на длинный фиксатор, выделенный красным цветом, по направлению к центру консоли.
-
Фиксатор должен отщелкнуться; после этого верхняя и нижняя части корпуса будут удерживаться вместе только защелками возле разъема питания.
-
-
-
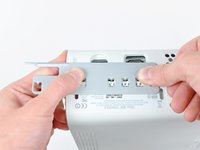
Вставьте инструмент для вскрытия Xbox 360 в два оставшихся фиксатора возле разъема питания.
-
Раздвиньте верхнюю и нижнюю части корпуса, чтобы полностью освободить удерживающие фиксаторы.
-
-
-
Возьмитесь за заднюю часть нижней крышки и потяните ее вверх, чтобы отсоединить от консоли.
-
-
-
-
-
Используйте кончик пластиковой лопатки (spudger), чтобы высвободить фиксатор, удерживающий кнопку извлечения диска на металлическом корпусе.
-
Вставьте плоский конец пластиковой лопатки между кнопкой извлечения диска и оптическим приводом.
-
Подденьте кнопку извлечения, чтобы снять ее с крепежных стоек, и извлеките ее из Xbox 360.
-
-
-
-
-
Выкрутите шесть серебристых винтов T10 Torx длиной 64 мм, крепящих верхнюю часть корпуса к металлическому основанию.
-
-
-
Поднимите верхнюю часть корпуса прямо вверх и снимите ее с консоли.
-
-
-
-
-
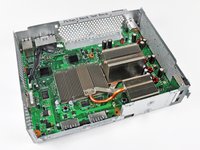
Отклейте серебристую ленту, удерживающую оптический привод в металлическом корпусе.
-
-
-
Слегка приподнимите оптический привод, чтобы получить доступ к разъемам SATA и питания, расположенным на его задней стороне.
-
-
-
Возьмите разъем питания за кабели и потяните его прямо из гнезда на оптическом приводе.
-
Отсоедините разъем передачи данных SATA от гнезда на оптическом приводе, потянув его прямо на себя.
-
-
-
-
-
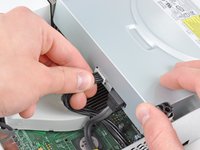
Вставьте плоский конец пластиковой лопатки (spudger) в небольшое прямоугольное отверстие в верхней части воздуховода охлаждающего вентилятора.
-
Осторожно освободите фиксатор воздуховода и извлеките воздуховод из Xbox.
-
Фиксатор также можно освободить с помощью металлического наконечника инструмента для открывания Xbox 360.
-
-
-
-
-
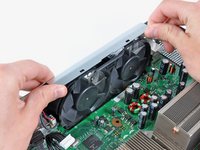
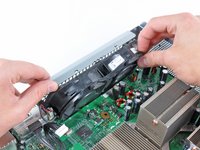
Приподнимая металлическую планку корпуса над двумя вентиляторами, потяните вентиляторы к центру материнской платы.
-
-
-
Извлеките разъем блока вентиляторов из гнезда на материнской плате, потянув его прямо вверх.
-
Извлеките блок вентиляторов из консоли.
-
-
-
-
-
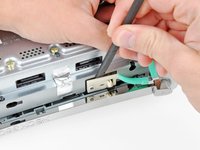
Используйте плоский конец лопатки (spudger), чтобы освободить защелки, удерживающие экран РЧ-модуля вдоль верхнего и левого края РЧ-модуля.
-
Снимите экран РЧ-модуля с консоли.
-
-
-
Открутите три винта T8 Torx длиной 5,6 мм, крепящие ВЧ-модуль к металлическому корпусу.
-
-
-
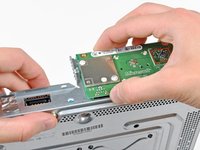
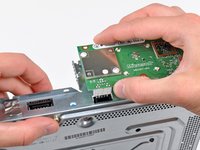
Возьмитесь за РЧ-модуль и потяните его прямо вверх, чтобы отсоединить от разъема на материнской плате.
-
Извлеките РЧ-модуль из консоли.
-
-
-
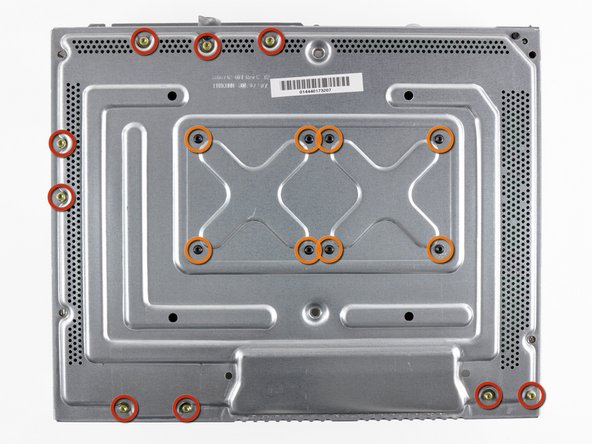
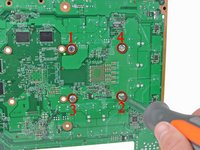
Открутите следующие винты, которыми материнская плата крепится к металлическому корпусу:
-
Девять золотистых винтов T10 Torx длиной 11 мм.
-
Восемь черных винтов T8 Torx длиной 5,6 мм.
-
-
-
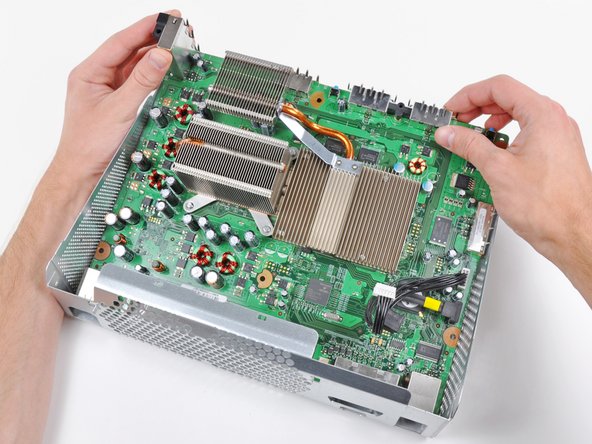
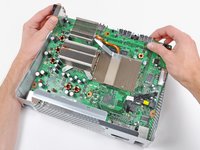
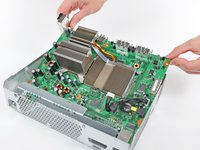
Приподнимите материнскую плату за передний край.
-
Извлеките материнскую плату из металлического корпуса.
-
-
-
-
-
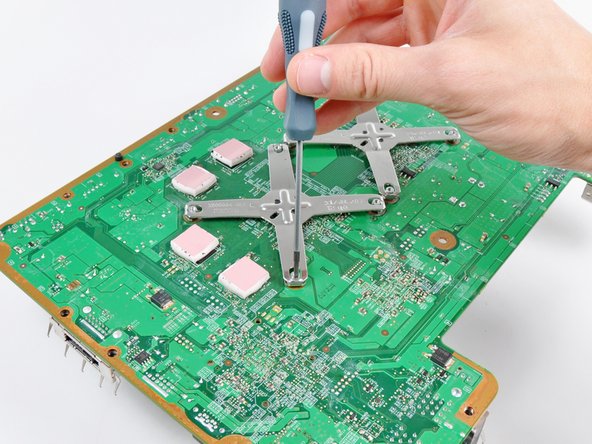
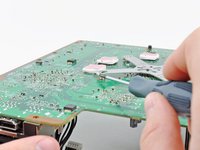
Вставьте кончик небольшой плоской отвертки между X-образным зажимом и его фиксирующей стойкой на радиаторе.
-
Подденьте X-образный зажим, отводя его от фиксирующей стойки, пока он не поднимется над небольшой канавкой на стойке.
-
-
-
Вставьте отвертку параллельно материнской плате между X-образной прижимной пластиной и ее стойкой крепления.
-
Поверните отвертку, чтобы полностью освободить X-образную прижимную пластину от стойки крепления.
-
-
-
-
-
Вставьте кончик небольшой плоской отвертки между X-образным зажимом и его фиксирующим выступом на радиаторе.
-
Подденьте X-образный зажим, отводя его от фиксирующего выступа, пока он не поднимется выше небольшой канавки, сделанной на выступе.
-
Снимите радиатор процессора с материнской платы.
-
-
-
-
Инструмент, используемый на этом этапе:Arctic Silver ArctiClean$11.99
-
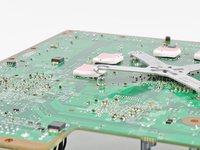
Теперь, когда радиаторы сняты с обоих процессоров, используйте пластиковую лопатку-спуджер, чтобы удалить все остатки старой термопасты с поверхностей обоих процессоров и внутренних поверхностей радиаторов.
-
-
Инструмент, используемый на этом этапе:Heat Gun$29.99
-
После очистки расположите сопрягаемые поверхности радиаторов и процессоров так, чтобы они были направлены вниз.
-
-
-
Переверните материнскую плату.
-
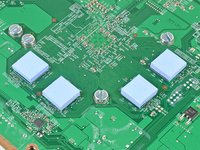
Снимите четыре силиконовые термопрокладки, наклеенные на чипы оперативной памяти на нижней стороне платы.
-
-
-
Используйте посадочное гнездо 1/4" на рукоятке комплектной отвертки (без установленной биты), чтобы открутить четыре стойки X-образного зажима с радиаторов CPU и GPU.
-
-
-
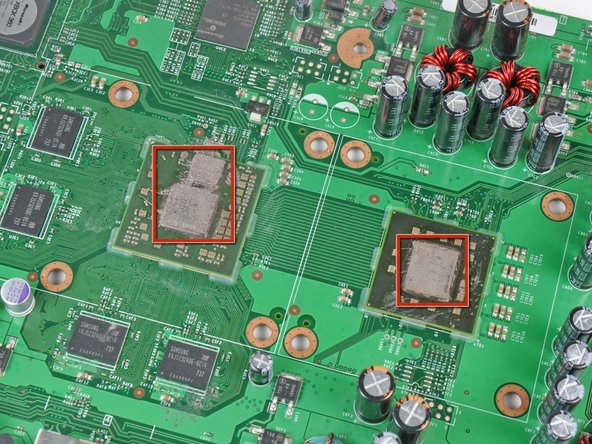
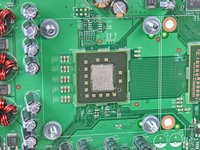
Нанесите тонкий слой термопасты на области, выделенные красным цветом.
-
После нанесения термопасты на процессоры закрепите радиаторы по одному. В нашем случае мы сначала установили радиатор процессора.
-
-
-
Вставьте машинный винт в каждое из четырех отверстий вокруг радиатора процессора так, чтобы их головки находились с обратной стороны платы. Удерживая винты на месте, проложите нейлоновую шайбу между материнской платой и металлической шайбой.
-
С помощью крупной плоской отвертки затяните винты в радиаторе процессора. Сначала слегка затяните четыре винта крест-накрест, как показано на втором изображении, а затем затяните их до конца, соблюдая ту же последовательность.
-
-
-
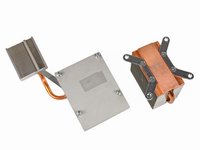
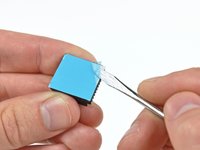
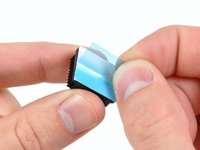
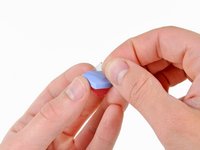
Используйте край небольшой плоской отвертки или другого тонкого острого предмета, чтобы аккуратно приподнять уголок синей или белой пластиковой пленки, закрывающей клейкую основу на нижней части обоих радиаторов.
-
Снимите защитную пленку с клейкой основы на обоих радиаторах.
-
-
-
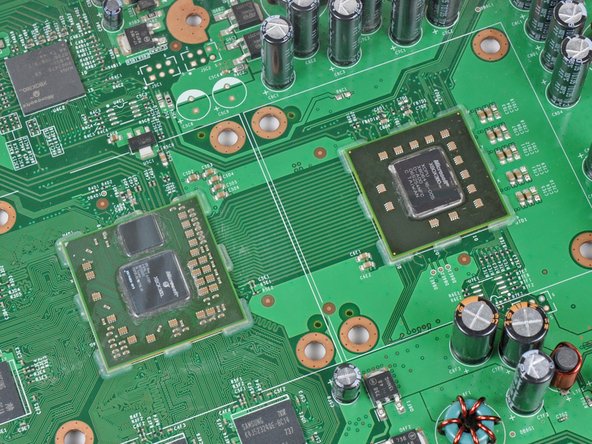
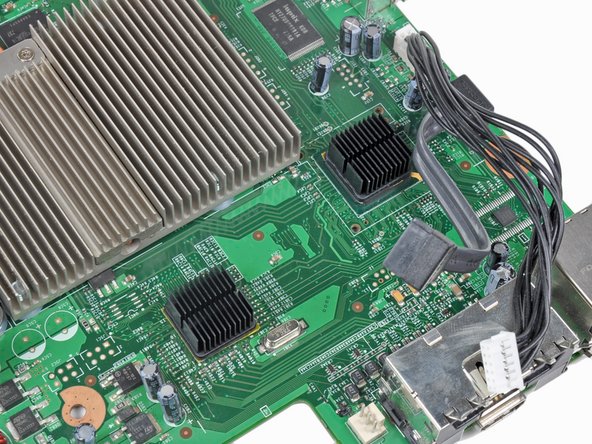
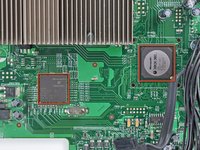
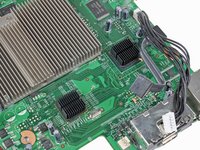
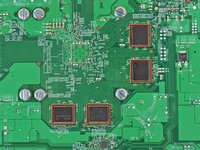
Аккуратно очистите поверхность двух чипов, выделенных красным на первом изображении.
-
Приклейте два радиатора на верхнюю часть двух чипов, выделенных красным на первом изображении, следя за тем, чтобы ребра были расположены так, как показано на втором изображении.
-
-
-
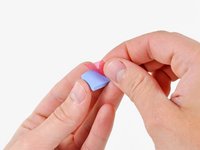
Снимите прозрачную и цветную пластиковую защитную пленку со всех четырех термопрокладок.
-
-
-
Приклейте термопрокладки к чипам оперативной памяти на нижней стороне платы.
-
Установите материнскую плату обратно в корпус и соберите вашу консоль Xbox 360.
-
-


Для сборки устройства выполните действия из шага 42 в обратном порядке.
Отменить: Я не выполнил это руководство.
633 человек успешно провели ремонт по этому руководству.
Особая благодарность этим переводчикам:
100%

Translation Bot помогает нам починить мир! Хотите внести свой вклад?
Начните переводить ›

75 Комментарии к руководству
I didn't have a heat gun so I disabled the fan and left the 360 on for 1/2 hour to heat up the weak solder points and then let it cool down for 1/2 hour before re-assembling the 360. This gave me all green lights.
yea but it goes in standby after some time and it dont heat up anymore, how did u do that?
Unfortunately this repair only lasted a few months on my xbox, going to try it again and hope for better results.
When you take it apart, I recommend following our reflow guide before installing the RROD fix kit. I recently did this to an X360 that the RROD kit fixed only momentarily and afterwards it worked good as new.
I did the relowing of the motherboard this weekend, hopefully it lasts longer than the previous repair.